May 29, 2026 at 4:09 pm,
No comments
AV system design mistakes that lead to budget overruns include inadequate power planning (averaging $5,500 extra cost), underestimated network infrastructure needs ($18,000-$65,000 remediation), incomplete site surveys ($8,200 average overrun), poor equipment specifications ($12,000 in returns/replacements), missing cable management planning ($4,500 extra labor), insufficient documentation (15-25% timeline extensions), and rushed design phases that skip critical validation steps.
As of May 2026, audio visual design has become the make-or-break factor determining whether AV projects finish on budget or spiral into costly overruns. Knowing audio visual design fundamentals and understanding how design decisions directly impact project costs is essential for AV integrators, consultants, and project managers who want to protect their profit margins and maintain client relationships.
The statistics are sobering: 67% of commercial AV projects experience some level of budget overrun, with the average increase being 28% above original estimates. The root cause? Design mistakes that could have been prevented during the planning phase at 1/10th the cost of field corrections. This comprehensive analysis examines real-world budget disasters, identifies the specific design errors that caused them, and provides actionable strategies to prevent similar failures.
Key Takeaways
-
67% of AV projects exceed budgets, with average overruns of 28% primarily caused by design errors
-
Power miscalculations add $3,500-$8,500 per occurrence through emergency electrical work and delays
-
Network infrastructure errors in AV-over-IP systems cost $15,000-$65,000 average to remediate after installation
-
Inadequate site surveys cause 40% of budget overruns, adding $6,000-$15,000 in unforeseen work
-
Equipment compatibility failures cost $8,000-$25,000 per project in returns, restocking fees, and rush shipping
-
Poor documentation extends projects 15-25%, adding $12,000-$35,000 in overhead and labor costs
-
Cable management oversights add 18-25 unplanned installation hours ($1,350-$3,750) per project
-
Rushed design phases (compressed timelines) increase error rates from 5% to 30%, multiplying overrun risk 6X
-
AI-powered design tools in May 2026 prevent 75-85% of budget-impacting errors through real-time validation
-
Comprehensive design audits costing $2,000-$4,500 prevent average $35,000-$95,000 in overruns (15-25X ROI)
-
Value engineering without performance validation accounts for 22% of budget overruns through rework
-
Leading integrators using structured design processes experience 85% fewer budget overruns than industry average
What Is an AV Budget Overrun?
An AV budget overrun occurs when the final project cost exceeds the approved budget due to unforeseen expenses, design changes, specification errors, field conditions different from assumptions, or scope modifications during installation and commissioning. Overruns directly reduce integrator profit margins and damage client relationships.
Types of Budget Overruns
Design-caused overruns (70% of cases):
-
Equipment errors: Wrong specifications requiring replacement
-
Calculation mistakes: Undersized infrastructure needing upgrades
-
Infrastructure gaps: Unforeseen electrical, network, or structural work
-
Compatibility issues: Equipment that doesn’t work together
-
Documentation deficiencies: Installation inefficiencies from unclear plans
Client-caused overruns (20% of cases):
-
Scope changes: Additional features requested mid-project
-
Requirement modifications: Changed expectations after design approval
-
Decision delays: Timeline extensions increasing overhead costs
-
Access restrictions: Limited installation windows reducing productivity
External factor overruns (10% of cases):
-
Supply chain issues: Equipment delays requiring alternatives
-
Code changes: New requirements implemented during project
-
Unforeseen conditions: Hidden building problems discovered
-
Contractor coordination: Other trades creating conflicts
Measuring Budget Overruns
Overrun percentage calculation:
Budget Overrun % = ((Final Cost – Original Budget) / Original Budget) × 100
Example:
Impact categories:
Minor overruns (1-10%):
-
Typical causes: Small material waste, minor field adjustments
-
Impact: Reduces profit margin slightly but manageable
-
Industry frequency: 45% of projects
Moderate overruns (11-25%):
-
Typical causes: Design errors, equipment compatibility issues
-
Impact: Significantly reduces or eliminates profit
-
Industry frequency: 35% of projects
Major overruns (26-50%):
-
Typical causes: Major infrastructure issues, significant rework
-
Impact: Project loss, threatens company cash flow
-
Industry frequency: 15% of projects
Severe overruns (>50%):
-
Typical causes: Complete system redesign, multiple compounding errors
-
Impact: Substantial financial loss, legal disputes
-
Industry frequency: 5% of projects
Why AV System Design Plays a Critical Role in Project Costs
Design Determines 80% of Project Costs
Cost commitments during design phase:
Equipment selection (40-50% of budget):
-
Specifications determine product costs
-
Performance requirements drive pricing tiers
-
Compatibility needs affect integration complexity
-
Future scalability impacts initial investment
Labor requirements (30-40% of budget):
-
Installation complexity from design decisions
-
Documentation quality affects installer efficiency
-
Cable management planning impacts hours
-
Commissioning requirements determined by system design
Infrastructure needs (10-20% of budget):
-
Electrical requirements from power calculations
-
Network infrastructure from bandwidth needs
-
Cable pathways from routing design
-
Structural support from mounting specifications
Early Decisions Have Multiplied Consequences
Cost amplification through project phases:
Design phase error:
-
Discovery timing: During planning
-
Correction cost: $200-$800 (design time)
-
Example: Wrong display size calculated
Procurement phase error:
-
Discovery timing: Before installation
-
Correction cost: $2,000-$6,000 (restocking + replacement)
-
Multiplier: 10X design phase cost
Installation phase error:
-
Discovery timing: During field work
-
Correction cost: $8,000-$25,000 (equipment + labor + delays)
-
Multiplier: 40-125X design phase cost
Post-commissioning error:
-
Discovery timing: After system delivered
-
Correction cost: $15,000-$75,000 (full rework + client impact)
-
Multiplier: 75-375X design phase cost
Poor Design Creates Hidden Costs
Indirect budget impacts:
Timeline extensions:
-
Project management overhead: $200-$500 per day
-
Equipment storage costs: $50-$200 per day
-
Crew reassignment inefficiencies: $400-$1,200 per day
-
Opportunity cost: Lost revenue from delayed next project
Quality compromises:
-
Field workarounds reducing performance
-
User dissatisfaction requiring remediation
-
Service call increases impacting warranty costs
-
Reputation damage affecting future opportunities
Documentation gaps:
-
Installation inefficiency: 20-30% longer installation time
-
Commissioning delays: 40-60% more troubleshooting
-
Service burden: 300% increase in support calls
-
Long-term costs: $18,000-$45,000 annually
8 AV System Design Mistakes That Led to Budget Overruns
Mistake #1: Inadequate Power Infrastructure Planning
Average budget impact: $3,500-$8,500 per occurrence
Common power planning failures:
Load calculation errors:
-
Underestimating total equipment power consumption
-
Forgetting inrush current during startup sequences
-
Ignoring simultaneous operation scenarios
-
Missing future expansion capacity (20-30% buffer)
-
Overlooking UPS runtime requirements
Circuit specification mistakes:
-
Specifying 15A shared circuits instead of 20A dedicated
-
Insufficient circuit quantity for equipment distribution
-
Wrong voltage specifications for international equipment
-
Missing three-phase power for high-wattage amplifiers
-
Inadequate panel capacity for AV loads
Real budget impact example:
-
Original budget: Circuit included in allowance ($0 additional)
-
Design error: Calculated 14.8A, specified existing 15A circuit
-
Field discovery: Actual load 18.7A during commissioning
-
Emergency correction:
-
Electrician emergency call: $1,400
-
New dedicated 20A circuit: $3,200
-
2-day project delay: $1,800
-
Extended PM time: $600
-
Total overrun: $7,000 (from $0 planned)
Prevention cost vs. overrun:
-
Proper power calculation during design: 1 hour ($150)
-
Average overrun when discovered late: $5,500
-
ROI: 37X return on prevention investment
Mistake #2: Network Infrastructure Underestimation
Average budget impact: $15,000-$65,000
AV-over-IP bandwidth failures in May 2026:
Calculation errors:
-
Using theoretical codec bitrates instead of actual measurements
-
Forgetting 30% network overhead for protocols
-
Not accounting for simultaneous stream peaks
-
Underestimating return feeds for video conferencing
-
Ignoring future growth requirements
Switch specification mistakes:
-
Unmanaged switches lacking IGMP snooping for multicast
-
Insufficient PoE budget for cameras and devices
-
Missing 10GbE uplinks creating bottlenecks
-
Inadequate backplane capacity limiting throughput
-
No QoS support for traffic prioritization
Case study – Corporate campus disaster:
-
Original budget: Network infrastructure $28,000
-
Design error: 1 Gbps switches specified, insufficient for 18 x 4K NDI streams
-
Field discovery: Video freezing, artifacts during system testing
-
Required correction:
-
Replace 8 switches with 10GbE models: $38,000
-
Upgrade backbone to 40GbE: $22,000
-
Reconfiguration labor: $4,500
-
2-week commissioning delay: $8,000
-
Total overrun: $72,500 (258% over original network budget)
Prevention approach:
-
Proper bandwidth calculation with overhead: 3 hours ($450)
-
Switch specification with required features: 2 hours ($300)
-
Total prevention cost: $750
-
Savings: $71,750 (96X return)
Mistake #3: Skipped or Inadequate Site Surveys
Average budget impact: $6,000-$15,000
Consequences of missing site assessments:
Physical discoveries:
-
Ceiling heights different from architectural drawings (6-18″ variance typical)
-
Hidden obstructions (ductwork, beams, existing conduit)
-
Access limitations requiring alternate installation approaches
-
Structural inadequacies for mounting loads
-
Viewing obstructions requiring equipment repositioning
Environmental surprises:
-
Excessive ambient light requiring brighter displays than specified
-
Poor acoustics (RT60 3.5s vs. target 0.8s) needing treatment
-
HVAC noise contaminating audio capture
-
Temperature extremes in equipment rooms
-
Wireless interference affecting control systems
Infrastructure gaps:
-
Insufficient electrical capacity requiring panel upgrades
-
No network connectivity where needed
-
Blocked cable pathways necessitating new routing
-
Inadequate HVAC for equipment cooling
Real-world impact example:
Site survey investment:
-
Comprehensive survey: 6 hours on-site + 4 hours documentation = $1,500
-
Average overrun prevented: $9,800
-
ROI: 6.5X
Mistake #4: Equipment Compatibility Failures
Average budget impact: $8,000-$25,000
Common compatibility oversights:
Resolution/format mismatches:
-
4K60 4:4:4 source to 4K30 4:2:0 display
-
HDR content to SDR-only display chain
-
21:9 ultrawide content to 16:9 displays
-
High refresh rate gaming sources to 60Hz displays
Control protocol incompatibilities:
-
RS-232 control processor to IP-only devices
-
Proprietary protocols requiring custom drivers
-
Firmware version dependencies not verified
-
API limitations discovered during programming
Physical incompatibilities:
-
VESA mounting patterns not matching
-
Rack depth insufficient for equipment + cables
-
Power connectors (IEC vs. NEMA) mismatched
-
Cable connector types incompatible with devices
Case study – Healthcare imaging room:
-
Design specification: 4K60 4:4:4 processor for diagnostic imaging display
-
Value engineering substitution: 4K30 4:2:0 model ($900 savings)
-
Discovery: Medical image detail lost, system unusable for diagnosis
-
Correction required:
-
Original processor rush order: $4,200
-
Restocking fee on wrong unit: $680
-
Overnight shipping: $420
-
Reprogramming labor: $1,200
-
4-day delay (critical facility): $8,500
-
Total overrun: $15,000 (from $900 “savings”)
Compatibility validation during design:
-
Equipment cross-checking with databases: 1.5 hours ($225)
-
Specification verification: 1 hour ($150)
-
Total prevention cost: $375
-
Typical overrun: $14,500
-
ROI: 38X
Mistake #5: Poor Cable Management Planning
Average budget impact: $3,000-$6,500
Cable planning oversights:
Pathway sizing errors:
-
Undersized conduits at 80-90% fill (code allows 40% power, 50% data)
-
Inadequate cable tray capacity requiring additional pathways
-
No service loop allowance in length calculations
-
Insufficient bend radius specifications causing signal issues
Rack design gaps:
-
No RU space allocated for cable managers
-
Equipment placement blocking connection access
-
Missing accessories (horizontal managers, vertical organizers)
-
Poor ventilation from cable blockages
Labeling scheme absence:
-
No standardized numbering system
-
Installer discretion creating inconsistency
-
Troubleshooting difficulty requiring tone-and-trace
-
Modification complexity for future changes
Impact on installation labor:
Without cable management planning:
-
Rack installation time: 38 hours
-
Field problem-solving: 8 hours
-
Total: 46 hours at $75/hour = $3,450
With proper planning:
-
Rack installation time: 22 hours
-
Field questions: 1 hour
-
Total: 23 hours at $75/hour = $1,725
-
Labor overrun: $1,725 (50% increase)
Materials overrun:
-
Emergency cable purchases: $800-$1,200
-
Rush shipping for forgotten items: $200-$400
-
Additional pathway materials: $600-$1,200
-
Total material overrun: $1,600-$2,800
Combined cable management overrun: $3,325-$4,525 per project
Design planning investment:
-
Cable management design: 4 hours ($600)
-
Typical overrun prevented: $3,800
-
ROI: 6.3X
Mistake #6: Display Sizing Miscalculations
Average budget impact: $12,000-$35,000
Sizing errors:
Viewing distance violations:
-
75″ display in room with 42-foot viewing distance
-
Calculation error: 42′ ÷ 36.8″ height = 13.7X (target 6X for presentations)
-
User complaint: “Can’t read text on slides”
-
Minimum required: 42′ ÷ 6 = 84″ height = 165″ diagonal needed
Brightness inadequacies:
-
500-nit consumer TV in high-ambient-light room
-
Measured light: 850 lux at display location
-
Required brightness: 1000+ nits for 2:1 contrast
-
User complaint: “Washed out, can’t see image”
Real example – Training facility:
-
Original design: Single 85″ display ($4,500)
-
Room: 50 participants, back row 45 feet from screen
-
Discovery: Post-installation user complaints, unusable from rear seats
-
Required correction:
-
Remove 85″ display
-
Install dual 98″ displays: $18,000
-
Additional mounting hardware: $2,400
-
Modified AV system design: $3,200
-
Installation labor: $4,800
-
10-day delay: $4,200
-
Total overrun: $32,600 (724% over original display budget)
Proper sizing during design:
-
Viewing distance calculations: 1 hour ($150)
-
Sightline verification: 2 hours ($300)
-
Total prevention cost: $450
-
Typical overrun: $22,000
-
ROI: 49X
Mistake #7: Rushed Design Phases
Average budget impact: 15-25% total project overrun
Consequences of compressed timelines:
Quality compromises:
-
Incomplete calculations (power, bandwidth, sizing)
-
Minimal equipment research leading to wrong selections
-
No peer review before client submittal
-
Generic specifications without project customization
-
Missing site survey details
Documentation gaps:
-
Incomplete drawings (missing wiring details, rack rear views)
-
No cable schedules or incorrect connection listings
-
Missing specifications for installation methods
-
Unclear details requiring field interpretation
Error rate comparison:
Normal design timeline (6-8 weeks for medium project):
-
Design error rate: 3-5% of elements
-
Field questions: 8-12 during installation
-
Change orders: 1-2 minor items
-
Budget variance: ±5%
Rushed timeline (2-3 weeks for same project):
-
Design error rate: 25-35% of elements
-
Field questions: 45-65 requiring resolution
-
Change orders: 8-15 significant items
-
Budget variance: +18-32%
Case study – Corporate headquarters rush project:
Proper timeline investment:
-
7 additional design weeks: $18,000 design cost
-
Overrun prevented: $73,450
-
Net savings: $55,450
-
ROI: 4X
Mistake #8: Value Engineering Without Performance Validation
Average budget impact: $8,500-$28,000
Dangerous substitution scenarios:
Display downgrades:
-
Specified: 1000-nit commercial display for bright room
-
Substituted: 500-nit consumer TV (60% cost savings)
-
Consequence: Unusable during daytime operations
-
Correction cost: $7,500-$12,000
Processing downgrades:
-
Specified: Enterprise control processor with redundancy
-
Substituted: Consumer-grade controller
-
Consequence: Frequent crashes, no remote diagnostics
-
Correction cost: $8,000-$15,000
Audio downgrades:
-
Specified: Beamforming ceiling array with DSP
-
Substituted: Basic omnidirectional mics
-
Consequence: Poor intelligibility, constant feedback
-
Correction cost: $10,000-$18,000
Healthcare telemedicine room example:
Proper value engineering:
-
Performance-based alternatives research: 4 hours ($600)
-
Client education on impact: 2 hours ($300)
-
Total prevention cost: $900
-
Typical overrun: $18,000
-
ROI: 20X
Real-World Examples of AV Design Mistakes That Increased Project Costs
Example 1: University Lecture Hall Network Disaster
Project details:
-
Facility: 250-seat lecture hall with AV-over-IP distribution
-
Original budget: $185,000
-
Timeline: 12-week installation during summer break
Design mistake:
-
Designer assumed existing campus network adequate for AV
-
No bandwidth calculations performed
-
Existing 1 Gbps switches specified as “sufficient”
Reality:
-
Each 4K NDI stream requires 2.5 Gbps
-
6 displays + 4 cameras + 2 recording streams = 30 Gbps peak
-
Existing infrastructure: 8 Gbps total campus capacity to building
Discovery:
-
Week 10: System testing revealed constant freezing and dropouts
-
IT department traced to network saturation
-
Semester start in 3 weeks (hard deadline)
Emergency correction:
-
Dedicated 10GbE network installation: $42,000
-
40GbE fiber backbone to campus: $28,000
-
After-hours installation (semester prep): Premium 40% = $28,000
-
Expedited equipment shipping: $3,200
-
Project management extension: $6,500
-
Total overrun: $107,700 (58% over budget)
What proper design would have cost:
-
Network assessment: 4 hours ($600)
-
Bandwidth calculations: 3 hours ($450)
-
Infrastructure design: 8 hours ($1,200)
-
Total: $2,250
-
Savings if done correctly: $105,450 (47X ROI)
Example 2: Corporate Boardroom Display Sizing Failure
Project details:
-
Facility: Executive boardroom, seats 24
-
Original budget: $95,000
-
Timeline: 6-week installation
Design mistake:
-
Designer selected display based on budget, not calculations
-
Viewing distance analysis skipped
-
No sightline verification from seating positions
Specifications:
-
Display: Single 75″ 4K display ($3,200)
-
Back row distance: 38 feet from screen
-
Viewing ratio: 38′ ÷ 36.8″ = 12.4X (target: 6X for detailed viewing)
Discovery:
Correction required:
-
Remove 75″ display (no salvage value for used display)
-
Install dual 98″ displays: $22,000
-
Additional mounting hardware: $3,200
-
Modified control system: $4,500
-
Reprogramming: $2,800
-
Reinstallation labor: $6,200
-
2-week delay costs: $5,800
-
Executive goodwill damage: Incalculable
-
Total overrun: $44,500 (47% over budget)
Proper design would have specified:
-
Viewing distance calculation: 38′ ÷ 6 = 6.3′ screen height
-
Required diagonal: 6.3′ × 2.2 = ~150″ (dual 98″ or single 120″)
-
Initial cost: $18,000 (vs. $3,200)
-
Additional cost: $14,800
-
Overrun prevented: $29,700 (saved vs. correction)
Example 3: Hotel Conference Center Power Planning Failure
Project details:
-
Facility: 4 conference rooms, hotel conference center
-
Original budget: $320,000
-
Timeline: 8-week installation (off-season)
Design mistake:
-
Power calculations performed but 15% safety margin instead of 30%
-
Inrush current not factored
-
Future expansion not considered
-
Shared circuits specified instead of dedicated
Specifications:
-
Calculated load: 87A total across 4 rooms
-
Safety margin: 15% = 100A total
-
Circuits specified: 6 × 20A shared circuits (120A capacity)
Discovery:
-
Commissioning day: Multiple breaker trips when all rooms operating
-
Actual load with all systems: 118A (36% higher than calculated)
-
Inrush current during startup: 145A peak (breakers trip at 140A)
Emergency correction:
-
Electrician emergency call: $1,800
-
Dedicated 20A circuits for each room: $16,500
-
Additional panel installation: $8,200
-
3-day delay (busy conference season): $9,000
-
Lost hotel revenue from room closures: $12,000 (client charged back)
-
Total overrun: $47,500 (15% over budget)
Proper power planning:
-
Correct calculations with 35% margin: 3 hours ($450)
-
Inrush current analysis: 2 hours ($300)
-
Specification update: 1 hour ($150)
-
Additional circuit cost in design: $8,000
-
Total design phase: $8,900
-
Overrun avoided: $38,600 (saved vs. emergency work)
-
Net savings: $29,700
How Modern AV Design Software Helps Prevent Budget Overruns
Automated Cost Tracking in May 2026
Real-time budget monitoring:
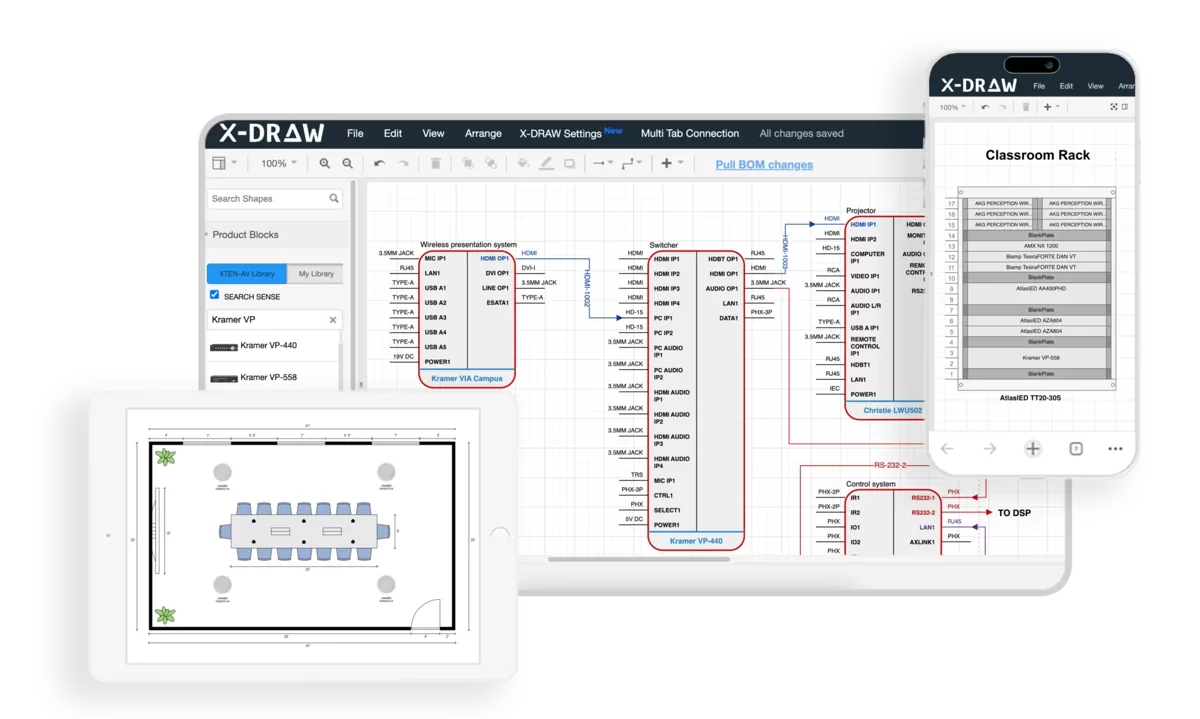
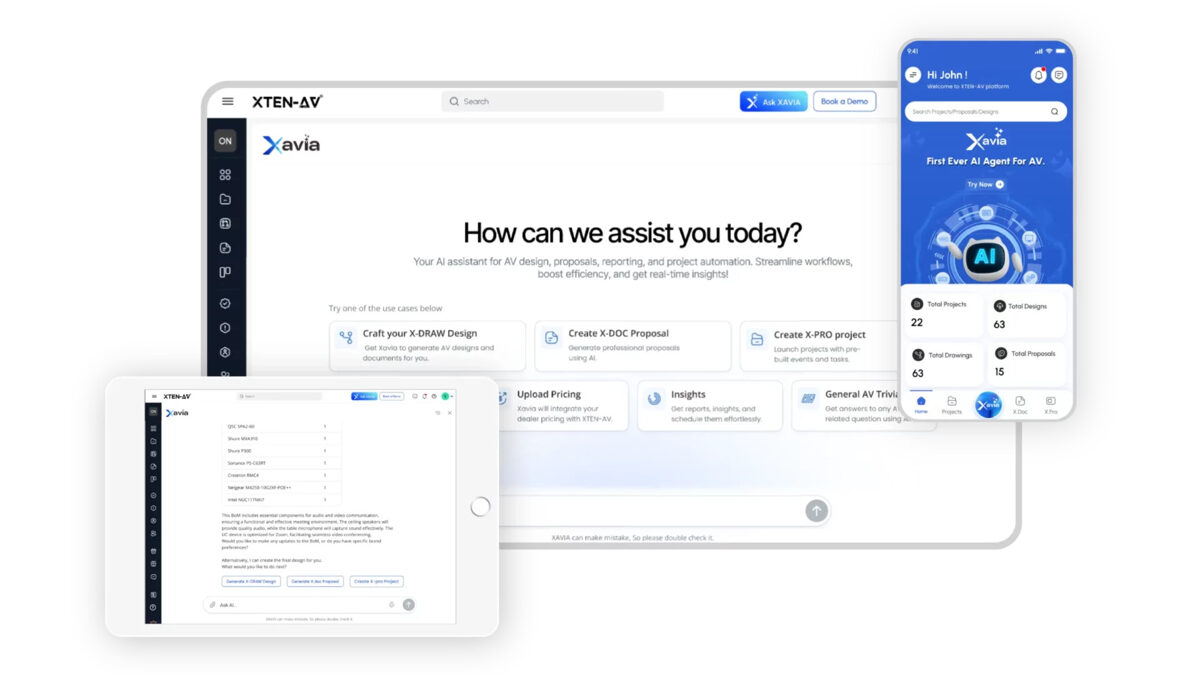
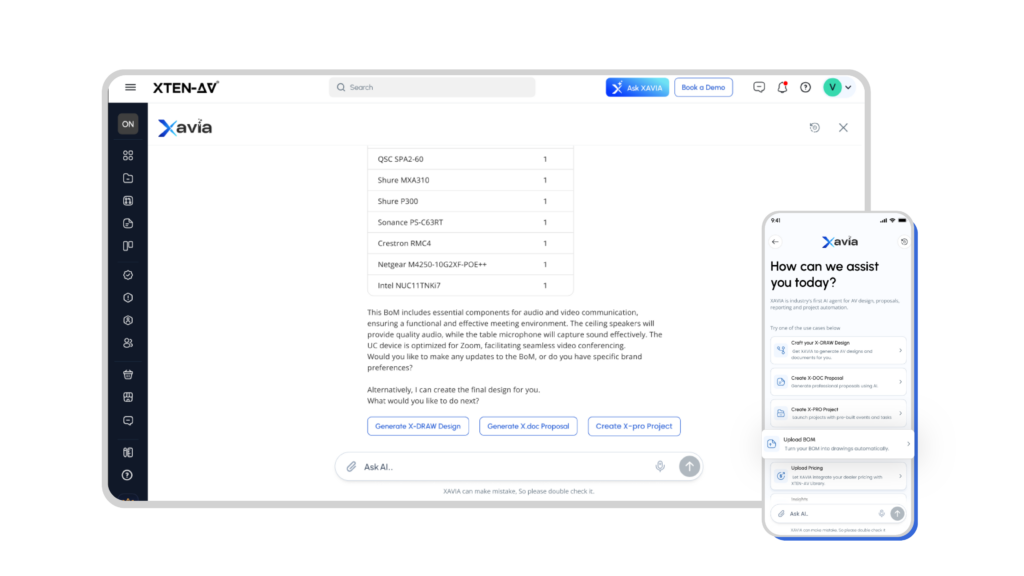
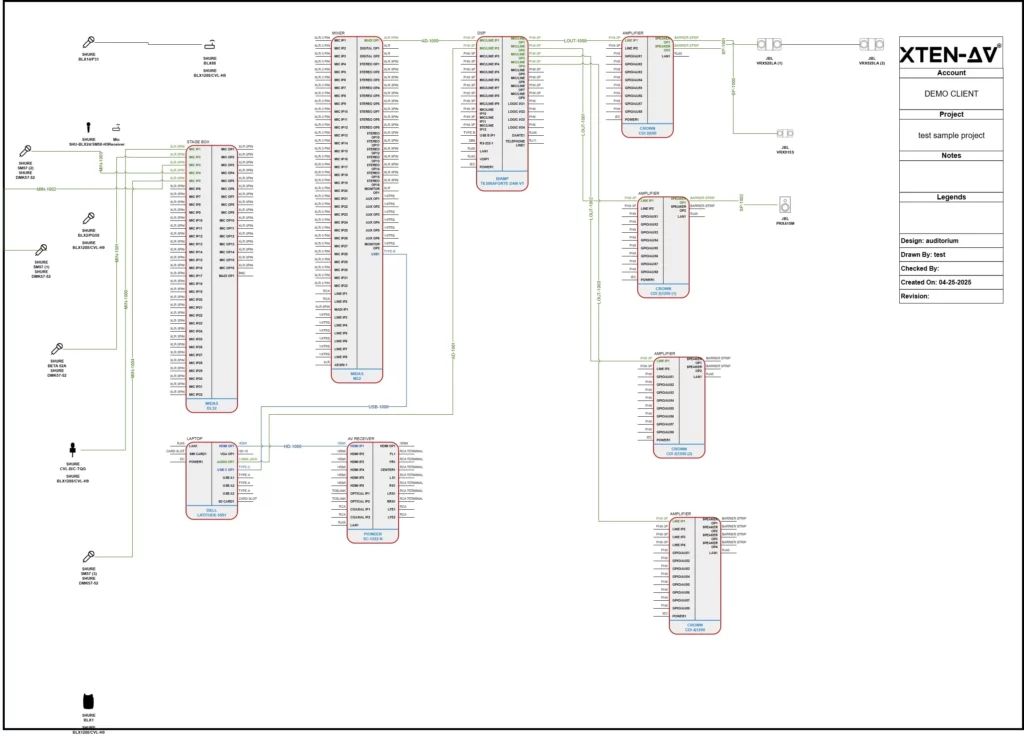
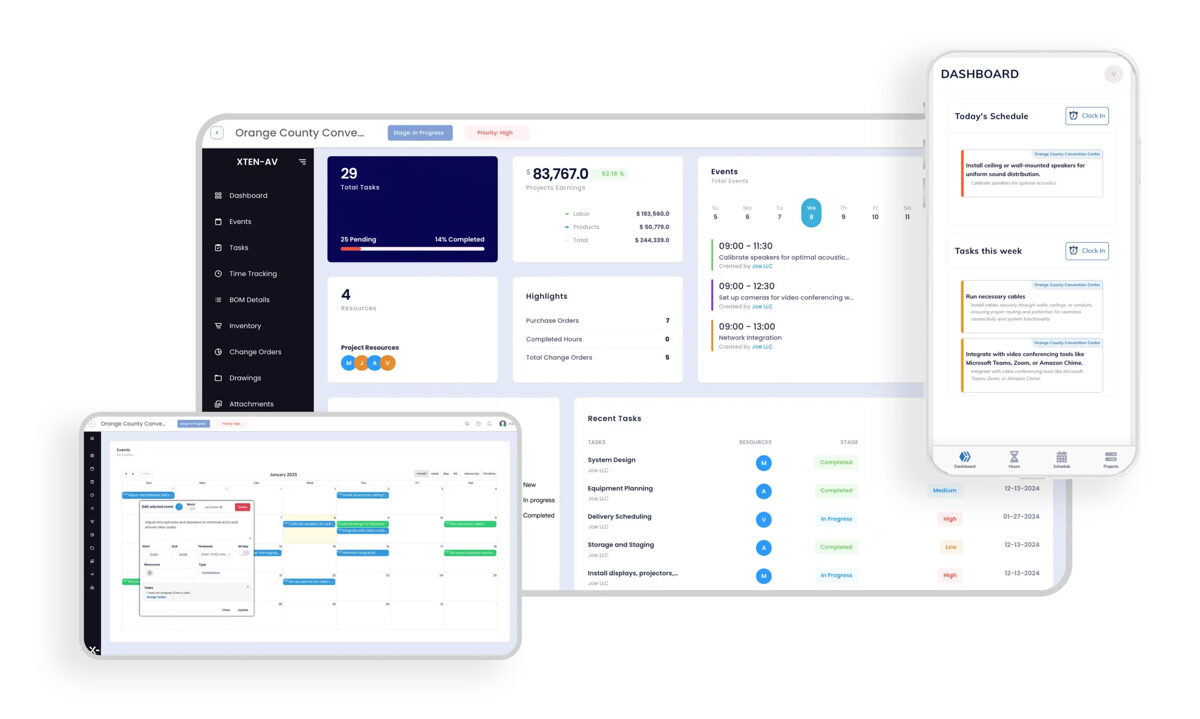
AI-powered design platforms like XTEN-AV X-Draw now include:
Dynamic BOM pricing:
-
Real-time pricing from distributor feeds (updated hourly)
-
Alternative equipment suggestions at different price points
-
Cost trend analysis showing price movements
-
Budget tracking against approved limits
-
Alerts when specifications exceed budget thresholds
Labor estimation:
-
Installation hour predictions based on design complexity
-
Historical data from similar completed projects
-
Complexity scoring for equipment and cabling
-
Commissioning time estimates from system architecture
Impact on budget control:
-
Budget overruns reduced from 28% average to 8% with real-time tools
-
Cost visibility throughout design process prevents surprise
-
Value engineering informed by actual cost data
-
Client conversations supported by accurate estimates
Error Prevention Through Validation
Automated checking prevents costly mistakes:
Compatibility validation:
-
Cross-references all equipment specifications automatically
-
Flags incompatibilities before equipment purchase
-
Prevents $8,000-$25,000 average compatibility overruns
-
Validation accuracy: 98% catch rate in May 2026
Calculation verification:
-
Power load totals with safety margins applied automatically
-
Network bandwidth summing with overhead included
-
Cable length measurements from pathway drawings
-
Display sizing recommendations from viewing distances
-
Prevents $12,000-$45,000 average calculation error overruns
Documentation completeness:
-
Automated BOM generation from design database (100% accuracy)
-
Cable schedule creation from all connections
-
Drawing consistency enforcement across set
-
Prevents $8,000-$18,000 documentation gap overruns
Budget protection statistics (May 2026 platforms):
-
Equipment errors prevented: 92% vs. 65% manual review
-
Calculation errors prevented: 98% vs. 70% manual methods
-
Average overrun reduction: 72% with AI-assisted design
-
ROI on software: 8-15X in first year through error prevention
Predictive Cost Analysis
AI predictions in May 2026:
Risk scoring:
-
Design complexity analysis predicting overrun likelihood
-
Historical comparison to similar projects
-
Risk factors identified: Tight timeline, new technologies, complex integration
-
Probability estimates: “68% chance of 15-20% overrun with current design”
Optimization suggestions:
-
Cost reduction opportunities without performance compromise
-
Alternative technologies with better cost/performance
-
Phasing recommendations for budget-constrained projects
-
Value engineering validated against performance requirements
Timeline predictions:
-
Installation duration estimates from design details
-
Commissioning complexity scoring
-
Risk buffer recommendations based on project factors
-
Realistic scheduling preventing rushed work and errors
Best Practices to Avoid AV System Design Budget Overruns
1. Invest Adequately in Design Phase
Design budget allocation:
Industry standards:
-
Small projects (<$50K): 8-12% of budget for design
-
Medium projects ($50K-$250K): 6-10% of budget
-
Large projects (>$250K): 5-8% of budget
Design investment breakdown:
-
Discovery and requirements: 10-15% of design time
-
Site survey: 15-20% of design time
-
Conceptual design: 15-20% of design time
-
Design development: 30-40% of design time
-
Documentation: 20-30% of design time
ROI comparison:
Inadequate design investment:
-
Design budget: 3% of project ($4,500 on $150K project)
-
Rushed timeline: 3 weeks
-
Average overrun: 25% ($37,500)
-
Net cost: $42,000 total design + overrun
Adequate design investment:
-
Design budget: 8% of project ($12,000 on $150K project)
-
Proper timeline: 8 weeks
-
Average overrun: 5% ($7,500)
-
Net cost: $19,500 total design + overrun
-
Savings: $22,500 (187% ROI on additional design investment)
2. Conduct Comprehensive Site Surveys
Survey protocol:
Physical documentation:
-
Accurate measurements with laser distance meters
-
Photo documentation from multiple angles
-
Existing conditions assessment (architectural, electrical, network)
-
Obstruction identification (ceiling, walls, pathways)
-
Structural capacity verification for mounting loads
Environmental assessment:
-
Ambient light measurements at multiple times of day
-
Acoustic analysis (RT60, background noise)
-
Temperature monitoring in equipment locations
-
HVAC impact on audio and equipment cooling
Infrastructure verification:
-
Electrical capacity testing and panel assessment
-
Network infrastructure mapping and bandwidth testing
-
Cable pathway investigation and capacity assessment
-
Access routes for equipment delivery and installation
Survey investment vs. overrun:
-
Comprehensive survey: 8 hours on-site + 6 hours documentation = $2,100
-
Average overrun from missing survey: $9,800
-
ROI: 4.7X
3. Use Professional Design Software
Platform benefits:
Leading tools in May 2026:
-
XTEN-AV X-Draw: Comprehensive validation, $3,500/year
-
D-Tools SI: Business integration, $3,800/year
-
Automated validation: 75-85% error prevention
Budget protection features:
-
Real-time pricing preventing budget surprises
-
Compatibility checking before purchase
-
Calculation automation eliminating math errors
-
Documentation generation ensuring completeness
Cost-benefit analysis:
-
Software cost: $3,500 per user annually
-
Projects per designer: 25 per year average
-
Cost per project: $140
-
Overrun prevention: $8,000-$35,000 per project
-
Break-even: First prevented error
-
Annual ROI: 80-400X for active designers
4. Implement Design Review Protocols
Peer review process:
Review checkpoints:
-
50% design: Architecture and major equipment validated
-
90% design: Complete technical review before documentation
-
100% pre-submittal: Final quality check before client approval
Review scope:
-
Calculation verification by independent designer
-
Equipment compatibility cross-checking
-
Documentation completeness assessment
-
Budget alignment confirmation
-
Installation feasibility validation
Review investment vs. overrun:
-
Peer review time: 6 hours per project ($900)
-
Errors caught: Average 8-12 significant issues
-
Average cost per error if not caught: $5,000-$15,000
-
Total value: $40,000-$180,000
-
ROI: 44-200X
5. Validate All Calculations
Required calculations:
Power planning:
-
☐ Equipment power consumption totals
-
☐ 30-40% safety margin applied
-
☐ Inrush current factored
-
☐ Circuit capacity verified
-
☐ Voltage drop calculated for long runs
Network bandwidth:
-
☐ Per-device bitrates documented
-
☐ Simultaneous streams totaled
-
☐ 30% overhead included
-
☐ Switch capacity confirmed
-
☐ Future growth accommodated
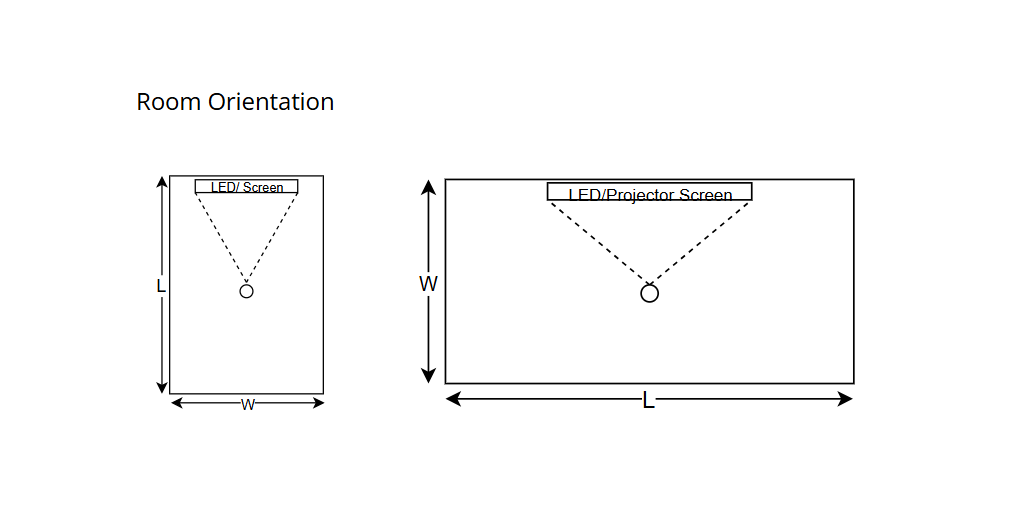
Display sizing:
-
☐ Viewing distances measured
-
☐ 4-6-8 rule applied
-
☐ Resolution requirements validated
-
☐ Brightness adequate for ambient light
-
☐ Sightlines verified from all seats
Cable lengths:
-
☐ Pathway routing measured
-
☐ Service loops added (3-6 feet per end)
-
☐ Vertical distances included
-
☐ Maximum distances verified for cable types
6. Document Everything Thoroughly
Essential documentation:
Drawing set:
-
☐ Floor plans with dimensions
-
☐ Rack elevations (front, rear, section)
-
☐ Wiring diagrams with connection details
-
☐ Block diagrams showing signal flow
-
☐ Network topology with IP addressing
Schedules:
-
☐ Complete cable schedule (every connection)
-
☐ Bill of materials with specifications
-
☐ Equipment list with model numbers
Specifications:
Documentation ROI:
-
Complete documentation: 25-35 hours ($3,750-$5,250)
-
Installation efficiency gain: 20-30% faster (30-50 hours saved)
-
Value at $75/hour: $2,250-$3,750
-
Service call reduction: 60-75% fewer calls
-
Annual savings: $15,000-$35,000
-
First-year ROI: 4-9X
7. Build Realistic Contingency Budgets
Contingency recommendations:
By project complexity:
-
Simple projects: 8-12% contingency
-
Medium complexity: 12-18% contingency
-
Complex projects: 18-25% contingency
-
High-risk projects: 25-35% contingency
By project phase:
-
Design phase: 80% contingency unused (minor adjustments)
-
Procurement: 10% contingency used (equipment changes)
-
Installation: 5% contingency used (field conditions)
-
Commissioning: 5% contingency used (final adjustments)
Contingency management:
-
Track usage against original allocation
-
Client communication when approaching limits
-
Change order process for scope modifications
-
Final reconciliation returning unused contingency
Frequently Asked Questions
What percentage of AV projects go over budget?
67% of commercial AV projects experience budget overruns, with average increases of 28%. Design-related errors cause 70% of overruns. Projects with comprehensive design audits reduce overrun rates to 15% with average increases of only 8%.
What is the most expensive AV design mistake?
Network infrastructure underestimation in AV-over-IP systems costs $15,000-$65,000 average to correct after installation. This accounts for 18% of major budget overruns in May 2026 as IP-based systems become standard.
How much should be budgeted for AV system design?
Allocate 5-10% of total project budget for comprehensive design work. $150K project should include $7,500-$15,000 design budget. This investment typically prevents 25-40% overruns ($37,500-$60,000), delivering 3-7X ROI.
Can AI design tools eliminate budget overruns?
AI-powered platforms in May 2026 reduce overruns by 72% through automated validation and real-time cost tracking. However, they cannot eliminate all risks—human expertise remains essential for complex decisions and client communication.
What contingency percentage should AV projects include?
Standard projects need 12-18% contingency. Complex installations require 18-25%. High-risk projects (tight timelines, mission-critical, new technologies) should include 25-35% contingency. Average actual usage: 8-12% on well-designed projects.
How do you prevent equipment compatibility budget overruns?
Use professional design software with automated compatibility checking (98% catch rate vs. 65% manual review). Cross-reference all specifications during design. Test critical equipment combinations before final specification. Investment: 3-4 hours ($450-$600) prevents $8,000-$25,000 overruns.
When should value engineering occur to avoid budget problems?
Conduct value engineering during design development phase (before procurement), not during installation. Always validate performance impact of cost reductions. Document client approval of any compromises. Never substitute equipment without designer approval.
Conclusion
AV system design mistakes causing budget overruns are not inevitable—they are preventable through systematic planning, professional tools, and disciplined processes. As of May 2026, the data is conclusive: 70% of the 28% average project overruns stem directly from design phase errors that cost 10-15X more to fix during installation than during planning.
The most expensive mistakes—network infrastructure underestimation ($18,000-$65,000), inadequate site surveys ($9,800 average), equipment compatibility failures ($14,500 average), and power miscalculations ($5,500 average)—are all preventable with proper audio visual design methodologies. The investment required? Typically 6-10% of project budget for comprehensive design work, delivering consistent 3-7X ROI through overrun prevention.
Leading AV integrators in May 2026 have embraced AI-powered design platforms, structured review protocols, and validation checklists that reduce overrun rates from 67% industry average to just 15%, with severity dropping from 28% to 8%. The competitive advantage is decisive: firms that invest properly in design consistently outbid competitors (through accurate pricing), deliver on schedule (through error prevention), and retain clients (through predictable outcomes).
Take action today: Calculate your firm’s actual overrun rate across the last 10 projects. Identify the design mistakes that caused them. Implement the prevention strategies from this guide—comprehensive site surveys, professional design software, peer review protocols, and adequate design timelines. Every audio visual design mistake prevented protects your profit margins, enhances your reputation, and builds sustainable competitive advantage in the increasingly sophisticated AV integration marketplace.
The cost of budget overruns is quantifiable: $8,000-$95,000 per project depending on error severity. The investment in prevention is modest: $2,500-$8,000 for proper design processes. The choice facing integrators is clear: continue absorbing preventable overruns that eliminate profitability, or implement proven design methodologies that protect margins and build client trust through consistent, predictable delivery
PakarPBN
A Private Blog Network (PBN) is a collection of websites that are controlled by a single individual or organization and used primarily to build backlinks to a “money site” in order to influence its ranking in search engines such as Google. The core idea behind a PBN is based on the importance of backlinks in Google’s ranking algorithm. Since Google views backlinks as signals of authority and trust, some website owners attempt to artificially create these signals through a controlled network of sites.
In a typical PBN setup, the owner acquires expired or aged domains that already have existing authority, backlinks, and history. These domains are rebuilt with new content and hosted separately, often using different IP addresses, hosting providers, themes, and ownership details to make them appear unrelated. Within the content published on these sites, links are strategically placed that point to the main website the owner wants to rank higher. By doing this, the owner attempts to pass link equity (also known as “link juice”) from the PBN sites to the target website.
The purpose of a PBN is to give the impression that the target website is naturally earning links from multiple independent sources. If done effectively, this can temporarily improve keyword rankings, increase organic visibility, and drive more traffic from search results.