
April 29, 2026 at 12:37 pm,
No comments
Setting up a projector correctly is the foundation of any successful home theater, classroom, or presentation space. Whether you’re an enthusiast building your first DIY projector setup or a professional AV integrator managing complex installations, accurate projector placement determines image quality, viewing experience, and system performance. The challenge? Manual calculations involving throw distance, screen size, throw ratio, mounting height—and understanding how to increase throw distance without sacrificing image quality can be complex, time-consuming, and prone to errors.
Key Takeaways
✅ Projector Calculator tools eliminate manual calculation errors and guesswork
✅ Understanding throw ratio is fundamental to proper projector placement
✅ Throw distance directly determines required screen size and image quality
✅ XTEN-AV provides professional-grade calculation with real-world factors
✅ Ultra-short throw, short throw, and standard throw projectors require different approaches
✅ Ambient light and screen gain significantly impact brightness requirements
✅ Lens shift and keystone correction affect placement flexibility
✅ Professional calculations account for mounting height, ceiling clearance, and viewing angles
✅ Room dimensions and seating distance influence optimal screen size
✅ Modern calculators integrate with complete AV design workflows
What is a Projector Calculator?
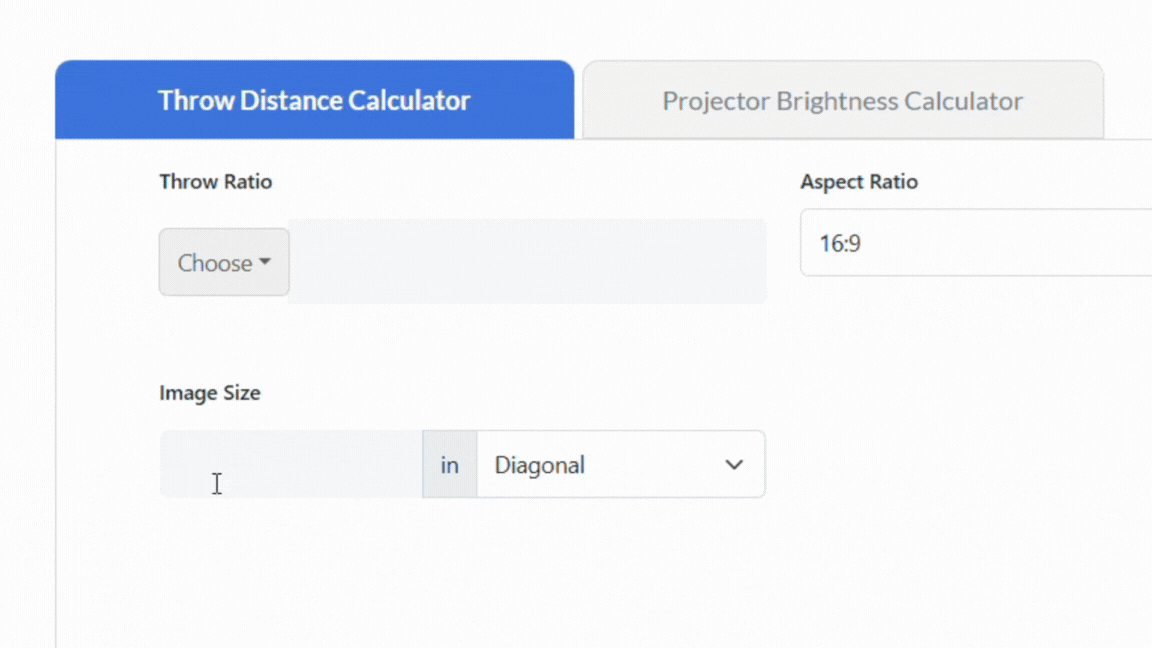
A projector calculator (also called projector throw calculator or projector throw distance calculator) is a digital tool that automatically determines the precise relationship between projector location, screen size, and image quality. These calculators use the projector’s throw ratio along with desired screen dimensions to calculate exact placement distance and mounting specifications.
Core Projector Placement Concepts
Essential terminology:
Throw Distance
-
The physical distance from projector lens to projection screen
-
Measured in feet or meters
-
Primary factor in placement planning
Throw Ratio
-
Mathematical relationship: throw distance ÷ screen width
-
Example: 2:1 ratio means 2 feet distance per 1 foot screen width
-
Determines projector category (short, standard, long throw)
Screen Size
-
Measured diagonally or by width/height
-
Influenced by room size and viewing distance
-
Limited by projector specifications and throw distance
Projector Types by Throw Ratio
|
Projector Type |
Throw Ratio |
Installation |
Best For |
|
Ultra-Short Throw (UST) |
0.19:1 – 0.4:1 |
Wall-mounted near screen |
Small rooms, living rooms |
|
Short Throw |
0.4:1 – 1.0:1 |
3-6 feet from screen |
Classrooms, bedrooms |
|
Standard Throw |
1.0:1 – 2.0:1 |
8-15 feet from screen |
Home theaters, conference rooms |
|
Long Throw |
2.0:1+ |
15+ feet from screen |
Auditoriums, large venues |
|
Subject: Throw ratio selection |
|||
|
Predicate: depends on |
|||
|
Object: room dimensions and installation constraints |
For guidance on space-specific requirements, see Best Placement for Any Home Theater Layout.
Step-by-Step DIY Projector Placement Setup Using a Calculator
Step 1: Gathering Essential Project Information
Required Measurements and Specifications
Before using any projector calculator, collect these measurements:
Room Dimensions
-
Length (front to back)
-
Width (side to side)
-
Ceiling height
-
Seating distance from screen
-
Obstacles (beams, lights, vents)
Screen Specifications
-
Desired screen diagonal size
-
Screen width and height
-
Aspect ratio (16:9, 16:10, 4:3, 2.35:1)
-
Screen gain factor
-
Mounting position (wall/ceiling)
Projector Specifications
-
Throw ratio (from manufacturer specs)
-
Native resolution (1080p, 4K)
-
Brightness (lumens)
-
Lens shift range (vertical/horizontal)
-
Zoom range (if applicable)
-
Keystone correction capabilities
Pro Tip: Find your projector’s throw ratio in the manufacturer’s specification sheet, usually listed as “Projection Distance” or “Throw Ratio Range.”
Understanding Your Room’s Constraints
Critical factors:
Ceiling Height
Viewing Distance
-
THX recommendation: Screen width × 1.5 to 2.5
-
4K viewing: Can sit closer (1.0 to 1.5 × screen width)
-
Impacts comfortable screen size
Ambient Light
-
Natural light from windows
-
Artificial lighting fixtures
-
Affects required projector brightness
Step 2: Using a Projector Throw Distance Calculator
Basic Throw Distance Calculation
Manual formula:
Throw Distance = Screen Width × Throw Ratio
Example calculation:
However, professional projector throw calculators handle:
Using a Projector Screen Size Calculator
When throw distance is fixed (existing mount, room constraints), you need to calculate maximum screen size:
Reverse formula:
Screen Width = Throw Distance ÷ Throw Ratio
Example:
For comprehensive guidance, consult How to Calculate Projector Screen Size for Home Theater.
Advanced Projector Throw Ratio Calculator Features
Advanced capabilities:
Zoom Range Analysis
-
Calculates minimum and maximum throw distances
-
Shows screen size flexibility
-
Determines zoom position for given setup
Lens Shift Compensation
-
Factors vertical lens shift percentage
-
Calculates offset mounting requirements
-
Adjusts for off-center placement
Keystone Correction Impact
-
Estimates resolution loss from keystone
-
Suggests placement improvements
-
Recommends lens shift alternatives
Step 3: Why XTEN-AV is the Best Projector Calculator for AV Companies
Among available projector calculator tools, XTEN-AV stands out as the industry-leading solution for AV integrators, system designers, and serious enthusiasts. While basic online calculators handle simple throw distance formulas, XTEN-AV provides an integrated AV design ecosystem that transforms projector planning from isolated calculations to complete system design.
Key Features That Make XTEN-AV Projector Calculator Stand Out
🎯 1. Accurate Throw Distance & Screen Size Calculations
XTEN-AV’s calculator precisely computes projector placement using throw ratio, screen size, and room dimensions.
-
Eliminates manual calculation errors
-
Ensures perfect image fit and alignment
-
Supports real-world installation accuracy
➡️ Core formula automation ensures consistent results across projects.
📐 2. Multi-Parameter Input for Real-World Scenarios
Unlike basic tools, it allows you to input:
-
Room dimensions (length, width, height)
-
Screen width/height/diagonal
-
Aspect ratio (16:9, 4:3, 16:10, 2.35:1)
-
Throw ratio range
-
Mounting constraints
-
Viewing distance requirements
This ensures highly customized and scenario-based outputs.
🌗 3. Environment-Aware Brightness Calculations
XTEN-AV goes beyond distance—it also factors:
-
Ambient lighting levels (lux measurements)
-
Screen gain characteristics
-
Projection type (front/rear)
-
Room reflectivity
-
Content type (presentations, cinema, gaming)
This helps determine ideal lumens and brightness levels, not just placement.
➡️ Result: Better image clarity in real-world environments, not just theoretical setups.
For brightness planning, see: How Many Lumens Do You Need for a Home Theater Projector? and Choosing the Right Projector Lumens for Every Scenario.
🔄 4. Supports All Projector Types (Short, Long, UST)
The calculator works seamlessly across:
-
Short-throw projectors (0.4:1 – 1.0:1)
-
Standard throw projectors (1.0:1 – 2.0:1)
-
Ultra-short throw (UST) systems (0.19:1 – 0.4:1)
-
Long throw projectors (2.0:1+)
This makes it highly versatile for home theaters, classrooms, and large venues.
🧠 5. Intelligent Automation (No Manual Math)
Users simply input parameters, and the tool:
-
Auto-calculates throw distance
-
Suggests optimal screen size
-
Adjusts placement dynamically
-
Provides mounting recommendations
-
Calculates brightness requirements
➡️ Eliminates guesswork and speeds up AV design workflows.
🏗️ 6. Advanced Room Modeling Capabilities
XTEN-AV integrates real-world installation factors, including:
-
Room layout and seating arrangement
-
Mounting height constraints
-
Lens shift and zoom ranges
-
Ceiling obstructions
-
Cable routing considerations
This ensures installation-ready outputs, not just theoretical numbers.
🔍 7. Lens Shift & Keystone Correction Integration
The calculator automatically considers:
-
Lens shift adjustments (vertical/horizontal percentages)
-
Keystone correction range and impact
-
Image geometry preservation
-
Resolution loss from digital correction
➡️ This prevents image distortion and ensures proper geometry even in off-axis installations.
Professional guidance available: How to Choose the Right Projector Lens for Any Auditorium.
📊 8. Visual Layout & Planning Assistance
It provides a visual representation of projector placement, helping users understand:
This is especially useful for client presentations and planning.
🔗 9. Multi-Brand Compatibility (Hardware-Agnostic)
Unlike manufacturer-specific tools (e.g., Epson, BenQ), XTEN-AV:
-
Works with any projector model
-
Supports multi-vendor environments
-
Accommodates custom throw ratios
-
Handles specialty projectors
➡️ Ideal for AV integrators working across brands.
⚙️ 10. Integrated AV Workflow Ecosystem
Subject: Platform integration
Predicate: connects
Object: projector calculations with complete AV design workflow
The calculator is not standalone—it integrates with the broader XTEN-AV platform:
-
AV design tools and schematics
-
CAD drawings and floor plans
-
Proposals and documentation
-
Equipment selection databases
-
Project management features
➡️ Enables a complete end-to-end AV system design workflow.
📈 11. High Accuracy (Near Real-World Precision)
XTEN-AV delivers ±1% placement accuracy using validated formulas and AVIXA standards.
-
Reduces on-site adjustments
-
Improves installation efficiency
-
Enhances client satisfaction
-
Minimizes rework and callbacks
Subject: High precision
Predicate: ensures
Object: first-time installation success
⚡ 12. Fast, User-Friendly Interface
Subject: User experience design
Predicate: prioritizes
Object: speed and ease of use
-
Instant results within seconds
-
Slider-based adjustments for real-time updates
-
Minimal learning curve
-
Intuitive interface design
-
Mobile-responsive for field use
➡️ Designed for both beginners and professional AV integrators.

Step 4: Optimizing Brightness and Image Quality
Understanding Projector Lumens Requirements
Projector brightness (measured in lumens or ANSI lumens) must overcome ambient light to deliver quality images. The required lumens depend on:
Ambient Light Conditions
-
Dark room: 1000-1500 lumens sufficient
-
Controlled lighting: 2000-3000 lumens recommended
-
Ambient light: 3000-5000 lumens required
-
High ambient: 5000+ lumens necessary
Screen Size Impact
-
Larger screens require more lumens
-
Screen gain can boost effective brightness
-
Dark screens reduce reflection, require more lumens
Calculation formula:
Required Lumens = (Screen Area in sq ft × Ambient Light Factor) ÷ Screen Gain
For detailed guidance: Projector Screen Brightness Calculator: Improve Brightness, Resolution & Viewing Experience.
Screen Gain and Its Impact
Screen gain measures how much light a screen reflects compared to a reference white surface:
-
Gain 1.0: Standard white screen (baseline)
-
Gain 1.3-1.5: Increased brightness, narrower viewing angle
-
Gain 0.8-0.9: Wider viewing angle, requires more lumens
-
High gain (2.0+): Specialized applications, very narrow angle
How to Increase Throw Distance Without Sacrificing Image Quality
When room constraints demand longer throw distances:
Brightness Compensation
Focus and Sharpness
-
Verify projector’s maximum throw distance specification
-
Ensure lens quality maintains sharpness at distance
-
Consider lens upgrade for long throws
Resolution Considerations
-
Higher resolutions (4K) maintain quality better at distance
-
Viewer distance increases, reducing perceived quality loss
Step 5: Mounting and Final Placement
Ceiling vs. Shelf Mounting
|
Mounting Type |
Advantages |
Disadvantages |
Best For |
|
Ceiling Mount |
Permanent, clean look, optimal angle |
Installation complexity, ceiling strength |
Home theaters, dedicated rooms |
|
Shelf/Table |
Easy setup, portable, no installation |
Takes floor space, less stable |
Temporary setups, renters |
|
Wall Mount |
Good for UST, space-saving |
Limited to specific projector types |
Living rooms, UST projectors |
|
Subject: Mounting selection |
|||
|
Predicate: depends on |
|||
|
Object: room type and installation permanence |
Lens Shift vs. Keystone Correction
Lens Shift (Preferred)
-
Optical adjustment moves lens physically
-
No image quality loss
-
Limited range (typically ±30% vertical)
-
Preserves native resolution
Keystone Correction (Last Resort)
For detailed comparison: Lens Shift vs Keystone: Which Preserves Focus Better?.
Installing Your Projector
Step-by-step installation:
-
Mark mounting position based on calculator results
-
Install mount with proper ceiling support
-
Mount projector securely
-
Power and connect cables
-
Adjust zoom and focus
-
Apply lens shift if needed
-
Fine-tune keystone (minimal correction)
-
Calibrate colors and settings
For bedroom-specific guidance: How to Build a DIY Projector Setup for Your Bedroom and How to Set Up a Projector in Your Bedroom for the Ultimate Movie Night.
Beginner to Pro: Skill Progression Guide
Beginner Level: Basic Home Theater Setup
Beginner priorities: ✓ Use basic projector throw calculator ✓ Choose standard throw projector (1.5:1 typical) ✓ Mount at screen center height ✓ Control ambient light with curtains ✓ Use 80-100 inch screen for living rooms
Intermediate Level: Optimized Installations
Intermediate techniques: ✓ Calculate optimal lumens for environment ✓ Consider screen gain selection ✓ Use lens shift for off-center mounting ✓ Optimize viewing angles and seating ✓ Implement basic acoustic treatments
Professional Level: Complex AV Integration
Professional capabilities: ✓ Use XTEN-AV for complete AV design ✓ Calculate multi-projector arrays ✓ Integrate control systems and automation ✓ Design edge blending setups ✓ Create professional documentation ✓ Coordinate with other trades
Common Projector Placement Mistakes to Avoid
Error 1: Ignoring Throw Ratio Specifications
Mistake: Assuming any projector works at any distance.
Solution: Always verify the throw ratio matches your throw distance and desired screen size using a projector throw distance calculator.
Error 2: Insufficient Brightness Planning
Mistake: Choosing projector based only on resolution, ignoring ambient light.
Solution: Use brightness calculators factoring room lighting and screen size.
Error 3: Excessive Keystone Correction
Mistake: Relying on keystone correction instead of proper mounting.
Solution: Position projector at correct angle, use lens shift when possible.
Error 4: Neglecting Viewing Distance
Mistake: Choosing screen too large or small for seating distance.
Solution: Follow THX guidelines or use viewing distance calculators.
Error 5: Poor Cable Management
Mistake: Not planning cable routes during mounting.
Solution: Calculate cable lengths including slack, plan routing paths.
Advanced Topics: Multi-Projector and Special Setups
Panoramic and Multi-Projector Arrays
For ultra-wide screens or immersive environments:
Planning requirements:
-
Calculate overlap zones for edge blending
-
Match brightness across projectors
-
Align color temperature
-
Calculate total lumens requirements
-
Plan mounting positions for all units
Rear Projection Setups
Rear projection considerations:
-
Throw distance occurs behind screen
-
Requires translucent screen material
-
Needs adequate depth (throw distance + clearance)
-
Mirror systems can reduce required depth
-
Inverted image settings required
Short Throw and UST Installations
UST advantages:
UST challenges:
-
Requires precise alignment
-
Sensitive to screen flatness
-
Limited vertical placement flexibility
Frequently Asked Questions (FAQ)
What is a projector calculator and why do I need one?
A projector calculator is a specialized tool that computes the optimal relationship between projector location, screen size, and throw distance using your projector’s throw ratio. You need one because manual calculations are error-prone and time-consuming. A good projector throw calculator considers zoom range, lens shift, mounting height, and room constraints to deliver installation-ready specifications. For professional work, advanced calculators like XTEN-AV also factor brightness requirements, ambient lighting, and screen gain for complete system planning.
How do I calculate the correct throw distance for my projector?
Use this formula: Throw Distance = Screen Width × Throw Ratio
For example, a 100-inch diagonal 16:9 screen has a 87-inch width. With a 1.5:1 throw ratio projector: 87 × 1.5 = 130.5 inches (10.9 feet) throw distance.
However, professional projector throw distance calculators handle complexities like:
-
Zoom range (min/max distances)
-
Lens shift offset adjustments
-
Mounting height calculations
-
Multiple aspect ratios
What’s the difference between lens shift and keystone correction?
Lens Shift physically moves the lens to adjust image position without digital processing. It preserves native resolution and image quality but has limited range (typically ±30% vertical).
Keystone Correction digitally warps the image to correct trapezoidal distortion. It’s convenient but reduces effective resolution and should be minimized.
Professional recommendation: Always use lens shift first, resort to minimal keystone only when necessary.
How many lumens do I need for my home theater?
General guidelines:
-
Dedicated dark theater: 1500-2500 lumens
-
Living room (controlled light): 2500-3500 lumens
-
Bright room: 3500-5000+ lumens
-
Large screens (120″+): Add 500-1000 lumens
Formula: Base lumens × (screen area / 100 sq in) × ambient light factor
Can I use any projector calculator for professional installations?
Basic online projector calculators work for simple home setups, but professional installations need tools that integrate:
✓ Multi-brand compatibility
✓ Brightness analysis with ambient light
✓ Room modeling capabilities
✓ Lens shift and keystone calculations
✓ Documentation generation
✓ Project workflow integration
XTEN-AV provides professional-grade calculations with ±1% accuracy, visual planning tools, and integration with complete AV design workflows—essential for commercial projects and demanding residential installations.
How do I increase throw distance without sacrificing image quality?
To maintain quality at longer distances:
Brightness: Increase projector lumens as brightness decreases with distance. Use higher gain screens to compensate.
Optics: Ensure the projector’s lens quality maintains sharpness at your throw distance. Verify you’re within maximum throw range specifications.
Resolution: Consider 4K projectors which maintain perceived quality better at distance.
Ambient Light: Control strictly as longer distances require more lumens.
For optimization strategies, see specialized guidance on this topic.
What’s the best placement for a bedroom projector setup?
Optimal bedroom placement:
-
Screen size: 80-100 inches for typical bedrooms
-
Throw distance: 8-12 feet (standard throw projector)
-
Mounting: Ceiling mount at foot of bed
-
Height: Slightly above eye level when seated
-
Brightness: 1500-2500 lumens sufficient with curtains
Alternatives: Short-throw or UST projectors work well in compact bedrooms.
Conclusion: From Calculations to Perfect Installations
Successful projector placement begins with accurate calculations. Whether you’re setting up your first home theater or designing complex commercial AV systems, using a professional Projector Calculator eliminates errors, saves time, and ensures optimal results. The progression from basic throw distance calculators to comprehensive tools like XTEN-AV reflects the evolution of the industry toward integrated, intelligent design workflows.
Key principles to remember:
✅ Always verify throw ratio before purchasing projectors
✅ Use projector throw calculators to validate placement
✅ Factor ambient light into brightness planning
✅ Prioritize lens shift over keystone correction
✅ Consider room constraints early in planning
✅ Calculate viewing distance for appropriate screen size
✅ Use professional tools like XTEN-AV for complex projects
From DIY enthusiasts building their first bedroom projector setup to professional AV integrators designing multi-million dollar installations, the fundamental principles remain the same: accurate calculations lead to perfect placement, and perfect placement delivers exceptional viewing experiences.
XTEN-AV represents the future of projector placement planning—where isolated calculations evolve into comprehensive design ecosystems. By combining throw distance calculations, brightness analysis, room modeling, and workflow integration, it transforms how professionals approach projector installations.
Whether you’re planning a simple home theater or a complex auditorium system, the right projector calculator is your first step toward installation success. The investment in proper planning tools pays dividends through reduced errors, faster installations, and satisfied clients.
PakarPBN
A Private Blog Network (PBN) is a collection of websites that are controlled by a single individual or organization and used primarily to build backlinks to a “money site” in order to influence its ranking in search engines such as Google. The core idea behind a PBN is based on the importance of backlinks in Google’s ranking algorithm. Since Google views backlinks as signals of authority and trust, some website owners attempt to artificially create these signals through a controlled network of sites.
In a typical PBN setup, the owner acquires expired or aged domains that already have existing authority, backlinks, and history. These domains are rebuilt with new content and hosted separately, often using different IP addresses, hosting providers, themes, and ownership details to make them appear unrelated. Within the content published on these sites, links are strategically placed that point to the main website the owner wants to rank higher. By doing this, the owner attempts to pass link equity (also known as “link juice”) from the PBN sites to the target website.
The purpose of a PBN is to give the impression that the target website is naturally earning links from multiple independent sources. If done effectively, this can temporarily improve keyword rankings, increase organic visibility, and drive more traffic from search results.