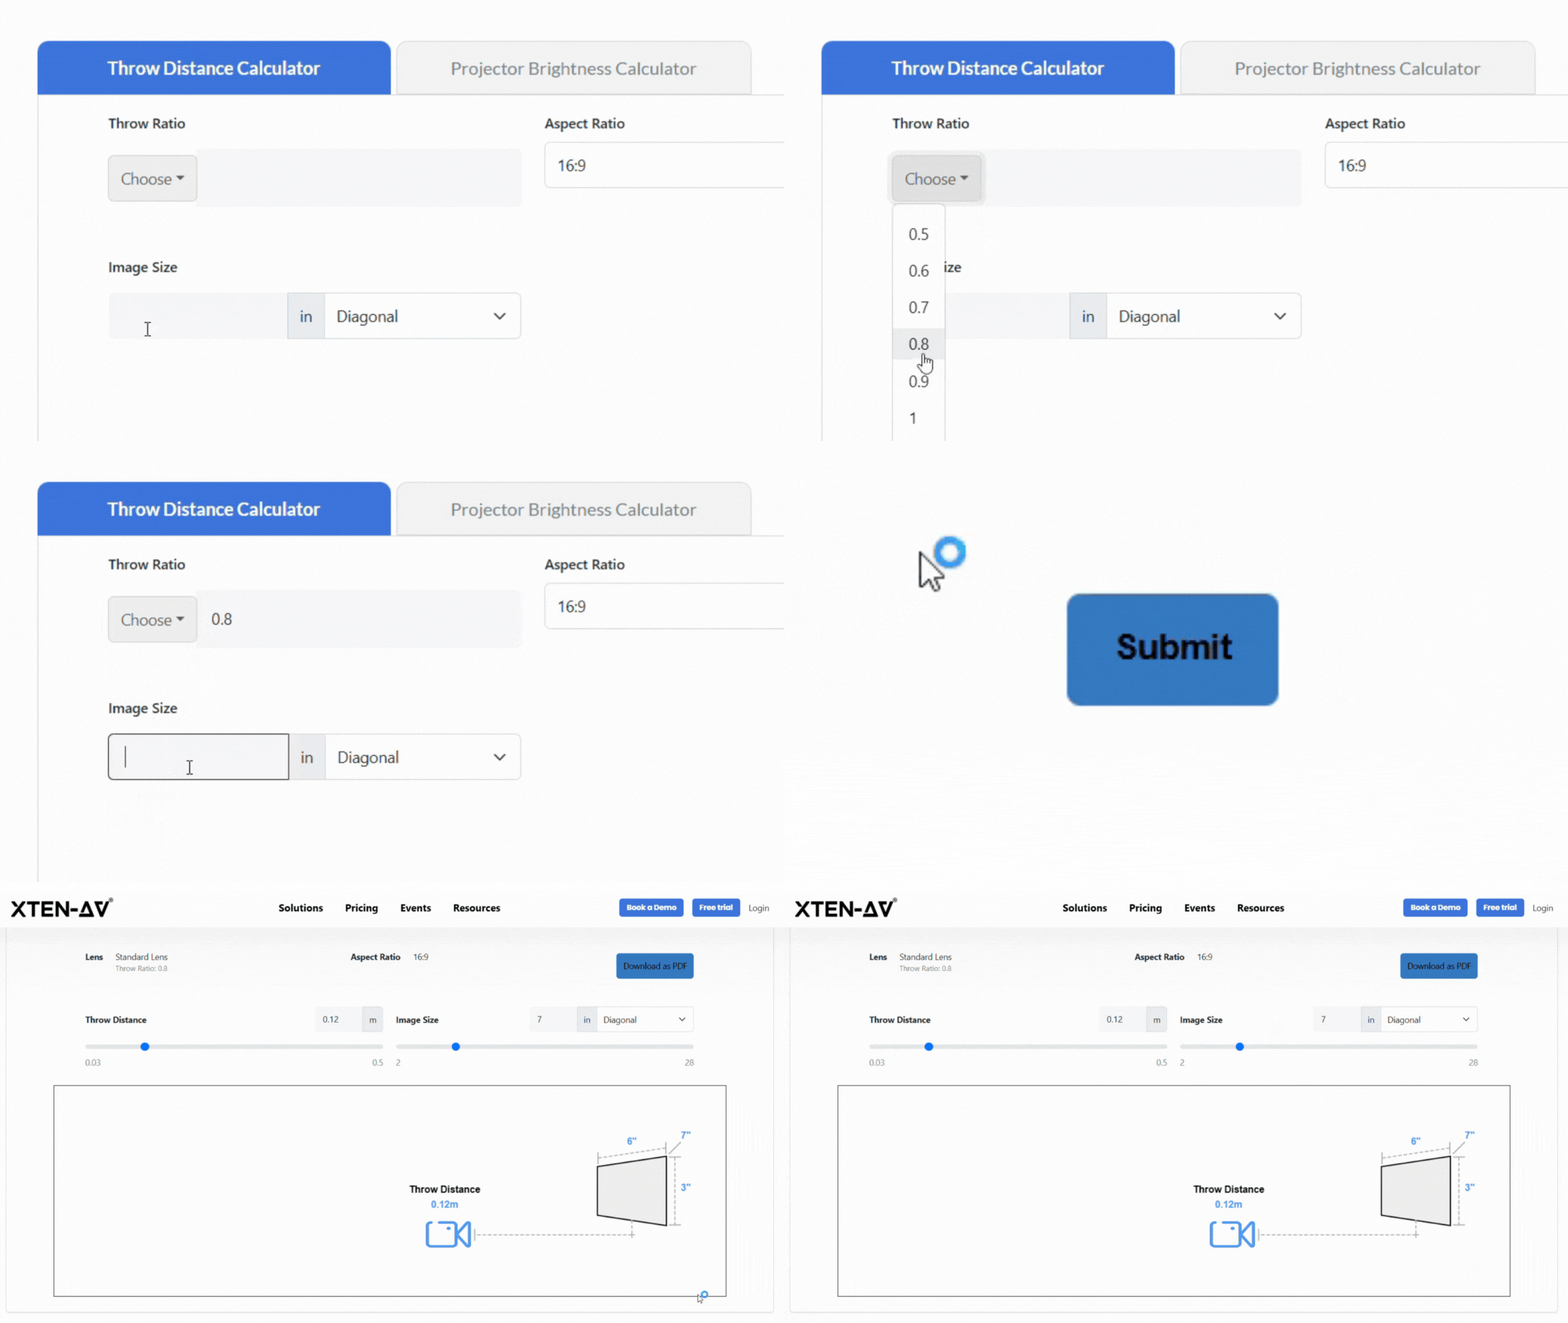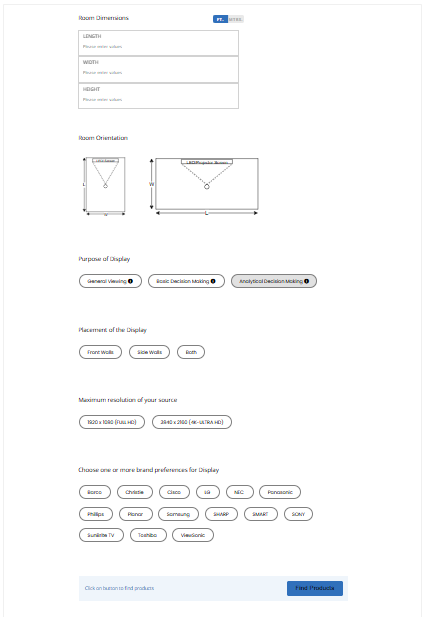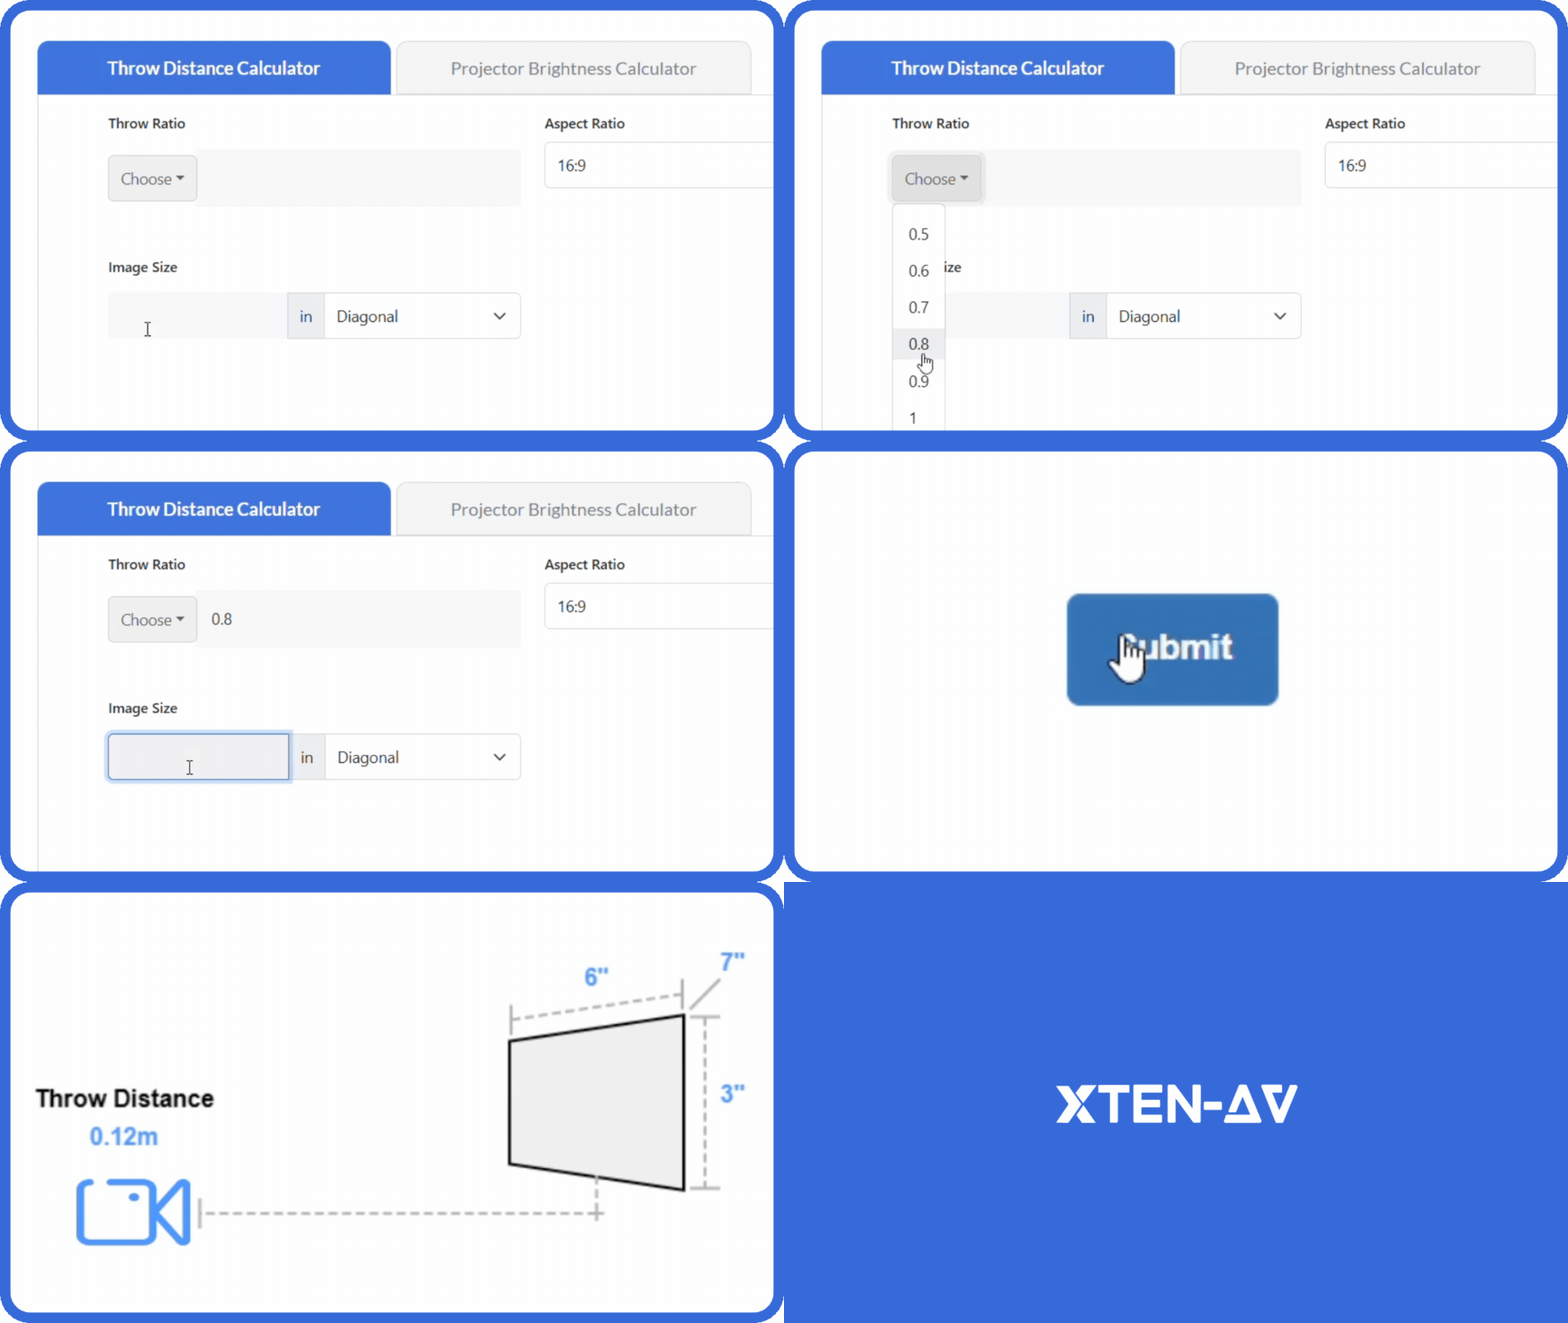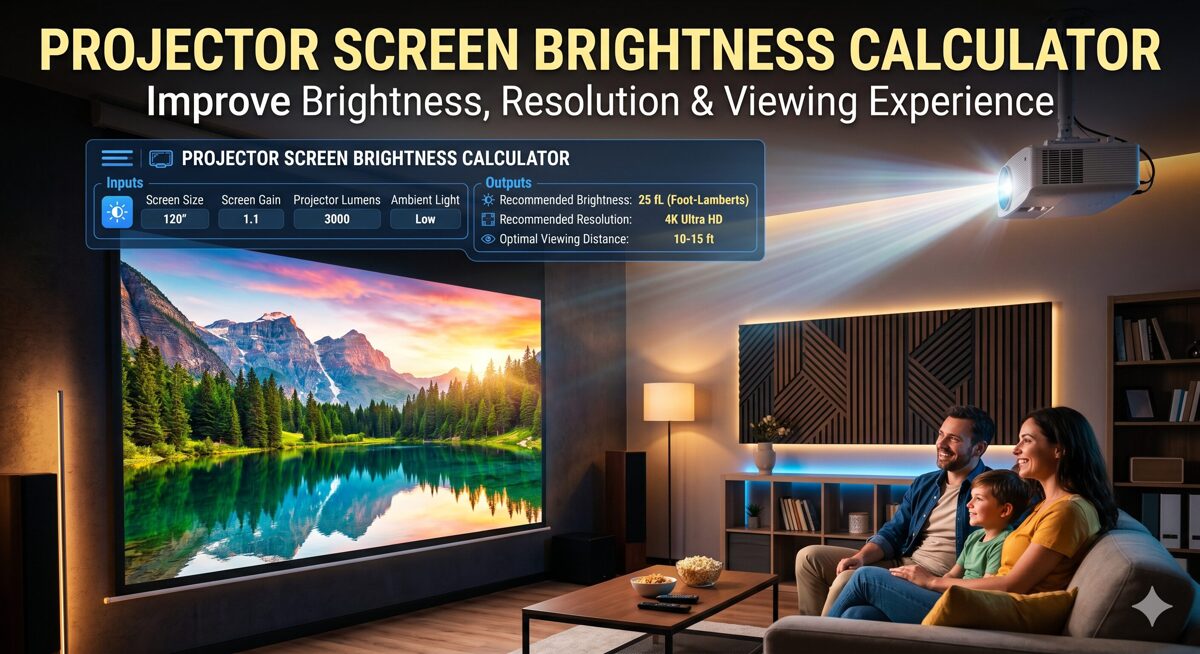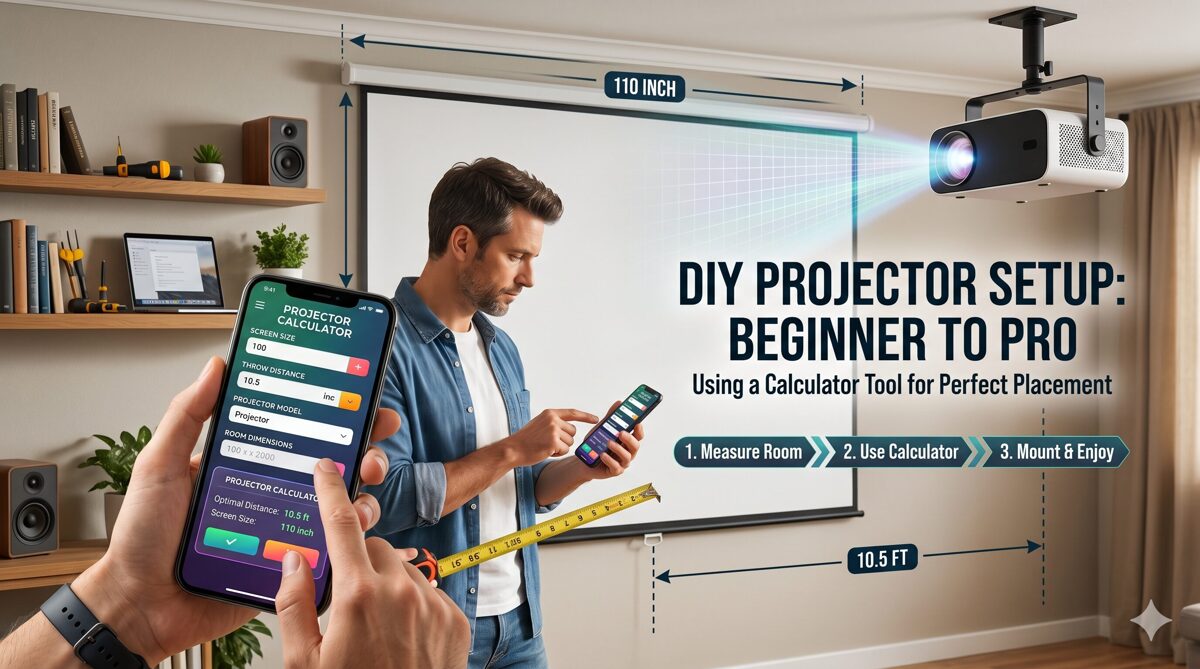
Choosing the right projector screen is one of the most important decisions in any projection setup, whether you are building a home theater, upgrading a conference room, or designing a classroom. Many people focus on the projector model itself but overlook a critical factor that directly impacts viewing comfort and image quality: matching projector screen size to room size.
A screen that is too large can cause eye strain and poor visibility, while a screen that is too small wastes the projector’s potential and reduces immersion. Understanding how room dimensions, viewing distance, aspect ratio, and projector placement work together helps you avoid costly mistakes.
In this guide, we will break down the exact relationship between room size and screen size. You will find clear charts, simple formulas, and practical examples to help you determine projector screen size accurately. We will also explain how tools like the Free Screen Size Calculator by XTEN-AV simplify this process, especially for users who want fast and reliable results without manual calculations.
Why Projector Screen Size Must Match Room Size
The size of your room determines how far viewers sit from the screen, where the projector can be mounted, and how large the image should be for comfortable viewing. Ignoring these factors often leads to common problems such as neck strain, blurry visuals, or uneven brightness.
Room size influences:
When you select the correct projector screen sizes, you ensure that everyone in the room can view content clearly without fatigue.
Understanding Projector Screen Size Basics
Before diving into charts and formulas, it is important to understand how projector screens are measured.
What Does Projector Screen Size Mean?
Projector screen size refers to the diagonal measurement of the screen, usually expressed in inches. For example, a 120 inch screen measures 120 inches from one corner to the opposite corner.
However, diagonal size alone does not tell the full story. You must also consider projector screen sizes dimensions, which include:
Screen width
Screen height
Aspect ratio
These dimensions determine how the image fits in your room.
Common Projector Screen Aspect Ratios
Aspect ratio defines the relationship between screen width and height. The most common options include:
16:9 for home theaters, offices, and classrooms
16:10 for business presentations
4:3 for legacy content
The same diagonal size will have different width and height depending on the aspect ratio. This is why understanding dimensions is critical when matching screen size to room size.
Projector Screen Size vs Room Size Chart
Below is a general guideline chart to help you match room size with recommended screen size. These values assume a 16:9 aspect ratio and standard seating distances.
Room Size vs Recommended Screen Size Chart
Room Depth (Viewing Distance)
Recommended Screen Size
Screen Width Approx
8 to 10 feet
80 to 100 inches
70 to 87 inches
10 to 12 feet
100 to 120 inches
87 to 105 inches
12 to 15 feet
120 to 150 inches
105 to 131 inches
15 to 20 feet
150 to 180 inches
131 to 157 inches
This chart gives a quick reference, but it does not replace precise calculation. Factors like content type, seating layout, and projector specifications still matter.
Exact Formula to Determine Projector Screen Size
If you want more accuracy, using a formula is the best approach.
Screen Size Formula Based on Viewing Distance
A commonly accepted guideline is:
Screen Width = Viewing Distance ÷ 1.5
Once you know the screen width, you can calculate diagonal screen size using the aspect ratio.
For a 16:9 screen:
Example Calculation
If your seating distance is 12 feet:
Convert feet to inches: 12 × 12 = 144 inches
Screen width = 144 ÷ 1.5 = 96 inches
Diagonal size = 96 ÷ 0.87 ≈ 110 inches
This means a 110 inch screen would be ideal for that room.
Using a Projector Screen Size Calculator
Manual calculations work well, but they take time and can be confusing for beginners. A projector screen size calculator automates this process by factoring in viewing distance, aspect ratio, and room layout.
The Free Screen Size Calculator by XTEN-AV allows users to input basic room details and instantly receive accurate screen size recommendations. It eliminates guesswork and helps avoid screens that are too large or too small for the space.
Best Home Theater Screen Size by Room Type
Home theaters require a more immersive experience than offices or classrooms. The Best Home Theater Screen Size depends heavily on how cinematic you want the experience to feel.
Small Home Theater Rooms
Medium Home Theater Rooms
Large Home Theater Rooms
Using a calculator ensures your screen fills your field of view without overwhelming it.
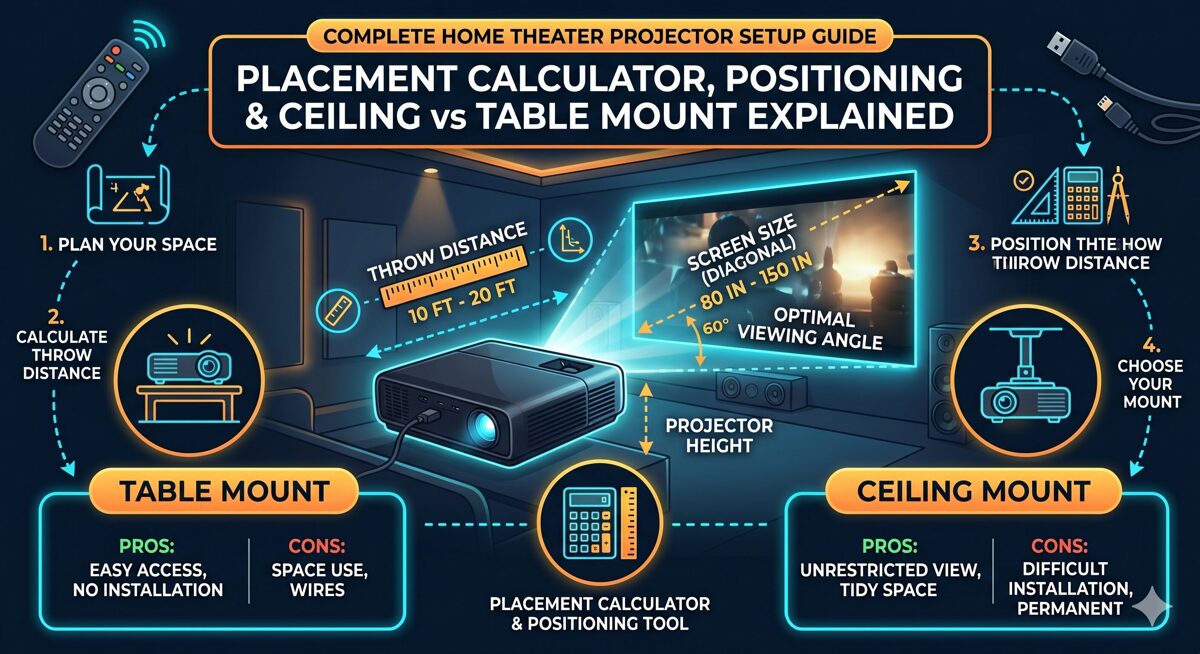
How Far Should The Projector Distance Be From the Screen?
One of the most common questions in projector setups is How Far Should The Projector Distance Be From the Screen? The answer depends on the projector’s throw ratio.
Understanding Throw Ratio
Throw ratio is calculated as:
Throw Distance ÷ Screen Width
For example:
Short throw and ultra short throw projectors allow larger images from shorter distances, making them ideal for smaller rooms.
Matching Projector Placement to Screen Size
Your projector placement must align with both room size and screen size.
Key considerations include:
Ceiling height
Mounting position
Lens shift capability
Zoom range
Improper placement can distort the image or limit screen size options.
Difference Between Screen Size and Screen Resolution
Many people confuse screen size with image resolution, but they are not the same.
Screen Size
Screen size refers to the physical dimensions of the screen. A larger screen means a physically bigger display area.
Screen Resolution
Resolution refers to the number of pixels displayed on the screen. Common resolutions include 1080p and 4K.
The Difference Between Screen Size and Screen Resolution becomes critical as screens get larger. A large screen with low resolution may appear blurry, while a high resolution projector maintains clarity even on bigger screens.
Choosing Screen Size Based on Resolution
For larger screens, higher resolution projectors are recommended.
This ensures sharp images and readable text.
Classroom and Office Screen Size Guidelines
Not all rooms are built for cinematic viewing. Classrooms and offices prioritize visibility and readability.
Classroom Screen Size
Viewing distance: 15 to 25 feet
Screen size: 120 to 150 inches
Aspect ratio: 16:9 or 16:10
Conference Room Screen Size
A calculator helps ensure all participants can see content clearly from every seat.
Common Mistakes When Selecting Projector Screen Sizes
Avoid these common errors:
Choosing the largest screen without considering room size
Ignoring projector throw limitations
Confusing diagonal size with screen width
Overlooking resolution requirements
These mistakes often lead to poor viewing experiences.
Why Use Free Screen Size Calculator by XTEN-AV
The Free Screen Size Calculator by XTEN-AV simplifies the entire decision-making process. Instead of relying on estimates or generic charts, it provides data-driven recommendations tailored to your space.
Key benefits include:
It is especially useful for homeowners, AV professionals, and system designers.
Step by Step Guide to Determine Projector Screen Size
To summarize, follow these steps:
Measure room depth and seating distance
Identify screen aspect ratio
Use a formula or calculator
Check projector throw distance compatibility
Match screen size with resolution
This structured approach ensures optimal results.
Final Thoughts
Matching projector screen size to room size is not guesswork. With the right formulas, charts, and tools, you can create a comfortable and immersive viewing experience in any space.
By understanding projector screen size, reviewing projector screen sizes dimensions, and using a projector screen size calculator, you can confidently design setups that work in real-world environments. Whether you are building a home theater, classroom, or boardroom, taking the time to calculate screen size properly ensures better image quality, viewing comfort, and long-term satisfaction.
If you want a faster and more accurate solution, the Free Screen Size Calculator by XTEN-AV provides a practical way to get it right the first time.
PakarPBN
A Private Blog Network (PBN) is a collection of websites that are controlled by a single individual or organization and used primarily to build backlinks to a “money site” in order to influence its ranking in search engines such as Google. The core idea behind a PBN is based on the importance of backlinks in Google’s ranking algorithm. Since Google views backlinks as signals of authority and trust, some website owners attempt to artificially create these signals through a controlled network of sites.
In a typical PBN setup, the owner acquires expired or aged domains that already have existing authority, backlinks, and history. These domains are rebuilt with new content and hosted separately, often using different IP addresses, hosting providers, themes, and ownership details to make them appear unrelated. Within the content published on these sites, links are strategically placed that point to the main website the owner wants to rank higher. By doing this, the owner attempts to pass link equity (also known as “link juice”) from the PBN sites to the target website.
The purpose of a PBN is to give the impression that the target website is naturally earning links from multiple independent sources. If done effectively, this can temporarily improve keyword rankings, increase organic visibility, and drive more traffic from search results.
February 3, 2026 at 1:34 pm, No comments Choosing the right projector screen is one of the most important decisions in any projection setup, whether you are building a home theater, upgrading a conference room, or designing a classroom. Many people focus on the projector model itself but overlook a critical factor that directly impacts viewing comfort and image quality:
In the rapidly evolving world of audiovisual integration, the technology landscape has become increasingly complex, demanding sophisticated tools that can keep pace with advanced AV system requirements, client expectations, and project timelines. For AV engineers, consultants, and system designers, selecting the right AV CAD Software isn’t just a technical decision—it’s a strategic investment that fundamentally impacts design efficiency, documentation quality, project profitability, and competitive positioning in the marketplace.
AV CAD Software has emerged as the indispensable backbone of modern audiovisual integration, enabling professionals to design intricate AV systems, create comprehensive technical documentation, generate accurate bills of materials, and streamline entire project workflows from initial concept through final commissioning. The importance of choosing the best AV CAD Software extends far beyond simple drawing capabilities—it determines how quickly you can respond to RFPs, how accurately you estimate projects, how effectively your teams collaborate, and ultimately, how successfully your business scales.
The challenge facing today’s AV professionals isn’t finding software, but rather identifying which platforms deliver genuine value through industry-specific features, intelligent automation, collaborative capabilities, and integration ecosystems that enhance rather than complicate workflows.
This comprehensive guide explores 9 leading AV CAD Software platforms specifically engineered for AV engineers and consultants. We’ll examine their unique capabilities, evaluate their strengths and limitations, analyze pricing models, and provide strategic guidance for selecting the optimal solution for your specific needs. Whether you’re designing corporate conference rooms, educational facilities, broadcast studios, control rooms, or large-scale venue installations, these platforms offer the specialized tools and intelligence that modern AV design demands.
AV CAD Software represents specialized computer-aided design (CAD) applications specifically engineered for the audiovisual integration industry. Unlike generic CAD platforms designed for architecture, mechanical engineering, or general drafting, AV CAD Software incorporates deep domain expertise about AV equipment, signal types, connectivity protocols, industry standards, and the unique workflows that AV professionals follow.
These purpose-built platforms enable AV engineers and consultants to:
Design complete AV systems encompassing audio, video, control, and network components
Create professional technical drawings including signal flow diagrams, rack elevations, floor plans, and wiring schematics
Generate accurate bills of materials (BOM) with precise part numbers and quantities
Document cable specifications, connection details, and signal routing
Produce comprehensive installation documentation for field technicians
Develop client-ready proposals, presentations, and system overviews
Manage project workflows from design through installation and commissioning
Coordinate with architects, electrical engineers, and general contractors
The fundamental differentiator of AV CAD Software is its embedded intelligence. Rather than treating AV devices as generic symbols requiring manual configuration, these platforms understand:
Device capabilities and technical specifications
Port configurations and connection types
Signal format compatibility (HDMI, SDI, Dante, HDBaseT, etc.)
Power requirements and thermal characteristics
Mounting specifications and space requirements
Integration protocols and control methods
This specialized knowledge dramatically accelerates design workflows, reduces errors that plague generic tools, and ensures documentation accuracy essential for successful project execution.
AV CAD Software serves as the central nervous system for AV integration businesses, connecting system design, documentation, estimation, project management, and client communication into cohesive workflows that improve efficiency, enhance quality, and support sustainable business growth.
Key Components of AV CAD Software
Professional AV CAD Software incorporates several critical components that distinguish it from generic design tools and define its effectiveness for AV applications:
1. Comprehensive Equipment Libraries
Extensive databases containing manufacturer-specific AV devices with complete technical specifications:
Display technology: LED displays, LCD panels, projectors, video walls
9 Best AV CAD Software Platforms for AV Engineers and Consultants
1. XTEN-AV (X-DRAW) – The Industry’s Most Advanced AI-Powered AV CAD Software
XTEN-AV represents the pinnacle of AV CAD Software innovation, purpose-engineered from the ground up to revolutionize how AV engineers and consultants approach system design, documentation, and project delivery. This comprehensive platform combines cutting-edge artificial intelligence, cloud-based collaboration, and integrated project management to deliver unprecedented efficiency and professional results.
Introduction
Unlike adapted general-purpose tools that require extensive customization, XTEN-AV was conceived, designed, and built specifically for the audiovisual integration industry. Every feature, workflow, and capability reflects a deep understanding of the challenges AV professionals face daily—from initial concept development through final system commissioning.
Key Features That Make the XTEN-AV AV CAD Software Stand Out
1. AI-Powered AV System Design
XTEN-AV is designed specifically for the AV industry and incorporates artificial intelligence to automate system design and documentation. Instead of manually drafting complex AV systems, the platform can generate designs based on project inputs and industry standards. This drastically reduces engineering time and improves design accuracy.
The AI engine analyzes room dimensions, acoustic characteristics, viewing requirements, budget parameters, and performance specifications to generate comprehensive system designs that would traditionally require hours of manual engineering. The platform understands equipment compatibility, signal flow logic, and best practices accumulated from thousands of successful installations.
2. Dedicated AV CAD Drawing Environment (X-DRAW)
Unlike generic CAD tools, XTEN-AV provides a specialized AV CAD drawing module called X-DRAW. It allows users to create:
AV line schematics showing complete system connectivity
Signal flow diagrams illustrating audio and video paths
Rack elevation diagrams with precise equipment positioning
Floor plan layouts with device placement and cable routing
Cable connection diagrams with detailed labeling
These drawings are created within a single platform tailored for AV system integrators, consultants, and designers, eliminating the complexity and inefficiency of juggling multiple software applications.
3. Automated Documentation and BOM Generation
One of the most powerful capabilities of XTEN-AV is automatic documentation generation. When a design is created, the software can automatically generate:
Bill of Materials (BOM) with accurate manufacturer part numbers and current pricing
Scope of Work documents describing complete project deliverables
Project documentation formatted for client review and approval
Client proposals combining technical specifications with professional presentation
This eliminates manual spreadsheet work and ensures that the project documentation always matches the design, preventing the costly discrepancies that plague manual processes.
4. Extensive AV Product Library
XTEN-AV includes a large database of AV equipment and components from multiple manufacturers. Designers can quickly add devices to their designs without manually creating symbols or blocks.
Benefits include:
Faster system design through intuitive equipment selection
Accurate device specifications automatically populated
Easy equipment selection with powerful filtering and search
Regular database updates with new product releases
Custom equipment creation for specialty items
5. Drag-and-Drop Device Connectivity
The platform allows designers to connect AV devices visually through ports and cables. Engineers can easily create connections between equipment such as displays, amplifiers, speakers, and processors.
Key capabilities include:
Port-to-port connectivity with visual cable representation
Cable ID labeling for field identification and troubleshooting
Multiple signal path visualization for complex routing scenarios
Layer-based design editing for organized, professional workflows
Automatic cable length calculation based on routing paths
6. Automated AV Layout Creation
XTEN-AV significantly simplifies the process of designing AV layouts. Users can generate layouts for:
Ceiling speaker placement with acoustic coverage modeling
Rack configuration with proper spacing and airflow considerations
Floor plans with equipment positioning and cable pathways
Front elevation diagrams for client visualization
These layouts can be created in minutes, reducing the time normally required with traditional CAD tools by 70-80%.
7. Cloud-Based Collaboration
Because XTEN-AV is fully cloud-based, teams can collaborate from anywhere. This allows:
Real-time design updates visible to all authorized team members
Remote access to projects from any device with internet connectivity
Centralized data storage eliminating file management headaches
Easy sharing with clients, contractors, and team members
Automatic backup and version history
Cloud access also ensures that project files remain secure and accessible, with enterprise-grade security and disaster recovery.
8. Integrated Proposal and Project Management
XTEN-AV goes beyond CAD drawing by integrating proposal generation and project management tools within the same platform.
This means users can:
Design the AV system with complete technical detail
Generate the proposal with professional formatting and branding
Manage the project through installation, testing, and commissioning
—all within a single workflow, eliminating redundant data entry and ensuring perfect consistency across all project phases.
9. Compatibility with Industry Tools
XTEN-AV supports integration and export capabilities that allow designs and documentation to be used with other platforms. This improves workflow flexibility and enables teams to integrate the software into existing project ecosystems.
Supported formats include PDF (universal documentation), DWG/DXF (AutoCAD compatibility), CSV/Excel (data export), and various image formats for presentations.
10. Purpose-Built for AV Professionals
Unlike general CAD software such as AutoCAD or Visio, XTEN-AV is built specifically for AV system integrators, engineers, consultants, and installation companies.
The platform understands AV-specific requirements such as:
Signal flow logic and routing complexity
Device port connectivity and compatibility validation
Rack layouts with industry-standard spacing
AV equipment databases with current technical specifications
This specialization makes it significantly more efficient for AV projects compared to adapted general-purpose tools.
Pros:
Revolutionary AI-powered automation dramatically reduces design time
Purpose-built exclusively for AV industry workflows
Newer platform with smaller legacy user community than established tools
Best For:
Professional AV integration firms, independent consultants, design engineers, and system designers seeking the most advanced, AI-powered AV CAD Software with comprehensive automation, seamless collaboration, and integrated project management. Ideal for organizations prioritizing efficiency, accuracy, professional deliverables, and scalable growth.
2. D-Tools System Integrator (SI) – Comprehensive Business Management Ecosystem
D-Tools SI represents a mature, full-featured system integration software platform that combines CAD drawing capabilities, project estimation, proposal generation, and complete business management tools in an integrated ecosystem serving the entire project lifecycle.
Introduction
As one of the longest-established platforms in the AV industry with over two decades of development, D-Tools SI has evolved into a comprehensive business management system trusted by thousands of integration companies worldwide. Its strength lies in managing projects from initial sales through final billing.
Key Features:
Integrated CAD drawing module for creating AV schematics and system diagrams
Massive manufacturer product database with over 500,000 products
Sophisticated labor estimation and project costing algorithms
Professional proposal generation with customizable templates and branding
Complete project tracking, scheduling, and resource management
Purchase order generation and inventory management capabilities
Seamless integration with QuickBooks and other accounting platforms
Mobile applications for field technicians and project managers
Change order management and project revision tracking
Comprehensive business analytics and reporting tools
Pros:
Mature, stable platform with extensive feature set
Enormous equipment database with frequent manufacturer updates
Strong estimation and pricing tools improve profitability
Complete business management solution beyond just design
Large, active user community with peer support
Excellent integration with accounting and business software
Comprehensive training programs and certification
Good for standardizing processes across large organizations
Cons:
Steeper learning curve due to extensive feature complexity
Higher total cost including initial implementation and ongoing subscriptions
CAD drawing tools less sophisticated than dedicated design platforms
Interface aesthetics feel dated compared to modern cloud applications
Requires significant setup, configuration, and customization time
Desktop-focused with limited true cloud collaboration
Best For:
Established AV integration companies seeking an all-encompassing business management platform that handles design, estimation, proposal generation, project management, procurement, and accounting integration within a single comprehensive ecosystem.
3. Stardraw Design 7 – Purpose-Built AV Design Platform
Stardraw Design 7 offers a dedicated AV design solution specifically engineered for creating AV system documentation with specialized tools, extensive manufacturer libraries, and workflows optimized for AV professionals.
Introduction
With over two decades serving exclusively the AV industry, Stardraw has refined its focus on AV design and documentation, balancing professional capabilities with approachability for AV professionals who may not have extensive CAD backgrounds.
Key Features:
AV-specific symbol libraries from 500+ manufacturers with regular updates
Automated cable schedules and comprehensive equipment reports
Specialized rack elevation design tools with accurate spacing
Signal flow diagram creation with intelligent routing
Floor plan integration showing equipment placement
Current product database with detailed technical specifications
Multiple professional output formats (PDF, DWG, DXF, images)
Template system for creating standardized, reusable designs
Comprehensive layer management for complex systems
Connector and port specification documentation
Pros:
Purpose-built specifically for AV industry requirements
Comprehensive manufacturer libraries covering major brands
More affordable than enterprise-level platforms
Easier learning curve than generic CAD tools like AutoCAD
Good balance of professional features and usability
Active user community with forums and peer support
Responsive technical support from AV-knowledgeable staff
Regular updates with new features and products
Cons:
Limited AI automation compared to cutting-edge platforms
Desktop-only application without true cloud collaboration
Smaller development ecosystem compared to major CAD platforms
Manual software and library updates required
No integrated proposal or estimation tools
Best For:
AV integrators, consultants, and system designers seek dedicated AV drawing software with industry-specific features, extensive equipment libraries, and professional output quality without the complexity of general CAD platforms or the investment of enterprise systems.
4. AutoCAD with AV Libraries – Industry-Standard CAD Platform
AutoCAD by Autodesk remains the globally recognized standard for professional CAD drafting across industries. When configured with specialized AV symbol libraries, custom templates, and optimized workflows, it becomes a powerful tool for AV system design.
Introduction
AutoCAD’s market dominance stems from its powerful drawing capabilities, extensive customization options, and universal file compatibility. For AV applications, it requires additional configuration with AV-specific libraries, blocks, and standardized workflows.
Key Features:
Professional-grade 2D and 3D CAD drawing tools
Extensive customization through AutoLISP, Visual LISP, and plugins
Industry-standard DWG file format ensuring universal compatibility
Advanced layer management and drawing organization
Precision drawing, measurement, and dimensioning tools
Professional PDF export and publishing capabilities
Mobile apps (AutoCAD mobile) and web version
Integration with broader Autodesk ecosystem (Revit, BIM 360)
Third-party AV symbol libraries available from multiple vendors
Powerful annotation, hatching, and detailing tools
Pros:
Industry-standard platform recognized globally by all design disciplines
Extremely powerful and flexible CAD capabilities
Universal file compatibility with architects, engineers, and contractors
Extensive training resources, tutorials, and educational materials
Excellent for firms doing architectural or engineering work alongside AV
No built-in AV-specific intelligence or automation
Requires manual BOM creation and documentation processes
Higher cost for professional version with full functionality
Generic tool not optimized specifically for AV workflows
Time-consuming for routine AV design tasks
Requires purchase or creation of AV symbol libraries
Best For:
AV firms with existing AutoCAD infrastructure, experienced CAD operators on staff, and projects requiring architectural integration, complex custom drawings, or coordination with architects and engineers using AutoCAD-based workflows.
5. Microsoft Visio – Accessible Business Diagramming
Microsoft Visio provides intuitive diagramming capabilities widely adopted by AV professionals for creating signal flow diagrams, system schematics, network diagrams, and basic floor plans within the familiar Microsoft ecosystem.
Introduction
As an integral part of the Microsoft product family, Visio offers familiar interfaces, seamless integration with Office 365 applications, and accessibility for teams already invested in Microsoft technologies and workflows.
Key Features:
Intuitive drag-and-drop interface requiring minimal training
Extensive template library including some AV-oriented templates
Custom stencil creation, editing, and organizational sharing
Deep integration with Microsoft 365, SharePoint, Teams, OneDrive
Collaboration through cloud storage and co-authoring
Web-based version (Visio for the web) for browser access
Data linking for creating dynamic, data-driven diagrams
Multiple export formats for sharing and publishing
Professional diagram themes and formatting
Shape data and custom properties for documentation
Pros:
Very affordable, especially when bundled with Microsoft 365 subscriptions
Minimal learning curve for users familiar with Microsoft products
Excellent integration throughout Microsoft ecosystem
Good for client presentations and business documentation
Solid cloud collaboration through Microsoft infrastructure
Familiar interface reduces training requirements
Widely accessible across most organizations
Regular updates as part of Microsoft development cycle
Cons:
Not designed for technical CAD work or precision drawing
No automated BOM generation or equipment databases
Very limited AV-specific features or intelligence
Not suitable for complex, detailed system designs
Lacks manufacturer equipment libraries
Generic business diagramming tool requiring extensive customization
Limited technical drawing capabilities
Best For:
Small AV firms, independent consultants, or companies needing basic diagramming capabilities for presentations, proposals, and simple system documentation within organizations already standardized on the Microsoft ecosystem.
6. Vectorworks Spotlight – Professional Entertainment Design
Vectorworks Spotlight delivers professional CAD and BIM capabilities with specialized tools for entertainment production, event design, theatrical installations, and AV systems requiring sophisticated 3D visualization and rendering.
Introduction
Vectorworks Spotlight targets the entertainment technology sector, providing advanced tools for lighting design, audio system layout, video projection, and rigging with robust 3D modeling capabilities ideal for theatrical, concert, and special event applications.
Key Features:
Professional 2D drafting and advanced 3D modeling
Specialized lighting design and visualization tools
Audio system design with speaker coverage modeling
Video and projection layout and mapping capabilities
Entertainment rigging design and documentation
Renderworks for photorealistic visualization and client presentations
BIM integration for coordinating with architectural teams
Extensive entertainment equipment symbol libraries
Braceworks structural analysis integration for rigging safety
Virtual reality and augmented reality support
GDTF (General Device Type Format) support
Pros:
Excellent 3D visualization and rendering capabilities
Specialized tools specifically for entertainment and live events
Professional rendering quality for impressive client presentations
Strong lighting and audio coverage modeling tools
Ideal for theatrical, concert, and venue installations
Active user community within entertainment sector
Cross-platform support (Mac and Windows)
Good integration with entertainment control systems
Cons:
Significant learning curve for full proficiency
Higher cost than basic design solutions
More complexity than needed for standard commercial AV integration
Requires powerful computer hardware for 3D modeling
Focused primarily on entertainment rather than corporate AV
Limited business management or estimation tools
Best For:
AV firms and consultants specializing in entertainment venues, theatrical installations, concert production, special events, and projects requiring sophisticated 3D visualization, lighting design, and photorealistic rendering capabilities.
Bluebeam Revu serves primarily as an advanced PDF markup, review, and collaboration platform that has become essential for many AV teams for reviewing, annotating, coordinating, and managing construction documents and AV drawings throughout project lifecycles.
Introduction
While not a CAD design tool in the traditional sense, Bluebeam Revu excels at document review, markup, collaboration, measurement, and coordination tasks that complement and enhance AV design workflows, particularly during construction and installation phases.
Key Features:
Advanced PDF markup and annotation tools
Real-time cloud collaboration through Bluebeam Studio
Precise measurement and take-off tools for quantities
Custom stamp, symbol, and markup creation
Seamless integration with CAD software workflows
Intelligent document comparison tools
Comprehensive mobile apps for field access and markup
BIM integration capabilities for coordinated projects
Batch processing of multiple files simultaneously
Form creation and data extraction
Pros:
Excellent for project coordination and team collaboration
Superior PDF markup capabilities compared to Adobe products
Very good for reviewing architect and engineer drawings
Reasonable pricing with perpetual license option
Widely adopted throughout construction industry
Strong mobile apps enabling effective field work
Excellent measurement and markup tools
Good customer support and training resources
Cons:
Not a design or CAD creation tool
Requires source drawings from other software
Limited creation capabilities beyond markup
Best used as complement to other tools, not standalone solution
Learning curve for advanced features
Annual maintenance costs for updates
Best For:
AV teams focused on project coordination, construction document review, field verification, RFI management, and collaboration with architects, engineers, and general contractors during construction and installation phases.
8. SketchUp Pro – Intuitive 3D Spatial Visualization
SketchUp Pro offers user-friendly 3D modeling capabilities popular among AV professionals for space planning, equipment visualization, room layout design, and creating compelling visual presentations for clients.
Introduction
SketchUp’s intuitive approach to 3D modeling has made it accessible for AV professionals needing to visualize equipment placement, room layouts, and spatial relationships without investing months in learning complex modeling software.
Key Features:
Intuitive, easy-to-learn 3D modeling interface
Extensive 3D Warehouse with millions of pre-made models
Layout tool for creating 2D documentation from 3D models
Extension Warehouse with thousands of plugins and add-ons
Web-based version (SketchUp for Web) requiring no installation
AR/VR capabilities for immersive client visualization
Import/export various file formats for interoperability
Mobile viewer apps for presenting designs
Trimble Connect for cloud collaboration
Professional rendering extensions available
Pros:
Much easier to learn than traditional 3D CAD platforms
Excellent for spatial planning and equipment visualization
Very good for creating impressive client presentations
Large library of free 3D models including AV equipment
Cross-platform support (Windows and Mac)
Affordable pricing structure compared to enterprise 3D tools
Good community support with extensive tutorials
Quick modeling for conceptual designs
Cons:
Not designed for technical AV schematics or signal flow diagrams
Limited documentation creation capabilities
No BOM generation or AV-specific intelligence
Documentation capabilities limited without Layout
Better as visualization supplement than primary design platform
Limited precision for technical drawings
Best For:
AV designers and consultants focusing on space planning, equipment layout visualization, room design, and creating impressive 3D presentations for clients, particularly for high-end residential, hospitality, and premium commercial projects.
9. Revit with AV Plugins – BIM Integration Platform
Autodesk Revit serves as the leading Building Information Modeling (BIM) platform which, when configured with specialized AV plugins and custom families, enables integrated AV system design within comprehensive building models for large-scale commercial projects.
Introduction
For major commercial projects requiring full BIM coordination across all building systems, Revit with AV-specific families, schedules, and plugins provides the most comprehensive approach to AV design within the broader building context.
Key Features:
Comprehensive BIM capabilities for complete building modeling
3D coordination with architectural, structural, and MEP trades
Advanced clash detection and interference checking
Significant overkill for most standard AV projects
Requires dedicated BIM specialists on staff
Limited AV-specific features without custom development
Very time-consuming for routine AV design work
Requires custom family creation for AV equipment
Best For:
Large AV integration firms and consultants working on major commercial, institutional, healthcare, or government projects requiring full BIM coordination with architects, engineers, and construction managers throughout design and construction phases.
Benefits of Using AV CAD Software
Implementing professional AV CAD Software delivers substantial, measurable advantages across all aspects of audiovisual integration operations:
1. Dramatic Productivity and Efficiency Gains
Professional AV CAD Software reduces system design time by 50-80% compared to manual methods or adapted generic tools. Automated features, intelligent equipment libraries, template-based workflows, and AI-powered design assistance eliminate tedious, repetitive tasks, enabling engineers to complete significantly more projects with existing staff resources while improving quality.
2. Superior Design Accuracy and Error Prevention
Built-in validation rules, port compatibility checking, signal path verification, and intelligent connectivity identify errors during design rather than discovering them during installation. This proactive error prevention reduces costly field changes, eliminates warranty claims, and improves client satisfaction. Automated documentation ensures perfect consistency between drawings, BOMs, and specifications.
3. Professional Client Communication and Presentation
High-quality technical drawings, 3D visualizations, comprehensive documentation, and professional proposals significantly elevate your company’s professional image. Clear visual communication improves client understanding of proposed systems, accelerates approval processes, reduces scope disputes, and differentiates your firm from competitors using basic methods.
4. Streamlined Change Management and Revisions
When project requirements evolve (as they inevitably do), AV-specific software automatically propagates changes throughout all related drawings, schedules, specifications, and documentation. This maintains perfect consistency while reducing revision time from hours to minutes, enabling responsive client service without sacrificing profitability.
5. Enhanced Team Collaboration and Coordination
Modern cloud-based platforms enable seamless collaboration among design engineers, project managers, installation technicians, and clients regardless of geographic location. Real-time updates, version control, change tracking, and multi-user editing prevent the file conflicts, miscommunication, and duplicated effort that plague email-based workflows.
6. Comprehensive Project Documentation
Automated generation of bills of materials, cable schedules, equipment specifications, installation instructions, testing procedures, and as-built drawings creates complete project archives essential for warranty service, future system modifications, facility management integration, and demonstrating professional due diligence.
7. Significant Competitive Business Advantage
Companies leveraging advanced AV CAD Software respond to RFPs 2-3x faster, provide more detailed and professional proposals, handle substantially larger project volumes, demonstrate superior technical competence, and win more competitive bids. This technological advantage directly translates to market share growth and improved client retention.
8. Organizational Knowledge Preservation
Template systems, standardized workflows, reusable design modules, and best practices documentation preserve organizational knowledge and expertise. This ensures consistent quality regardless of individual designer experience level and protects against catastrophic knowledge loss during staff transitions or retirements.
9. Improved Project Profitability
Accurate BOMs prevent procurement errors and material waste. Reduced design time improves labor efficiency. Fewer field errors eliminate costly change orders. Streamlined workflows increase throughput. Better change management preserves margins on scope modifications. These factors combine to directly improve project profitability by 15-30%.
10. Scalable Growth Infrastructure
Professional AV CAD platforms provide the technological foundation enabling business growth without proportionally increasing overhead costs. Efficient workflows, automation, standardization, and collaboration capabilities allow companies to scale operations while maintaining quality, consistency, and profitability.
Step-by-Step: How AV Engineers Use AV CAD Software
Understanding the practical workflow for utilizing AV CAD Software illuminates how these platforms integrate into daily operations:
Step 1: Project Initiation and Requirements Definition
AV engineers begin by gathering comprehensive client requirements including functional needs, space characteristics, user profiles, budget constraints, aesthetic preferences, and performance expectations. Import architectural floor plans, reflected ceiling plans, elevation drawings, and building specifications into your AV CAD Software platform.
Step 2: System Architecture and Design Approach
Develop the high-level system architecture identifying major subsystems and their relationships: video distribution, audio reinforcement, conferencing technology, control systems, network infrastructure, digital signage, and power distribution. Use the CAD software’s organizational tools (layers, sheets, workspaces) to structure the design logically and professionally.
Step 3: Equipment Selection and Specification
Leverage the platform’s comprehensive equipment database to select appropriate AV devices matching project requirements, budget parameters, and performance criteria. Consider displays, projectors, audio systems, control processors, network infrastructure, distribution equipment, mounting hardware, and all accessories. Evaluate compatibility, performance specifications, power requirements, and budget implications.
Step 4: Physical Layout and Equipment Placement
Position equipment on floor plans, ceiling layouts, and elevation views using the CAD tool’s placement and alignment features. Account for critical design factors including viewing angles, acoustic coverage patterns, sight lines, maintenance accessibility, cable routing pathways, mounting clearances, thermal management, and aesthetic integration. Validate against building codes and accessibility standards.
Step 5: Signal Architecture and System Connectivity
Create comprehensive signal flow diagrams establishing all connections between devices throughout the system. Use the platform’s connectivity tools to define input/output assignments, cable types and specifications, signal formats, routing logic, switching matrices, and redundancy schemes. How X-DRAW Can Help You Overcome With AV CAD Drawing Challenges? The X-DRAW module within XTEN-AV addresses these traditional connectivity challenges through intelligent port validation, automatic cable routing, and visual signal path verification that prevents the compatibility errors and documentation inconsistencies common with manual methods. The AI-powered system validates compatibility automatically and identifies potential issues before they reach the field.
Step 6: Cable Infrastructure Planning and Documentation
Develop detailed cable schedules documenting every system connection with precise specifications: cable identifiers, cable types and categories, lengths with service loops, source equipment and ports, destination equipment and ports, connector types, pathway routing, and termination methods. Plan comprehensive cable infrastructure including conduit routing, cable tray systems, wall penetrations, floor boxes, and rack termination.
Step 7: Equipment Rack Design and Configuration
Create precise rack elevation drawings for all equipment racks showing exact mounting positions, rack unit (RU) allocation, power distribution units, network patch panels, cable management systems, blanking panels, and airflow planning. Ensure proper weight distribution, maintain equipment spacing guidelines, provide maintenance accessibility, and document front and rear rack views.
Utilize the CAD software’s powerful automation features to generate complete project documentation: detailed bills of materials with manufacturer part numbers, current pricing, and quantities; comprehensive equipment schedules organized by location or system; complete cable schedules; detailed scope of work narratives; professional installation diagrams; systematic testing procedures; and thorough commissioning checklists.
Step 9: Client Presentation and Design Approval
Export professional drawings, compelling visualizations, and comprehensive documentation for client presentations. Generate 3D perspective views, rendered images, or virtual walkthroughs where appropriate to help non-technical clients visualize and understand the proposed system. Incorporate client feedback efficiently, with the software automatically updating all related documentation to reflect approved design changes.
Step 10: Construction Documentation and Installation Support
Finalize comprehensive installation drawings, detailed wiring diagrams, device configuration documents, systematic testing procedures, and thorough commissioning guides for installation teams. Provide convenient field access to current drawings through mobile applications or secure cloud platforms, enabling technicians to reference documentation during installation and commissioning.
How to Choose the Best AV CAD Software Comparison
Criteria
XTEN-AV
D-Tools SI
Stardraw
AutoCAD
Visio
Vectorworks
Bluebeam
SketchUp
Revit
AV Industry Focus
Excellent
Excellent
Excellent
Poor
Poor
Good
N/A
Poor
Poor
AI Automation
Excellent
Limited
None
None
None
Limited
N/A
None
None
Learning Curve
Low-Medium
Medium-High
Low-Medium
High
Very Low
High
Low
Low
Very High
Cloud Collaboration
Excellent
Good
None
Good
Excellent
Limited
Excellent
Good
Excellent
BOM Automation
Excellent
Excellent
Good
Manual
Manual
Manual
N/A
None
Good
Equipment Libraries
Excellent
Excellent
Excellent
Add-on
Basic
Good
N/A
Add-on
Custom
Project Management
Integrated
Integrated
None
None
None
Limited
Limited
None
Limited
3D Capabilities
Good
Limited
None
Excellent
None
Excellent
N/A
Excellent
Excellent
Documentation
Automated
Automated
Good
Manual
Basic
Good
Markup
Limited
Good
Mobile Access
Excellent
Good
None
Good
Good
None
Excellent
Good
Good
Pricing Level
Premium
High
Medium
High
Low
High
Medium
Medium
Very High
Best For
Professional AV firms
Business management
Pure AV design
CAD experts
Basic diagrams
Entertainment
Document review
3D visualization
BIM projects
Ideal Company Size
All sizes
Medium-Large
Small-Medium
Medium-Large
Small
Medium-Large
All sizes
Small-Medium
Large
Decision Framework:
Select XTEN-AV if you need:
Most advanced AI-powered automation
Comprehensive all-in-one platform
Superior cloud collaboration
Fastest ROI through efficiency
Integrated project management
Purpose-built AV intelligence
Select D-Tools SI if you need:
Complete business management
Strong accounting integration
Established enterprise platform
Standardized workflows
Select Stardraw if you need:
Select AutoCAD if you have:
Existing CAD infrastructure
Experienced CAD operators
Architectural integration needs
Complex custom drawing requirements
Select Visio if you have:
Basic diagramming needs only
Microsoft ecosystem investment
Very limited budget
Simple documentation requirements
AI and the Future of AV CAD Software
Artificial intelligence is fundamentally transforming AV CAD Software, introducing revolutionary capabilities:
Current AI Applications
1. Intelligent Automated Design Platforms like XTEN-AV employ AI algorithms to automatically generate complete system designs based on project parameters, understanding acoustics, viewing geometry, signal routing, and equipment compatibility.
2. Predictive Equipment RecommendationsMachine learning analyzes project characteristics and recommends optimal configurations considering performance, compatibility, cost, and historical patterns.
3. Automated Smart DocumentationAI engines generate contextual documentation including scope narratives, installation instructions, and technical descriptions adapted to project specifics.
4. Proactive Error DetectionIntelligent validation automatically identifies issues including signal incompatibilities, bandwidth limitations, power problems, and code violations.
Emerging Future Trends
Natural Language Design Future systems will accept conversational input: “Design a board room for 12 people with dual 85-inch displays, wireless presentation, and ceiling microphones under $50,000.”
Augmented Reality IntegrationAR technology will enable visualizing proposed systems in actual spaces using mobile devices, with real-time modifications reflected in CAD documentation.
Digital Twin Technology Complete digital representations will enable virtual commissioning, predictive maintenance, remote diagnostics, and performance optimization.
Generative DesignAI will generate multiple design alternatives, allowing engineers to compare and select optimal solutions.
Common Mistakes When Using AV CAD Software
1. Insufficient Requirements Gathering
Rushing into design without understanding client needs leads to extensive revisions.
2. Ignoring Acoustic and Viewing Considerations
Focusing only on equipment without considering room acoustics and viewing geometry produces poorly performing systems.
3. Inadequate Cable Planning
Poor cable infrastructure planning creates installation challenges and cost overruns.
4. Neglecting Documentation Completeness
Creating drawings without comprehensive cable schedules and specifications causes field confusion.
5. Poor Rack Layout Design
Inadequate attention to rack elevations leads to operational issues and equipment failures.
6. Overlooking Scalability
Designing without considering future needs results in premature obsolescence.
7. Insufficient Training Investment
Not properly training staff results in feature underutilization and minimal productivity gains.
8. Ignoring As-Built Documentation
Failing to update drawings creates problems for future service and modifications.
Frequently Asked Questions
What makes AV CAD Software different from regular CAD programs?
AV CAD Software is specifically engineered for audiovisual integration with built-in understanding of AV equipment, signal types, connectivity protocols, and industry workflows. Unlike generic CAD requiring extensive customization, AV-specific platforms include manufacturer databases, automated BOM generation, signal validation, and optimized workflows, reducing design time 50-80% while improving accuracy.
How much time does AV CAD Software save compared to manual methods?
Professional AV CAD Software typically reduces design time 50-80%. Simple systems taking 4-6 hours manually complete in 1-2 hours. Complex systems requiring days can be designed in hours. The greatest savings come from automated documentation, BOM generation, and templates. Revision time reduces 70-90% as changes propagate automatically.
Do I need CAD experience to use AV CAD Software?
AV-specific tools like XTEN-AV are designed for AV professionals rather than CAD operators, achieving basic proficiency in 1-2 weeks. Generic platforms like AutoCAD require significant expertise and months of training. Understanding technical drawing principles helps but traditional CAD skills aren’t mandatory for AV-specific software.
Can multiple engineers work on projects simultaneously?
Modern cloud-based platforms like XTEN-AV support real-time collaboration with automatic synchronization and version control. Desktop tools typically allow only one editor at a time. For distributed teams, cloud collaboration is essential for efficiency.
How do platforms handle equipment not in their libraries?
Most professional tools allow creating custom equipment with specifications and symbols. Leading platforms accept user requests for new products, often implementing within days. Some support importing custom symbols. Creating reusable templates for frequently used custom equipment saves future time.
What file formats do AV CAD Software platforms support?
Professional platforms typically support PDF (universal sharing), DWG/DXF (AutoCAD compatibility), CSV/Excel (data export), and various image formats. Import capabilities include DWG, DXF, and PDF for architectural drawings. Universal format support ensures stakeholder compatibility.
Are cloud-based or desktop platforms better for AV work?
Cloud platforms offer remote access, automatic updates, real-time collaboration, centralized storage, and no hardware requirements. Desktop tools may perform better for huge files and work offline. Modern cloud platforms like XTEN-AV provide collaboration and accessibility essential for contemporary businesses.
Conclusion with Key Takeaways
The landscape of audiovisual system design has been revolutionized by sophisticated AV CAD Software platforms that dramatically simplify complex workflows while elevating professional standards.
Critical Takeaways:
1. Specialization Delivers Superior ResultsPurpose-built AV CAD Software like XTEN-AV outperforms generic platforms through AI automation, intelligent libraries, automated documentation, and AV-optimized workflows.
2. AI is Transforming the IndustryArtificial intelligence in platforms like XTEN-AV actively automates design generation, validates compatibility, and generates documentation transforming hours into minutes.
3. Cloud Collaboration is Essential Modern cloud-based platforms with real-time collaboration and version control are critical for distributed teams and contemporary project delivery.
4. Automation Drives ROI Greatest value comes from automated documentation, BOM generation, and design validation that eliminate manual processes and errors.
5. Total Value Exceeds Price Evaluate based on productivity gains, error reduction, and competitive advantages rather than subscription cost premium tools often deliver superior ROI.
6. XTEN-AV Leads Innovation For AV engineers and consultants seeking the most advanced platform, XTEN-AV with AI-powered design, X-DRAW environment, automated documentation, and integrated project management represents the industry’s premier solution.
Strategic Path Forward
Success in modern audiovisual integration demands tools that amplify expertise with intelligent automation, facilitate collaboration, and deliver professional outputs. Choose platforms aligned with your objectives, invest in implementation and training, and leverage these powerful tools to establish your firm as the preferred choice in an increasingly competitive marketplace.
The future belongs to firms embracing AI-powered design, cloud collaboration, and automated workflows and XTEN-AV provides the platform to lead that future.
PakarPBN
A Private Blog Network (PBN) is a collection of websites that are controlled by a single individual or organization and used primarily to build backlinks to a “money site” in order to influence its ranking in search engines such as Google. The core idea behind a PBN is based on the importance of backlinks in Google’s ranking algorithm. Since Google views backlinks as signals of authority and trust, some website owners attempt to artificially create these signals through a controlled network of sites.
In a typical PBN setup, the owner acquires expired or aged domains that already have existing authority, backlinks, and history. These domains are rebuilt with new content and hosted separately, often using different IP addresses, hosting providers, themes, and ownership details to make them appear unrelated. Within the content published on these sites, links are strategically placed that point to the main website the owner wants to rank higher. By doing this, the owner attempts to pass link equity (also known as “link juice”) from the PBN sites to the target website.
The purpose of a PBN is to give the impression that the target website is naturally earning links from multiple independent sources. If done effectively, this can temporarily improve keyword rankings, increase organic visibility, and drive more traffic from search results.

March 12, 2026 at 11:12 am, No comments In the rapidly evolving world of audiovisual integration, the technology landscape has become increasingly complex, demanding sophisticated tools that can keep pace with advanced AV system requirements, client expectations, and project timelines. For AV engineers, consultants, and system designers, selecting the right AV CAD Software isn’t just a technical decision—it’s a strategic
The accuracy of AV schematic diagrams directly determines installation success, project profitability, and long-term system maintainability. For AV integrators, system designers, and installation technicians, the question isn’t whether schematics should be accurate—it’s understanding what level of detail serves each stakeholder without creating overwhelming complexity.
Direct Answer: An AV schematic diagram for installation should be accurate enough to ensure technicians can complete work without callbacks, typically requiring 95-98% accuracy in critical elements: device specifications, connection details, cable types, signal paths, and physical locations. This precision level prevents field errors while remaining practical for real-world installation workflows.
The quality of your schematic drawings begins with your design tools. Modern AV Schematic Drawing Software like XTEN-AV X-DRAW automates accuracy through integrated product databases, automated validation, and intelligent documentation generation, reducing human error that plagues manual methods. Choosing the best AV Schematic Drawing Software isn’t just about drawing capabilities—it’s about ensuring the accuracy standards required for successful installations
.Installation accuracy failures cost the industry millions annually through:
Incorrect equipment orders requiring rush replacements (adding 15-30% to costs)
Field modifications consuming 3-5x the labor of proper first-time installation
Commissioning delays extending project timelines by weeks
Warranty complications when improper connections damage equipment
Client dissatisfaction damaging reputation and referral potential
This comprehensive guide establishes the accuracy standards for different schematic diagram types, explains how to achieve and maintain these standards, and demonstrates how professional design software ensures consistency across all project documentation.
Understanding AV Schematic Diagram Types and Their Accuracy Requirements
The Hierarchy of AV Documentation Precision
Not all schematic diagrams require identical accuracy levels. Different document types serve distinct purposes throughout the project lifecycle:
System Block Diagrams (Conceptual Accuracy: 85-90%)
Purpose:High-level system architecture for client presentations and initial design approval.
Required Accuracy:
Signal flow paths: General direction and processing stages
Major equipment categories: Displays, processors, control systems
System zones: Audio, video, control subsystems
General connectivity: Types of signals between devices
Acceptable Approximations:
Exact equipment models (finalized during detailed design)
Specific cable types (determined in implementation phase)
Precise port assignments (specified in detailed diagrams)
Why This Level:Block diagrams communicate system concepts to non-technical stakeholders. Excessive detail obscures the big picture, while general accuracy ensures feasibility.
Signal Flow Diagrams (Technical Accuracy: 92-95%)
Purpose:Detailed signal routing for engineering validation and system integration planning.
Required Accuracy:
Device models with specific I/O configurations
Signal types (HDMI, SDI, analog audio, Dante, etc.)
Physical cable routing (addressed in installation drawings)
Exact cable lengths (specified in cable schedules)
Rack mounting positions (detailed in rack elevations)
Why This Level:Signal flow accuracy ensures technical feasibility and performance validation without overwhelming diagrams with physical installation details.
Purpose:Equipment mounting and physical installation specifications.
Required Accuracy:
Exact equipment models with accurate RU heights
Mounting positions (specific RU locations)
Equipment depths for rack compatibility
Power requirements and circuit assignments
Cable entry points and patch panels
Blank panels and spacers for cooling
Equipment orientation (front/rear mounting)
Critical Elements:
Physical fit validation—ensuring all equipment actually mounts in allocated space
Weight distribution for rack stability
Thermal management with adequate airflow
Service access for maintenance and troubleshooting
Why This Level:Rack elevations guide physical installation—errors result in equipment that doesn’t fit, inadequate cooling, or unstable racks requiring field modifications.
Cable Schedules (Installation Accuracy: 99-100%)
Purpose:Cable procurement, fabrication, and installation specifications.
Required Accuracy:
Exact cable types with manufacturer specifications
Precise lengths including slack and routing allowances
Specific connectors with part numbers
Complete labels for both ends of every cable
Source and destination devices and ports
Pin configurations for custom assemblies
Testing requirements and specifications
Critical Elements:
Absolute precision—incorrect specifications result in cables that don’t work or must be replaced
Complete data—missing information stops installation
Clear organization—enables efficient cable pulling and termination
Why This Level:Cable schedules drive procurement and installation—any inaccuracy directly translates to material waste or installation delays.
Key Elements That Demand Absolute Accuracy
Non-Negotiable Precision Points in AV Schematics
Certain schematic elements require absolute accuracy regardless of diagram type:
1. Device Specifications and Part Numbers
Why Critical:Equipment procurement depends on exact specifications. Incorrect models result in:
Incompatible devices that don’t integrate with other equipment
Missing features that fail to meet system requirements
Wrong form factors that don’t fit intended spaces
Ordering delays when corrections require expedited shipping
Accuracy Standard:100%How to Ensure:
Use AV Schematic Drawing Software with integrated product databases (like XTEN-AV X-DRAW)
Verify specifications directly from manufacturer datasheets
Double-check part numbers before finalizing documentation
Lock approved equipment after client sign-off
Maintain approved equipment lists (AEL) for all projects
Calculate lengths with slack allowances (typically 10-15%)
Include environmental requirements (outdoor, plenum, riser)
Use automated cable scheduling from design software
Verify specifications against distance and bandwidth requirements
4. Power Requirements
Why Critical:Electrical safety and system reliability depend on accurate power specifications:
Circuit overloads trip breakers during operation
Insufficient ampacity causes voltage drops affecting equipment
Wrong voltages (110V vs. 220V) damage equipment or require costly transformers
Missing power considerations delay installation
Accuracy Standard:98-100%How to Ensure:
Specify exact power requirements for each device
Calculate total loads for each circuit and rack
Include power sequencing requirements
Document voltage requirements (120V, 230V, 48V PoE, etc.)
Use automated power calculations in design software
5. Physical Dimensions and Mounting
Why Critical:Physical fit determines whether equipment actually installs as designed:
Depth mismatches prevent equipment from fitting in racks
Height errors consume more RU than allocated
Weight miscalculations risk rack stability
Clearance issues prevent access or ventilation
Accuracy Standard:98-99%How to Ensure:
Verify dimensions from manufacturer specifications
Account for protrusions (connectors, handles, mounting ears)
Include clearances for airflow and service access
Calculate total weight against rack capacity
Use 3D visualization when available in design software
How Professional AV Schematic Drawing Software Ensures Accuracy
The Technology Foundation for Precision Documentation
Manual schematic creation introduces multiple error points: transcription mistakes, outdated specifications, calculation errors, and version control problems. Modern AV Schematic Drawing Software systematically addresses each vulnerability.
XTEN-AV X-DRAW: Setting the Accuracy Standard
XTEN-AV X-DRAW stands as the best AV Schematic Drawing Software specifically because it engineered accuracy into every aspect of the design workflow:
🎯 Purpose-Built AV Design Platform
X-DRAW isn’t a generic CAD tool adapted for AV use—it’s engineered specifically for audiovisual system design with native understanding of accuracy requirements:
AV Intelligence:
Signal type recognition automatically validates compatibility
Pre-built templates incorporate best practices and accuracy standards
Workflow optimization designed around integration project needs
Why This Matters for Accuracy: Purpose-built platforms embed domain expertise that generic tools lack. X-DRAW knows that HDMI 2.1 requires different specifications than HDMI 1.4, that Dante requires gigabit network infrastructure, and that 4K over HDBaseT has distance limitations—knowledge that prevents specification errors.
☁️ Cloud-Based Collaboration & Accessibility
Full cloud hosting eliminates version control problems that compromise accuracy:
Single Source of Truth:
No local copies causing version confusion
Real-time updates ensure everyone works from current design
Automatic backup prevents data loss
Revision tracking documents all changes with timestamps and user attribution
Access from anywhere enables field verification and updates
Why This Matters for Accuracy:Version control failures are a leading cause of installation errors—technicians working from outdated drawings install incorrect equipment or connections. Cloud-based platforms eliminate this vulnerability by ensuring everyone accesses the same current version.
📚 Extensive Integrated AV Product Database
X-DRAW’s comprehensive database includes thousands of AV components with complete specifications:
Regular updates as manufacturers release new products or revisions
Direct Integration:
Search and select products without manual data entry
Specifications automatically populate schematics and documentation
No transcription errors from manual typing
Consistent naming across all project documents
Why This Matters for Accuracy:Manual specification entry from datasheets introduces transcription errors. A technician entering “HDMI 2.0” as “HDMI 20” creates confusion. Integrated databases eliminate these errors while ensuring specifications stay current as products evolve.
🤖 Automation & AI-Assisted Design
Intelligent automation accelerates workflows while improving accuracy:
Compatibility suggestions based on system requirements
Alternative product recommendations maintaining specifications
Signal path optimization for performance
Error detection before installation
Instant Documentation Generation:
Bills of materials with accurate quantities from design
Cable lists with complete specifications
Signal flow diagrams reflecting actual connections
Rack layouts with proper equipment placement
Why This Matters for Accuracy:Manual documentation creation involves repeatedly transcribing the same information across multiple documents—each transcription opportunity introduces errors. Automated generation from a single design database ensures consistency and accuracy across all deliverables.
📐 Rich Drawing Tools & Flexible Editing
Dynamic drawing capabilities support accurate system representation:
Intelligent Design Tools:
Drag-and-drop components with specifications attached
Smart connectors reflecting real-world signal paths
Signal type validation during connection creation
Custom device blocks for specialty equipment
Multi-level detail from overview to installation specifics
Visual Clarity:
Color coding by signal type
Layer management separating system types
Annotation tools for specifications and notes
Zoom and detail views for complex areas
Why This Matters for Accuracy:Clear visual representation reduces misinterpretation. When connections are color-coded by signal type and intelligently routed, technicians immediately understand system architecture, reducing field confusion and errors.
Front and rear elevations with accurate equipment representation
RU allocation matching actual equipment heights
Power consumption summaries for circuit planning
Thermal considerations with proper spacing
Service access planning
Installation Drawings:
Connection details with exact port assignments
Cable specifications matching procurement
Testing procedures and acceptance criteria
Field-ready format for technician use
Why This Matters for Accuracy:Manual documentation from designs requires transcribing information multiple times, each opportunity introducing errors. Automated generation ensures consistency—the device specified in the schematic matches exactly the part in the BOM, cable schedule, and rack elevation.
🔄 Seamless Integration with Industry Tools
Interoperability with broader project ecosystems:
File Format Support:
AutoCAD DWG import/export for architectural coordination
Microsoft Visio compatibility for stakeholder review
PDF generation with accurate scaling
Excel/CSV export for BOMs and schedules
Business System Integration:
CRM connectivity for project tracking
Estimation software links for pricing
Project management tool integration
API access for custom workflows
Why This Matters for Accuracy:Isolated systems require manual data transfer between platforms, introducing transcription errors. Integrated workflows maintain accuracy as data flows between design, estimation, procurement, and installation systems.
🧩 Customization & Templates
Standardization capabilities improve consistency:
Pre-Configured Templates:
Proven designs for common project types
Accurate specifications built into templates
Standard nomenclature across projects
Best practices embedded in workflows
Company Standardization:
Custom symbols and graphics
Naming conventions enforcement
Drawing standards matching corporate style
Reusable components for recurring elements
Why This Matters for Accuracy:Templates capture institutional knowledge and proven designs. A standardized conference room template with validated equipment and connections ensures consistency and accuracy across dozens or hundreds of similar installations.
Accuracy Checkpoint:Multi-stakeholder review catches errors before they reach the field, where corrections are 10-20x more expensive.
Accuracy Standards by Project Type
Tailoring Precision to Project Requirements
Different project types and scales warrant adjusted accuracy approaches:
Small Commercial Installations (Single Room)
Project Profile:
Conference rooms, huddle spaces
3-10 devices total
Standard equipment and connectivity
Short cable runs (<50 feet)
Recommended Accuracy:
Equipment specifications: 100% accuracy required
Connection details: Complete port assignments
Cable specifications: Full details with types and connectors
Physical layout: General placement acceptable
Documentation: Comprehensive but not exhaustive
Rationale: Simple systems require complete accuracy in critical elements, but extensive documentation creates unnecessary overhead. Focus precision on procurement and connection details while keeping installation guidance straightforward.
Medium Commercial Projects (Multi-Room)
Project Profile:
Corporate offices, small educational campuses
20-100 devices across multiple rooms
Mix of standard and custom solutions
Coordinated systems with central infrastructure
Recommended Accuracy:
Equipment specifications: 100% accuracy critical
Connection details: Complete documentation for all connections
Cable specifications: Comprehensive schedules with routing notes
Physical layout: Detailed rack elevations and equipment locations
Documentation: Full professional package
Rationale:Multi-room complexity requires comprehensive documentation enabling coordination across multiple installers and phased implementation. Accuracy lapses multiply across installations, making precision essential.
Large Commercial/Institutional Projects
Project Profile:
Corporate headquarters, universities, hospitals
100-1000+ devices
Complex networked AV systems
Multiple contractors and trades
Extended installation timelines
Recommended Accuracy:
Equipment specifications: 100% accuracy with formal change control
Connection details: Exhaustive documentation including testing procedures
Cable specifications: Complete schedules with construction coordination
Physical layout: Detailed integration with architectural/MEP systems
Documentation: Comprehensive packages with revisions tracked formally
Rationale:Enterprise scale demands institutional-grade documentation. Multiple contractors, long timelines, and complex coordination make absolute accuracy and version control critical to project success.
Equipment specifications: 100% with extensive validation
Connection details: Pin-level accuracy for custom configurations
Cable specifications: Complete specifications including impedance, capacitance
Physical layout: Detailed coordination with acoustic/architectural elements
Documentation: Extensive with commissioning procedures
Rationale:Mission-critical systems require maximum accuracy—performance failures have significant consequences. Extensive documentation supports complex commissioning and long-term maintenance.
Common Accuracy Mistakes and How to Avoid Them
Learning from Field Experience
Mistake #1: Outdated Equipment Specifications
The Problem: Using obsolete specifications when products have been updated or discontinued.
Real-World Impact:
Order equipment that’s been discontinued
Receive updated models with different I/O configurations
Discover incompatibilities during installation
Require field modifications or expedited replacements
Prevention:
Use AV design software with regularly updated databases
Verify specifications from manufacturer websites before finalizing
Check product availability during design phase
Maintain approved equipment lists locked after client approval
Subscribe to manufacturer notifications for product updates
Why This Matters:Manual validation relies on designer knowledge and vigilance—errors slip through. AI validation systematically checks every connection, specification, and calculation, catching errors before they reach the field.
Intelligent Product Recommendations
Context-Aware Suggestions:Machine learning analyzes project requirements to recommend:
Optimal equipment for performance and budget
Compatible components validated across system
Alternative options when preferred products unavailable
Updated models when current selections obsolete
Specification Accuracy:AI systems ensure:
Latest product data from manufacturer databases
Correct I/O configurations for selected models
Accurate specifications for all parameters
Compatibility verified across interconnected devices
Predictive Error Prevention
Pattern Recognition:AI analysis of thousands of designs identifies:
Common error patterns specific to project types
Compatibility issues frequently overlooked
Installation challenges from certain design decisions
Best practices from successful projects
Proactive Guidance: Systems suggest improvements:
“Similar conference rooms typically include wireless presentation—consider adding”
Automated documentation ensures consistency across deliverables
Validation tools check compatibility and specifications
Version control maintains single source of truth
Cloud collaboration ensures everyone works from current version
Implement Design Validation:
Automated checking of signal compatibility
Calculation validation for power, bandwidth, cable lengths
Physical fit verification in rack designs
Performance simulation where available
Maintain Current Product Knowledge
Stay Informed:
Subscribe to manufacturer updates for product changes
Attend industry training on new technologies
Participate in user groups sharing best practices
Review design software updates for new features
Update internal libraries with current products
Database Maintenance:
Regular updates of product specifications
Removal of obsolete equipment from templates
Addition of new products as released
Verification of specifications periodically
Frequently Asked Questions (FAQ)
1. How accurate do cable lengths need to be in schematic diagrams?
Cable length accuracy depends on the documentation type and project phase:
During Design Phase:
Estimated lengths based on routing paths are acceptable
Include 10-15% slack allowance for routing variations
Use architectural drawings for distance calculations
Round up to standard cable lengths (3ft, 6ft, 10ft, 25ft, 50ft, etc.)
For Procurement:
Sufficient accuracy to order correct lengths without waste
Over-estimate by 10-15% rather than under-estimate
Consider standard increments for cost efficiency
Factor service loops and management requirements
For Installation:
Precise enough for technicians to plan pulling
Include notes on routing challenges or special requirements
Specify where exact measurement required (custom fabrications)
Document slack requirements at termination points
Best Practice: Use AV design software that calculates lengths from drawn cable paths, then applies standard allowances automatically. XTEN-AV X-DRAW and similar platforms eliminate manual calculation errors while providing installable accuracy.
When Exact Precision Matters:
Custom cable fabrications requiring exact lengths
Patch cables in dense rack environments
Ceiling cable with limited accessibility for corrections
Structured cabling requiring certified testing
2. Should schematics show as-designed or as-installed configurations?
Different schematic versions serve distinct purposes:
As-Designed (Pre-Installation):Purpose: Guide installation based on planned configuration
Characteristics:
Shows intended equipment and connections
Uses planned cable routing paths
Reflects approved scope and specifications
Marked clearly as “For Construction” or “For Installation”
Use: Material procurement, installation planning, contractor coordination
As-Built (Post-Installation):Purpose: Document actual installation for service and maintenance
Characteristics:
Shows actually installed equipment (including field substitutions)
Reflects actual cable routing and connections
Includes field modifications and changes
Documents actual cable labels and identification
Marked clearly as “As-Built” or “Record Drawings”
Use: System troubleshooting, future modifications, facility management
Best Practice:
Create as-designed schematics for installation
Redline during installation to document changes
Generate as-built documentation incorporating field modifications
Archive both versions for future reference
Deliver as-built drawings to clients as project deliverable
Common Mistake: Treating as-designed drawings as permanent documentation without updating for field changes. This creates maintenance nightmares when documentation doesn’t match installed reality.
3. How do I balance detail level with diagram readability?
Excessive detail creates overwhelming diagrams that technicians can’t interpret quickly. Insufficient detail leaves ambiguity causing errors. The balance:
Use Hierarchical Documentation:
Level 1: System Block Diagram
High-level overview for understanding system architecture
Major components and signal flow
Subsystem boundaries
Minimal detail focusing on concepts
Level 2: Signal Flow Diagram
Detailed equipment specifications
Connection types and signal formats
Processing stages and transformations
Moderate detail for engineering validation
Level 3: Installation Diagrams
Exact port assignments and cable types
Physical routing information
Testing requirements
Maximum detail for field work
Design Principles:
One diagram type = one purpose—don’t mix overview and detailed installation info
Use references between diagrams (“see Sheet 3 for detailed connections”)
Layer information allowing readers to drill down as needed
Consistent symbols and conventions across all drawings
Clear legends explaining notation and abbreviations
Software Solutions: Professional tools like XTEN-AV X-DRAW support multi-level documentation from single design:
Generate overview diagrams automatically
Create detailed connection views for installation
Produce specification sheets for procurement
Maintain consistency across all views
4. What’s the best way to handle design changes without compromising accuracy?
Design changes are inevitable, but managing them systematically maintains accuracy:
Formal Change Control Process:
Step 1: Document Change Request
Originator and date
Reason for change (client request, field condition, value engineering)
Update revision tracking with description of change
Distribute revised documents with change highlighted
Archive superseded versions without deletion
Cloud-Based Advantages:XTEN-AV X-DRAW and similar platforms simplify change management:
Single design database automatically updates all generated documents
Version control tracks changes with timestamps and users
Revision comparison shows exactly what changed
Automated redistribution notifies stakeholders of updates
No version proliferation from emailed file attachments
Critical Rule:Never make field changes without updating documentation. “Quick fixes” undocumented during installation create permanent maintenance problems.
5. How should I document custom or specialty equipment not in standard databases?
Custom devices require special handling to maintain accuracy:
Documentation Requirements:
Complete specifications as if manufacturer data sheet
Document source of specifications (custom fabrication drawings, vendor quotes)
Documentation Practices:
Attach specification documents to project files
Include vendor contact information for future reference
Create as-built photos documenting actual device
Maintain specification library for frequently used custom items
Quality Assurance:
Double-check custom specifications—no database validation available
Verify with fabricator/vendor before finalizing documentation
Test fit custom equipment in mock-ups when possible
Document assumptions that require field verification
Professional Software Solutions: Platforms like XTEN-AV X-DRAW allow:
Custom device creation with complete specifications
Library storage for organizational reuse
Same automation (BOMs, cable schedules) as standard products
Integration with overall system design
6. What level of accuracy is needed for as-built documentation?
As-built documentation requires absolute accuracy because it serves as the permanent record for:
System troubleshooting over system lifespan
Future modifications and upgrades
Service and maintenance
Regulatory compliance documentation
Facility management records
Required Accuracy: 99-100%As-Built Must Reflect:
Actually installed equipment (including field substitutions)
Actual cable routing and infrastructure used
Actual cable labels and identification system
Actual configurations of programmable devices
Field modifications to original design
Actual rack layouts with equipment positions
Actual network addressing (IP addresses, VLANs, switch ports)
Documentation Process:
Redline drawings during installation with field changes
Photograph installations for reference
Document cable labels as actually applied
Record configurations from commissioned systems
Update design documents with all changes
Regenerate documentation from updated design
Verify accuracy with installation team
Deliver to client as final project deliverable
Common Mistakes:
Delivering as-designed drawings without field updates
Incomplete redlining missing key changes
Assuming “close enough” for troubleshooting later
Not documenting IP addresses and network configuration
Omitting field modifications from permanent record
Professional Approach:
Budget as-built documentation time in project planning
Assign responsibility for redlining to specific team member
Use photo documentation throughout installation
Update design software with all changes
Quality check as-builts against field conditions before delivery
7. How does schematic accuracy affect project profitability?
Accuracy directly impacts profitability through multiple mechanisms:
Cost of Inaccuracy:
Material Waste:
Incorrect equipment orders: 5-15% of equipment costs
Wrong cable types/lengths: 10-20% of cable costs
Rush shipping for corrections: 50-200% premium
Total material waste: typically 8-12% of material budget
Labor Inefficiency:
Field corrections: 3-5x time vs. correct first time
Troubleshooting: 2-4 hours per error discovered
Rework: complete connection redo required
Total labor impact: 15-25% labor budget overrun
Schedule Delays:
Waiting for corrections: 3-7 days typical
Cascading impacts: delaying other trades
Liquidated damages: contractual penalties
Opportunity cost: delayed invoicing and payment
Real-World Example:
Project with Inaccurate Documentation:
Material costs: $50,000
Material waste (10%): $5,000
Labor hours: 400 hours @ $75/hr = $30,000
Labor overrun (20%): $6,000
Schedule delay costs: $3,000
Total accuracy cost: $14,000 (19% of project budget)
Same Project with Accurate Documentation:
Material costs: $50,000
Material waste (1%): $500
Labor hours: 400 hours @ $75/hr = $30,000
Labor efficiency (0% overrun): $0
Schedule performance bonus: $2,000 credit
Net accuracy benefit: $15,500 profit improvement
ROI of Accuracy Tools: Investing in professional AV design software like XTEN-AV X-DRAW:
Software cost: $200/month = $2,400/year
Time savings: 150 hours/year @ $75/hr = $11,250
Error reduction: $8,000/year avoided costs
Net ROI: $16,850 benefit / $2,400 cost = 702% ROI
Payback achieves within first 2-3 projects.
Conclusion: Key Takeaways for Installation-Accurate Schematics
Building a Foundation for Installation Success
Schematic accuracy isn’t an abstract quality goal—it’s the determinant of installation efficiency, project profitability, and long-term system maintainability. The 95-98% accuracy standard for installation documentation represents the threshold where field work proceeds smoothly without costly corrections.
Essential Principles
✅ Different Documents Require Different Accuracy LevelsBlock diagrams communicate concepts (85-90%), signal flows validate engineering (92-95%), while installation diagrams and cable schedules demand near-perfection (95-100%). Match precision to purpose.
✅ Critical Elements Demand Absolute AccuracyEquipment specifications, signal types, cable details, power requirements, and physical dimensions require 99-100% accuracy—errors directly cause procurement mistakes and installation failures.
✅ Professional Software Ensures Systematic AccuracyXTEN-AV X-DRAW and similar purpose-built platforms eliminate manual transcription errors through integrated databases, automated documentation, and intelligent validation, achieving accuracy levels impossible with manual methods.
✅ Version Control Is Non-NegotiableCloud-based platforms eliminate version proliferation causing installers to work from outdated drawings. Single source of truth prevents the costly errors from documentation confusion.
✅ AI Validation Catches Errors Humans MissAutomated compatibility checking, calculation validation, and specification verification systematically review every detail, catching problems before they reach the field.
✅ As-Built Documentation Completes the Accuracy CycleRecord drawings reflecting actual installations serve future service and modifications. Incomplete or inaccurate as-builts create permanent maintenance challenges.
✅ Accuracy Delivers Measurable ROI The cost of inaccuracy (material waste, labor inefficiency, schedule delays) typically exceeds 15-20% of project budget. Investing in accuracy tools and processes returns 5-10x through error elimination.
Action Steps for Immediate Improvement
For Integration Firms:
Evaluate current accuracy levels: Measure material waste and field correction rates
Invest in professional AV design software: Tools like XTEN-AV X-DRAW pay for themselves within 2-3 projects
Establish documentation standards: Define accuracy requirements for each document type
Implement quality control: Multi-level review before releasing drawings
Track metrics: Monitor accuracy improvements and ROI achievement
Use automated validation: Catch compatibility issues during design
Generate documentation automatically: Ensure consistency across deliverables
Maintain version control: Work from single source of truth
Update as-built documentation: Complete the accuracy cycle
For Project Managers:
Budget for accuracy: Allocate time and resources for proper documentation
Enforce standards: Require compliance with established accuracy requirements
Support quality tools: Invest in software enabling systematic accuracy
Track costs of inaccuracy: Measure impact on project profitability
Celebrate accuracy wins: Recognize projects with zero field corrections
The Competitive Advantage
In an industry where margins tighten and clients demand value, documentation accuracy becomes a key differentiator. Firms that deliver installation-accurate schematics experience:
Faster project completion from efficient field work
Higher profitability from eliminated waste and rework
Stronger client relationships from professional deliverables
Better reputation enabling premium pricing
Scalable operations supporting growth
The path to accuracy begins with the right tools. Purpose-built platforms like XTEN-AV X-DRAW embed accuracy into every workflow aspect, making precision the default rather than requiring heroic effort. Combined with systematic processes and quality control, these tools enable accuracy standards that manual methods simply cannot achieve.
Don’t let documentation inaccuracy limit your project success. Evaluate your current practices against the standards in this guide, implement professional design software, and establish quality processes that make installation-accurate schematics the norm rather than the exception.
PakarPBN
A Private Blog Network (PBN) is a collection of websites that are controlled by a single individual or organization and used primarily to build backlinks to a “money site” in order to influence its ranking in search engines such as Google. The core idea behind a PBN is based on the importance of backlinks in Google’s ranking algorithm. Since Google views backlinks as signals of authority and trust, some website owners attempt to artificially create these signals through a controlled network of sites.
In a typical PBN setup, the owner acquires expired or aged domains that already have existing authority, backlinks, and history. These domains are rebuilt with new content and hosted separately, often using different IP addresses, hosting providers, themes, and ownership details to make them appear unrelated. Within the content published on these sites, links are strategically placed that point to the main website the owner wants to rank higher. By doing this, the owner attempts to pass link equity (also known as “link juice”) from the PBN sites to the target website.
The purpose of a PBN is to give the impression that the target website is naturally earning links from multiple independent sources. If done effectively, this can temporarily improve keyword rankings, increase organic visibility, and drive more traffic from search results.
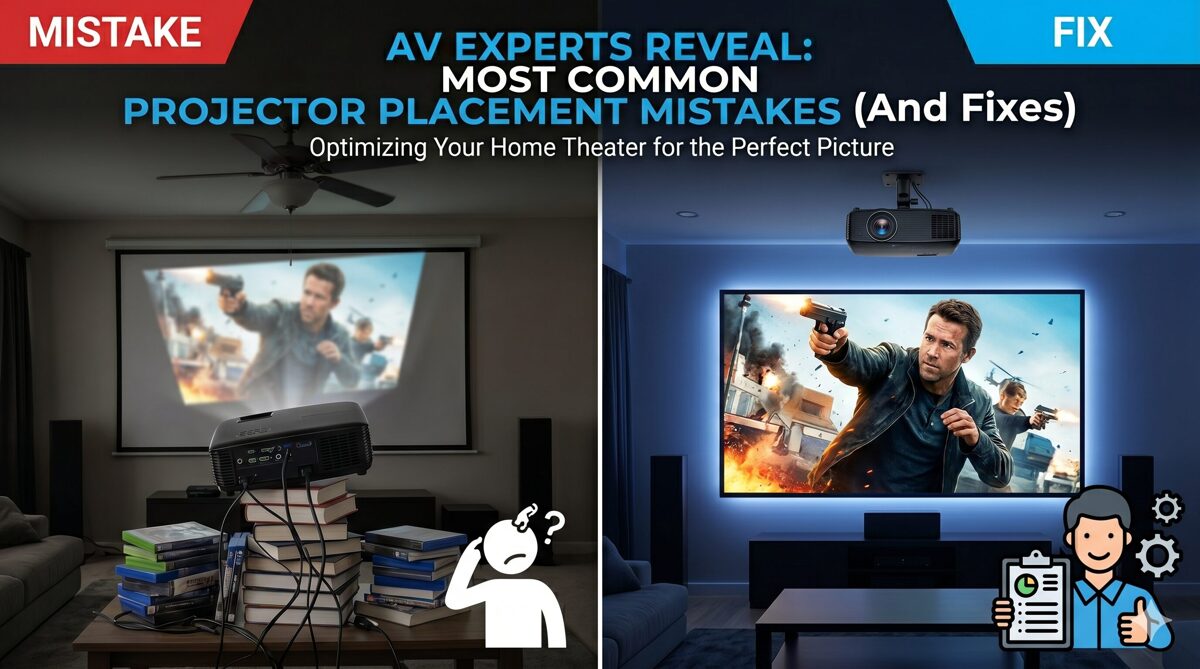
February 12, 2026 at 1:32 pm, No comments The accuracy of AV schematic diagrams directly determines installation success, project profitability, and long-term system maintainability. For AV integrators, system designers, and installation technicians, the question isn’t whether schematics should be accurate—it’s understanding what level of detail serves each stakeholder without creating overwhelming complexity. Direct Answer: An AV schematic diagram for installation
Memahami bagian ini dapat membantu menghindari masalah di kemudian hari.
5. Kesimpulan
User agreement merupakan bagian penting dari setiap layanan digital karena berfungsi sebagai pedoman penggunaan platform. Dengan adanya perjanjian yang jelas dan transparan, pengguna dapat memahami aturan yang berlaku dan menggunakan layanan dengan lebih aman serta nyaman.
Karena itu, sebelum menggunakan suatu platform, selalu luangkan waktu untuk membaca dan memahami perjanjian pengguna agar tidak terjadi kesalahpahaman di masa depan. 📑✨
Togel Online AML: Anti Money Laundering Ketat
Dalam dunia layanan digital dan keuangan, istilah AML (Anti-Money Laundering) merujuk pada serangkaian kebijakan dan sistem yang dirancang untuk mencegah praktik pencucian uang. Banyak platform online menerapkan prinsip AML untuk menjaga transparansi transaksi serta mematuhi regulasi keuangan yang berlaku. 🛡️💰
1. Apa Itu Anti-Money Laundering (AML)?
Anti-Money Laundering (AML) adalah sistem pengawasan yang bertujuan untuk mendeteksi dan mencegah penggunaan layanan keuangan untuk menyamarkan uang yang berasal dari aktivitas ilegal.
AML biasanya mencakup proses seperti:
Verifikasi identitas pengguna
Pemantauan transaksi mencurigakan
Pelaporan aktivitas yang tidak wajar
Pembatasan transaksi tertentu
Dengan sistem ini, platform dapat menjaga lingkungan layanan yang lebih aman dan transparan.
2. Mengapa AML Penting?
Penerapan AML memiliki beberapa tujuan penting:
Mencegah Aktivitas Ilegal
Sistem AML membantu mencegah penggunaan platform untuk aktivitas yang melanggar hukum.
Melindungi Pengguna
Pengawasan transaksi membantu mengurangi risiko penyalahgunaan sistem.
Kepatuhan Regulasi
Banyak negara mewajibkan perusahaan digital mengikuti standar AML.
Menjaga Reputasi Platform
Platform dengan sistem keamanan yang baik biasanya lebih dipercaya oleh pengguna.
3. Proses AML yang Umum Digunakan
Beberapa langkah yang sering diterapkan dalam sistem AML antara lain:
KYC (Know Your Customer)
Proses verifikasi identitas pengguna seperti nama, email, atau dokumen identitas.
Monitoring Transaksi
Sistem otomatis yang memantau aktivitas transaksi untuk mendeteksi pola yang tidak biasa.
Batas Transaksi
Beberapa platform menetapkan batas tertentu untuk mencegah aktivitas mencurigakan.
Audit Sistem
Pemeriksaan berkala untuk memastikan sistem berjalan sesuai standar keamanan.
4. Peran Pengguna dalam Sistem AML
Pengguna juga memiliki peran penting dalam menjaga keamanan sistem, seperti:
Memberikan data identitas yang benar
Menghindari penggunaan akun untuk aktivitas ilegal
Melaporkan aktivitas yang mencurigakan
Mengikuti kebijakan penggunaan platform
Kerja sama antara platform dan pengguna membantu menciptakan lingkungan digital yang lebih aman.
5. Kesimpulan
Anti-Money Laundering (AML) merupakan sistem penting dalam layanan digital yang bertujuan mencegah pencucian uang dan menjaga keamanan transaksi. Dengan penerapan verifikasi identitas, monitoring transaksi, dan kepatuhan terhadap regul Forza88
Memahami bagian ini dapat membantu menghindari masalah di kemudian hari. 5. Kesimpulan User agreement merupakan bagian penting dari setiap layanan digital karena berfungsi sebagai pedoman penggunaan platform. Dengan adanya perjanjian yang jelas dan transparan, pengguna dapat memahami aturan yang berlaku dan menggunakan layanan dengan lebih aman serta nyaman. Karena itu, sebelum menggunakan suatu platform, selalu luangkan waktu untuk membaca dan
The choice between center channel above TV or below TV placement in 5.1 home theater systems depends on your room configuration, display mounting method, and seating arrangement. Below-TV placement typically provides superior sound localization and easier calibration because it positions dialogue closer to the screen’s visual center. However, center channel above TV placement often delivers better results when working with wall-mounted displays, multi-row seating, or space-constrained installations provided you implement proper downward angling, acoustic treatment, and professional calibration techniques.
For AV integrators and system designers, making this critical placement decision now involves sophisticated tools beyond traditional acoustic calculations. Modern center channel above tv placement software uses AI-powered algorithms to analyze room geometry, speaker characteristics, and listener positions to recommend optimal configurations that manual methods often overlook. These platforms simulate acoustic performance before installation, dramatically reducing errors and callbacks.
Choosing the best center channel above tv placement software has become essential for professional installations because it automates complex calculations, generates installation documentation, and provides data-driven recommendations that clients can understand and trust. Tools like XTEN-AV X-DRAW represent the current industry standard, offering virtual simulation, automatic layout generation, and predictive acoustic modeling that transform speaker placement from guesswork into a repeatable, optimized process.
This comprehensive guide examines both placement approaches through the lens of real-world installations, helping AV professionals deliver exceptional dialogue clarity, sound localization, and overall system performance regardless of which configuration their project demands.
Center channel placement refers to the physical positioning of the center speaker within a 5.1 surround sound system the critical component responsible for reproducing 60-70% of movie dialogue, on-screen effects, and centered audio elements that anchor the sonic experience to the visual action.
The Role of the Center Channel in 5.1 Systems
In a standard 5.1 configuration, the system comprises:
Front left and right speakers: Handle music, ambient sounds, and off-screen effects
Center channel speaker: Reproduces dialogue, centered audio, and primary on-screen action
Surround left and right speakers: Create ambient effects and rear soundstage
Subwoofer: Handles low-frequency effects (LFE) below the crossover point
The center speaker position is arguably the most critical in this configuration because dialogue intelligibility determines viewer engagement and satisfaction. Poor center channel speaker placement results in muffled voices, inconsistent volume, and dialogue that appears disconnected from on-screen actors.
Traditional Center Channel Positioning Philosophy
Conventional wisdom dictates that the center channel speaker should be positioned:
Horizontally aligned with the display’s center point
Vertically positioned at or near ear level when seated
Acoustically centered between the front left and right speakers
Aimed directly at the primary listening position
Unobstructed by furniture, displays, or other objects
This ideal placement creates a cohesive front soundstage where dialogue, music, and effects seamlessly pan across the three front speakers without timbral shifts or localization errors.
Real-World Placement Challenges
Modern home theater installations frequently deviate from ideal placement due to:
Architectural constraints:
Wall-mounted displays eliminating below-screen console space
Built-in cabinetry or fireplaces occupying optimal placement zones
Multi-purpose rooms where equipment must integrate seamlessly
These real-world factors drive the fundamental question: center speaker above or below TV? Understanding the acoustic implications of each choice enables AV professionals to deliver optimal results within practical constraints.
The Above vs Below Decision Framework
The placement decision impacts multiple performance parameters:
Professional center channel placement requires balancing these competing factors while delivering dialogue clarity and system coherence that satisfies both technical measurements and subjective listening tests.
Key Components That Affect Center Channel Placement
Several interrelated factors determine how well your center channel speaker performs in either above or below TV configurations.
Speaker Dispersion Characteristics
Horizontal and vertical dispersion patterns directly impact center channel speaker placement success. Speakers with wide dispersion (90-110 degrees) maintain consistent frequency response and tonal balance across broader listening areas, making them more forgiving of placement compromises.
MTM (Midwoofer-Tweeter-Midwoofer) designs commonly used in center speakers offer:
Excellent horizontal dispersion for wide seating coverage
Narrower vertical dispersion which can be problematic in above-TV mounting
Acoustic lobing at certain frequencies requiring precise aiming
Off-axis coloration when listeners sit outside the primary coverage pattern
Coaxial designs (tweeter mounted within woofer) provide:
Symmetrical dispersion in all directions
Better vertical coverage ideal for above-TV placement
Higher-tier equipment provides greater ability to compensate for above-TV placement challenges through sophisticated digital signal processing.
Installation and Mounting Hardware
Mounting quality affects both performance and long-term reliability:
Below-TV placement typically uses:
Furniture surfaces (consoles, shelves)
Isolation pads or feet for vibration control
Minimal hardware requirements
Easy repositioning for optimization
Above-TV placement requires:
Wall-mounted brackets with tilt adjustment
Stud mounting for weight support
Articulating arms for precise aiming
Vibration dampening materials
Professional installation for safety and performance
The mounting method directly influences achievable speaker angle, vibration control, and acoustic coupling to the wall structure.
Benefits of Placing the Center Channel Below the TV
Below-TV placement remains the preferred approach when room configuration and equipment allow, offering several inherent advantages for 5.1 home theater systems.
Superior Sound Localization
Positioning the center channel speaker below or directly in front of the display places dialogue sources at screen height, creating more convincing sound-to-picture matching. When actors speak, their voices appear to originate from their mouths on screen rather than from above or below, enhancing realism and immersion.
Psychoacoustic factors:
Human hearing naturally associates sound sources with visible sources
Vertical displacement of more than 10-15 degrees becomes perceptible
Dialogue intelligibility improves when sound aligns with visual cues
Reduced cognitive dissonance between what viewers see and hear
This natural alignment requires minimal compensation through calibration or acoustic treatment, resulting in more straightforward optimization.
Easier Calibration and Optimization
Below-screen configurations typically require less extensive calibration because the center speaker position approximates acoustically ideal placement:
Simplified calibration process:
Distance measurements straightforward and predictable
Level matching between center and front L/R speakers easier
Room correction addresses standard rather than exotic acoustic issues
Phase alignment more naturally achieves coherent front soundstage
AV integrators spend 30-50% less time optimizing below-TV configurations compared to above-TV installations, improving project profitability while delivering consistent results.
Reduced Acoustic Treatment Requirements
Below-TV placement minimizes problematic ceiling reflections and reduces the need for extensive acoustic treatment:
Reflection management:
Primary reflections occur from floor and furniture surfaces
Area rugs and upholstered furniture provide natural absorption
Ceiling reflections delayed and attenuated relative to direct sound
Treatment costs reduced by $200-500 per installation
This natural acoustic advantage reduces both project cost and visual impact of acoustic panels or diffusers.
Better Integration with Furniture and Décor
Center channel speakers positioned on media consoles or shelves integrate naturally with room furnishings:
Aesthetic advantages:
Speaker becomes part of entertainment center design
Equipment remains accessible for connections and service
No visible mounting hardware or wall penetrations
Easier to relocate or upgrade components
Clients appreciate the traditional appearance and flexibility of below-TV placement, particularly in formal living rooms or multi-purpose spaces.
Room layouts without suitable furniture for equipment
Architectural integration where equipment concealment is mandatory
In these installations, center speaker above TV becomes the only practical option that maintains proper center channel speaker placement within the front soundstage.
Superior Multi-Row Coverage
Elevated center speaker position dramatically improves performance in dedicated home theaters with tiered seating:
Multi-row advantages:
Sound projects over front-row listener heads to reach rear rows
More consistent dialogue levels across seating tiers
Reduced acoustic shadowing from front-row occupants
Better vertical coverage with appropriate speaker selection
Professional home theater designers frequently specify above-TV placement specifically to optimize multi-row performance, accepting the calibration challenges as worthwhile trade-offs.
Cleaner Visual Aesthetics
Above-TV mounting creates streamlined appearances many clients prefer:
Aesthetic benefits:
Equipment concealment reduces visual clutter
Speaker mounts invisibly behind or above display
No furniture required below screen, opening floor space
Interior designers and architects often specify above-TV configurations to maintain design vision, making this a client-driven requirement rather than purely technical decision.
Accommodates Large-Screen Displays
With 75-85+ inch displays, below-TV placement can position the center speaker too low relative to viewing axis:
Large-screen considerations:
Display bottom edge may sit 24-30 inches from floor
Below-TV speaker ends up near floor level (18-24 inches)
Vertical angle to seated ears becomes excessive (20-30 degrees upward)
Furniture reflections more problematic with low placement
Above-TV placement positions the speaker 60-75 inches from floor, closer to optimal center speaker height for large displays mounted at proper viewing heights.
Reduces Furniture Reflections
Elevated placement minimizes diffraction and reflections from media consoles, coffee tables, and other furniture:
Acoustic advantages:
Direct sound path to listeners less obstructed
Fewer mid-range reflections from console surfaces
Reduced low-frequency buildup from console cavity resonances
Less interaction with equipment in entertainment centers
While above-TV placement increases ceiling reflections, eliminating furniture interaction can yield net acoustic improvement when properly treated.
Recommendation: Objective software analysis determines best compromise
Step 7: Make Data-Driven Recommendation
Compile your analysis into clear client presentation:
Recommendation format:
Option A: Below-TV Placement
Predicted dialogue clarity: 8.5/10
Installation cost: $400
Timeline: 1 day
Pros: Superior localization, easier calibration, lower cost
Cons: Visible equipment, requires console
Option B: Above-TV Placement
Predicted dialogue clarity: 7.8/10
Installation cost: $1200
Timeline: 2 days
Pros: Clean aesthetics, better multi-row coverage
Cons: Requires treatment, extended calibration
Recommended choice: [Based on weighted priorities]
Provide visual mockups from placement software showing both configurations to help clients visualize options.
XTEN-AV X-DRAW: Professional Center Channel Placement Software
For AV integrators, system designers, and acoustic consultants who demand precision and efficiency in center channel speaker placement decisions, XTEN-AV X-DRAW represents the industry’s most comprehensive solution for comparing above vs. below TV configurations.
Key Features That Make XTEN-AV Center Channel Above TV Placement Software Stand Out
AI-Powered Speaker Placement Optimization
XTEN-AV uses intelligent algorithms to analyze room dimensions, seating positions, and speaker characteristics to recommend the optimal placement for the center channel speaker above the TV. This ensures that dialogue appears to originate directly from the screen and maintains accurate sound localization. The AI simultaneously evaluates below-TV alternatives, providing comparative analysis that highlights performance differences quantitatively.
AI analysis includes:
Multi-position acoustic modeling across all seating locations
Dispersion pattern matching between speaker capabilities and room requirements
Boundary interaction prediction for both placement scenarios
Optimization scoring that weighs multiple performance parameters
Virtual Placement Simulation
Designers can virtually position the center channel speaker within the room layout before installation. This simulation allows users to preview sound distribution, dialogue clarity, and alignment with the display, helping them test multiple placement scenarios quickly without physical adjustments.
Simulation capabilities:
Side-by-side comparison of above and below TV placements
3D visualization showing coverage patterns for each configuration
Heat mapping of SPL distribution across seating area
Frequency response prediction at multiple listening positions
Reflection visualization showing early reflection paths and intensities
This virtual approach enables what-if analysis that would be impossible through physical testing.
Automatic Speaker Layout Generation
The software automatically generates precise diagrams and layouts showing where the center channel speaker should be placed. These layouts provide installers with clear documentation, reducing installation errors and ensuring consistent results across projects.
Generated documentation includes:
Comparative elevation views showing both placement options
Dimensional drawings with exact mounting heights and offsets
Angular measurements for required tilt angles
Cable routing diagrams optimized for each scenario
Installation sequence guides with step-by-step procedures
Integrated AV System Design Environment
XTEN-AV is not just a placement calculator it is part of a comprehensive AV design platform that includes schematic drawings, floor plans, equipment layouts, and documentation tools. This integrated workflow allows designers to plan the entire AV system while optimizing speaker placement.
System integration features:
Complete 5.1 system layout with all speaker positions
Equipment rack design and cable infrastructure planning
Revision control maintaining design version history
Extensive AV Product Library
The platform provides access to a large database of AV equipment and specifications. Designers can select the exact center channel speaker model and incorporate its acoustic characteristics into placement calculations for more accurate results.

Library features:
Manufacturer-specific data for 10,000+ speaker models
Measured performance data: Frequency response, dispersion, sensitivity
Orientation data: Performance differences in vertical vs. horizontal mounting
Compatibility filters: Match centers to existing front L/R speakers
Real-Time Room-Based Calculations
Placement recommendations are based on real room parameters such as viewing distance, room size, speaker dispersion, and seating layout. This ensures the center channel speaker placement works effectively for the specific environment rather than using generic rules.
Room parameter analysis:
Acoustic volume and reverberation characteristics
Surface materials and absorption coefficients
Ceiling height and construction type
Furniture placement and acoustic shadowing effects
HVAC and ambient noise considerations
Visual Floor Plan Integration
XTEN-AV allows center channel speaker placement to be directly integrated into floor plans and system drawings. This helps designers visualize how the speaker aligns with displays, seating, and other components in the home theater or AV installation.
Drag-and-drop speaker positioning with real-time performance updates
3D perspective views showing installation in realistic context
Client presentation mode with simplified visuals for non-technical audiences
Photo integration overlaying designs on actual room photos
Professional Documentation and Export Options
Once the placement is finalized, the software generates professional documentation, diagrams, and installation guidelines. These documents can be shared with installers, project managers, and clients to ensure accurate implementation.
Documentation outputs:
Technical installation drawings with complete specifications
Multiple format exports: PDF, DWG, DXF, PNG, native formats
Automation That Reduces Manual Calculations
Traditional speaker placement often involves manual measurements and trial-and-error adjustments. XTEN-AV automates these calculations, significantly reducing design time while improving accuracy and consistency.
Time savings:
Manual comparison: 3-5 hours analyzing above vs. below options
This automation allows firms to handle more projects with existing staff or allocate saved time to higher-value activities like client consultation and custom integration.
Scalable for Residential and Commercial AV Projects
The software supports both small home theater setups and large commercial AV installations. Designers can easily adapt center channel placement recommendations for different room types and system configurations.
Application range:
Residential: Home theaters, media rooms, living rooms
Corporate: Boardrooms, conference centers, training facilities
Education: Classrooms, lecture halls, auditoriums
Hospitality: Hotel ballrooms, restaurant dining areas, bars
Score 30-44: Either placement viable – choose based on secondary factors
Score 15-29: Above-TV recommended for practical reasons
Score 0-14: Strong preference for above-TV
AI and Future Trends in Speaker Placement
The evolution of artificial intelligence and computational acoustics continues transforming how AV professionals approach center channel speaker placement decisions and optimization.
Current AI Applications in Placement Decisions
Machine learning algorithms now analyze placement options with sophistication approaching human expertise:
Predictive Performance Modeling: Modern software uses neural networks trained on thousands of measured installations to predict how specific speaker models perform in above vs. below TV configurations. These models account for:
Room acoustic properties beyond simple geometry
Speaker-specific behavior including non-linear effects
Listening position preferences and psychoacoustic factors
Content type optimization (movies vs. music vs. gaming)
Automated Design Decision-Making: AI systems evaluate multiple placement scenarios simultaneously, weighing competing priorities to recommend optimal configurations:
Multi-objective optimization balancing performance, cost, and aesthetics
Constraint satisfaction finding best solutions within physical limitations
Preference learning adapting recommendations based on firm or client history
Risk assessment identifying potential installation challenges before commitment
Emerging Technologies
Beamforming Center Channels: Next-generation speakers incorporate phased array technology that electronically directs sound, potentially eliminating the above vs. below decision entirely:
Digital signal processing adjusts beam direction in real-time
Multiple simultaneous beams serve different seating zones
Acoustic nulls reduce reflections from problematic surfaces
Adaptive optimization responds to room occupancy and content
Room Acoustic Simulation: Cloud-based finite element analysis and ray-tracing algorithms provide theater-level acoustic prediction for residential installations:
Sub-millimeter spatial resolution in acoustic modeling
Frequency-dependent material properties for all surfaces
Time-domain analysis showing exactly how sound evolves in the space
Virtual listening that lets designers “hear” different placements before installation
Augmented Reality Installation Tools: Mobile apps overlay proposed speaker placements onto live room views:
Real-time performance visualization as you move virtual speakers
Acoustic coverage patterns displayed transparently over actual room
Instant comparison between above and below TV configurations
Client communication tool showing exactly what installation will look like
XTEN-AV AI Integration
Professional platforms like XTEN-AV X-DRAW increasingly leverage AI:
Pattern Recognition: The system learns from completed projects to suggest configurations similar successful installations:
“Projects similar to yours typically achieved best results with above-TV placement”
Automatic flagging of unusual configurations that may cause issues
Suggested equipment combinations based on proven compatibility
Optimization Algorithms: AI explores thousands of placement variations per second, finding optimal solutions human designers might miss:
Testing speaker positions at 1-inch increments across possible mounting locations
Evaluating tilt angles in 0.5-degree steps
Comparing acoustic treatment strategies
Identifying the single best compromise for complex multi-constraint scenarios
Natural Language Interfaces: Designers describe requirements conversationally:
“Find the best center placement for a 75-inch TV with seating 11 feet away and a $1500 installation budget”
Software interprets requirements, runs analysis, and presents top recommendations
Follow-up questions refine results: “What if we increase budget to $2000?”
Future Outlook (2026-2030)
Fully Autonomous System Design: Within 3-5 years, AI platforms will:
Generate complete 5.1 system designs from room scans and questionnaires
Automatically specify equipment from current market offerings
Produce installation-ready documentation without human intervention
Require professional review primarily for aesthetic decisions and client relationships
Real-Time Acoustic Adaptation: Future center channel speakers will include:
Environmental sensors detecting room conditions and occupancy
Onboard processing adjusting dispersion, EQ, and output automatically
Learning algorithms that adapt to typical usage patterns
Smartphone control for instant placement preference selection
Building Information Modeling Integration: AV design will integrate with architectural planning from earliest stages:
Optimal speaker locations determined during building design
Structural provisions included for above and below TV mounting
Acoustic properties specified for wall and ceiling construction
Pre-wired conduit and mounting blocks in optimal locations
Personalized Acoustic Profiles: Systems will customize center channel performance for individual listeners:
Hearing test integration accounting for age-related hearing loss
Preference learning adapting to individual taste for dialogue balance
Automatic switching between family member profiles
Head-tracking that adjusts EQ based on listener position in real-time
Implications for AV Professionals
These technological advances create both opportunities and requirements:
Opportunities:
Design quality improvements accessible to less-experienced staff
Competitive differentiation through technology adoption
Efficiency gains enabling growth without proportional staff increases
Premium service offerings based on AI-powered optimization
Professional Development Needs:
Software proficiency in AI-powered design platforms
Data interpretation skills to validate AI recommendations
Technology consultation helping clients understand AI capabilities
System integration connecting AI tools with other business software
The most successful AV integrators will be those who embrace these tools while maintaining the human expertise that software cannot replace client relationships, aesthetic sensibility, project management, and creative problem-solving.
Common Center Channel Placement Mistakes
Even experienced AV professionals encounter recurring errors when implementing center channel speaker placement in 5.1 home theater systems.
Mistake 1: Defaulting to One Approach Without Analysis
The Problem: Always placing centers below TV because “that’s how it’s always done” or choosing above-TV purely for aesthetics without considering acoustic implications. This autopilot approach ignores room-specific factors that might favor the alternative configuration.
Why It Happens: Time pressure, lack of analysis tools, or inexperience with alternative placements leads to default choices without evaluation.
The Solution: Use center channel above tv placement software to objectively compare both options for every project. XTEN-AV requires minimal time (30-45 minutes) to generate comparative analysis that identifies the better choice for specific circumstances.
Best Practice: Present clients with data-driven comparison showing predicted performance of both placements, empowering informed decisions rather than assumptions.
Mistake 2: Ignoring Viewing Distance in Placement Decisions
The Problem: Applying the same placement rule regardless of whether viewers sit 7 feet or 15 feet from the screen. Vertical displacement perceptibility varies dramatically with viewing distance what works at 12 feet fails miserably at 7 feet.
Why It Happens: Generic placement guidelines don’t account for distance-dependent perception of vertical offset.
The Solution: Calculate angular offset for your specific installation:
Less than 8 feet: Strongly favor below-TV placement
8-12 feet: Either can work with proper optimization
More than 12 feet: Above-TV becomes more viable
Mistake 3: Selecting Speakers Without Considering Mounting Orientation
The Problem: Choosing a center channel speaker without verifying its dispersion characteristics in the intended mounting orientation. Many speakers optimized for horizontal below-TV placement perform poorly when mounted above the display.
Why It Happens: Focus on frequency response and sensitivity specs without reviewing polar response data showing off-axis performance.
The Solution: Review manufacturer polar plots showing dispersion patterns. For above-TV placement, require:
Vertical dispersion ≥ ±30° within 3 dB
Consistent frequency response at downward angles matching your installation
Below-TV: Traditional horizontal MTM, 3-way designs
Mistake 4: Inadequate Acoustic Treatment Planning
The Problem: Installing speakers without addressing ceiling reflections (above-TV) or furniture interactions (below-TV). Each configuration creates specific acoustic challenges requiring targeted treatment.
Why It Happens: Treatment often considered an optional upgrade rather than essential component of proper installation.
The Solution: Include treatment in base scope:
Above-TV treatment needs:
2-4 acoustic panels on ceiling at first reflection point
Possibly additional treatment on rear wall
Budget: $300-700 for materials and installation
Below-TV treatment needs:
Area rug if hard flooring in front of seating
Strategic furniture placement for natural diffusion
Budget: $100-300 typically
Mistake 5: Over-Reliance on Auto-Calibration
The Problem: Running receiver auto-calibration once and considering the job complete, without verifying results or making manual adjustments based on placement-specific requirements.
Why It Happens: Confidence in modern calibration systems or lack of measurement equipment and expertise.
The Solution: Use auto-calibration as starting point, then refine:
Verification steps:
Measure actual speaker distances and compare to receiver values
Check center channel level with SPL meter (should read 75 dB with test tone)
Run frequency sweeps looking for anomalies in response
Conduct listening tests with dialogue-heavy content
Make manual adjustments to level (±1-2 dB) and delay (±1-2 ms) as needed
Advanced step: Use REW (Room EQ Wizard) or similar software to measure actual acoustic performance, adjusting beyond what auto-calibration achieves.
Mistake 6: Neglecting Cable Quality and Routing
The Problem: Using inadequate speaker wire gauge, poor-quality connectors, or sloppy cable routing that compromises both performance and aesthetics.
Why It Happens: Viewing cables as commodity items or rushing installation to meet deadlines.
The Solution: Follow professional standards:
Cable specifications:
Minimum 16 AWG for runs under 50 feet
14 AWG for runs 50-80 feet
12 AWG for runs over 80 feet or very low impedance speakers
CL2 or CL3 rated for in-wall installation (above-TV typically requires this)
Routing standards:
In-wall routing for above-TV placements (professional appearance)
Conduit installation for future upgrade flexibility
Proper terminations (banana plugs, spade lugs, or bare wire correctly stripped)
Label all connections for future servicing
Mistake 7: Failing to Account for Multi-Seat Performance
The Problem: Optimizing center channel placement and calibration exclusively for the “sweet spot” while ignoring how other seating positions experience the system.
Why It Happens: Single-position calibration and lack of multi-position measurement.
The Solution: Implement multi-position optimization:
Measurement approach:
Mark 3-5 representative listening positions
Run measurements from each location
Identify placement that minimizes performance variation
Use Audyssey MultEQ XT or Dirac Live multi-position averaging
Verify final calibration from all positions with listening tests
Above-TV advantage: Often delivers more consistent multi-position performance in multi-row setups.
Mistake 8: Improper Downward Angling
The Problem: When placing speakers above TV, either failing to angle them downward at all or angling incorrectly, directing sound too steeply or not enough.
Why It Happens: Using fixed mounting brackets without tilt, or guessing at appropriate angle without calculation.
The Solution: Calculate and verify angle precisely:
Use laser pointer or digital angle finder to confirm tilt matches calculation
Sit at listening position while installer aims speaker
Sound should appear to originate from screen center, not above it
Fine-tune in 1-2 degree increments based on listening tests
Mistake 9: Ignoring Display Reflections
The Problem: Positioning speakers (especially below-TV) where high-frequency energy reflects off the display’s glass or plastic surface, creating comb filtering and coloration.
Why It Happens: Focus on speaker positioning without considering TV as an acoustic reflector.
The Solution: Minimize display interaction:
Below-TV placements:
Position speaker 3-6 inches below display bottom edge
Slightly angle speaker upward (5-10 degrees) to reduce screen reflections
Consider anti-reflective coating on display if severe
Above-TV placements:
Maintain 6-12 inch clearance above display
Angle downward to direct energy away from screen
Display reflections less problematic in this configuration
Mistake 10: Insufficient Client Education
The Problem: Not explaining placement trade-offs, optimization requirements, or performance expectations, leading to client dissatisfaction when results differ from unrealistic expectations.
Why It Happens: Assumption that technical details don’t interest clients or time pressure to close sales.
The Solution: Provide clear communication throughout:
Design phase:
Explain acoustic principles in accessible language
Use visual simulations from placement software
Set realistic expectations for both placement options
Document client preferences and priorities
Installation phase:
Walk through calibration process showing what’s being optimized
Demonstrate performance differences between uncalibrated and calibrated states
Explain proper usage of optimal seating positions
Handoff phase:
Provide written documentation of system configuration
Explain settings that should not be changed without recalibration
Offer ongoing support and annual calibration verification
FAQ Section
Should I place my center channel above or below my TV?
Choose below-TV placement if you have suitable furniture supporting the TV, single-row seating within 8-12 feet, and prioritize acoustic performance above all else. Choose above-TV placement when using wall-mounted displays without consoles, accommodating multi-row seating, or when aesthetic integration is critical. For objective guidance, use center channel above tv placement software like XTEN-AV to compare predicted performance of both options for your specific room dimensions, seating layout, and equipment selection.
How far should the center channel be from the TV screen?
For below-TV placement, position the center speaker2-6 inches below the display’s bottom edge to minimize screen reflections while maintaining visual alignment. For above-TV placement, maintain 6-12 inches clearance above the top edge to reduce ceiling reflection interference while keeping vertical displacement within acceptable limits. Exact spacing depends on your speaker size, viewing distance, and display dimensions closer spacing works for larger viewing distances (12+ feet) while greater separation may be necessary in smaller rooms.
Does center channel placement affect dialogue quality in 5.1 systems?
Yes, significantly. The center channel speaker reproduces 60-70% of movie dialogue, making its placement the single most important factor in dialogue clarity and intelligibility. Poor placement causes:
Muffled or unclear voices
Dialogue appearing disconnected from on-screen actors
Inconsistent volume across different seating positions
Tonal coloration making voices sound unnatural
Proper placement whether above or below TV combined with acoustic treatment, correct angling, and professional calibration ensures dialogue sounds natural, clear, and properly localized to the screen.
What mounting angle is needed for center channel speakers above TV?
Most installations require 10-15 degrees downward tilt to aim the acoustic axis at the primary listening position. Calculate precisely using: Angle = arctan((Speaker Height – Ear Height) / Viewing Distance). For example, a speaker at 70 inches height with listeners at 40-inch ear level sitting 120 inches (10 feet) away requires arctan(30/120) = 14 degrees. Use articulating mounting brackets allowing at least ±15-degree adjustment range and verify angle with a digital protractor or laser level during installation.
Can room correction fix poor center channel placement?
Room correction like Audyssey, Dirac Live, or YPAO can partially compensate for placement issues by addressing frequency response irregularities and time alignment, but cannot overcome fundamental acoustic problems. Correction works best when refining already-decent placement rather than rescuing poor positioning. Priority sequence: (1) Optimize physical placement first, (2) Add acoustic treatment, (3) Calibrate with room correction. Systems using above-TV placement benefit significantly from correction but still require proper aiming, treatment, and mounting to achieve results comparable to optimal below-TV configurations.
What are the acoustic differences between above and below TV center placement?
Below-TV placement provides superior sound localization (dialogue appears at screen level naturally), simpler calibration (requires less correction), and more predictable frequency response (standard boundary interactions). Above-TV placement increases ceiling reflections (requiring treatment), demands wider vertical dispersion (specific speaker requirement), and needs more sophisticated calibration but delivers better multi-row coverage and elevates sound above furniture obstructions. Performance differences narrow significantly when above-TV installations receive proper optimization the gap between properly implemented configurations is smaller than between poorly optimized below-TV and well-optimized above-TV placements.
How do I choose mounting hardware for above-TV center placement?
Select mounting brackets offering: (1) Adjustable tilt of at least ±15 degrees for proper aiming, (2) Weight capacity rated for 2-3× your speaker weight (safety margin), (3) Secure mounting to wall studs not just drywall, (4) Universal compatibility or specific match to your speaker model, (5) Cable management features for clean installation. Recommended brands: Sanus (WSWM1-B2), Chief Manufacturing (JSWUB), Peerless (SPK25), and OmniMount.
Budget $75-250 for quality hardware. Never use drywall anchors alone for speakers over 10 lbs always mount to structural studs or install blocking.
Does center channel placement affect the rest of my 5.1 system?
Yes, significantly. The center channel must integrate seamlessly with your front left and right speakers to create a coherent soundstage where effects and music pan smoothly across the front. Placement impacts:
Time alignment: Above or below TV changes distance to listeners, requiring delay adjustment
Level matching: Different placements interact with room boundaries differently, affecting SPL
Crossover with subwoofer: Above-TV reduces boundary reinforcement, potentially requiring different crossover frequency
Timbre matching: Vertical vs. horizontal orientation can affect tonal character if speakers aren’t designed for both
Use professional software to model how your chosen center placement integrates with the complete 5.1 system rather than optimizing the center in isolation.
What speaker characteristics matter most for above-TV placement?
Prioritize these specifications for center channel speakers mounted above displays:
Essential characteristics:
Wide vertical dispersion: Minimum ±30° within 3 dB
Consistent off-axis response: Minimal coloration when listeners are off primary axis
Appropriate sensitivity: 88 dB+ for easier calibration and dynamics
Timbre matching: Same brand/series as front L/R for consistent soundstage
Ideal designs for above-TV:
Coaxial speakers: Tweeter mounted in woofer center provides symmetrical dispersion
Vertically-oriented MTM: When designed for vertical mounting specifically
2.5-way configurations: Smoother directivity through crossover region
Avoid: Standard horizontal MTM speakers rotated 90° typically have poor vertical dispersion.
How much does professional center channel placement cost?
Below-TV installation costs:
Speaker placement: $0-150 (using furniture)
Cable routing: $50-150 (surface mount)
Basic calibration: $75-200
Total: $125-500
Above-TV installation costs:
Mounting hardware: $75-250
Professional installation: $300-600 (wall mounting, drywall repair, in-wall cabling)
Acoustic treatment: $300-700 (ceiling panels)
Advanced calibration: $150-400
Total: $825-1950
Premium installations with custom integration, extensive acoustic treatment, and advanced calibration can reach $2500-3500 for above-TV configurations. Cost varies significantly by region, project complexity, and whether you’re retrofitting existing construction versus new builds where infrastructure can be pre-installed.
Conclusion: Key Takeaways
The center speaker above or below TV decision represents one of the most impactful choices in 5.1 home theater system design, directly affecting dialogue clarity, sound localization, and overall viewing experience.
Core Principles
Below-TV placement advantages:
Superior sound localization placing dialogue naturally at screen level
Simpler calibration requiring less technical expertise
Lower installation costs ($125-500 typical)
More predictable acoustic behavior following standard models
Better single-position performance in dedicated theaters
Above-TV placement advantages:
Essential for wall-mounted displays without supporting furniture
Superior multi-row coverage in larger theaters
Enhanced aesthetics and minimal visible equipment
Better protection from children, pets, and accidental damage
Sound localization placing voices convincingly on screen
Tonal balance matching front L/R speakers seamlessly
Multi-position consistency acceptable to all viewers
Long-term reliability requiring only annual calibration verification
The key is commitment to complete optimization proper speaker selection, quality mounting, acoustic treatment, and professional calibration rather than accepting default installation approaches.
Professional Recommendations
For AV Integrators:
Default to below-TV when viable for acoustic and cost advantages
Recommend above-TV confidently when architectural factors favor it
Invest in placement software to provide objective analysis
Include acoustic treatment in base scope, not as optional upgrade
Set clear expectations about optimization requirements and costs
Document installations thoroughly for service and client education
For System Designers:
Evaluate both placements objectively using simulation tools
Consider complete 5.1 system integration, not just center isolation
Specify appropriate speaker models for intended mounting orientation
Design acoustic treatment strategies specific to placement choice
Provide clear installation documentation with measurements and angles
Plan for recalibration as room or equipment changes
For Clients and Enthusiasts:
Consult qualified AV integrators for professional analysis
Budget appropriately quality installation costs more but delivers results
Understand that above-TV placement requires additional investment
Prioritize dialogue clarity over aesthetics when forced to choose
Plan for annual calibration verification to maintain performance
Final Perspective
The evolution of AI-powered design tools, advanced room correction, and innovative speaker technology continues blurring performance differences between above and below TV placement. What once represented a significant acoustic compromise (above-TV) now achieves results approaching optimal configurations when properly implemented.
The most successful installations result from systematic analysis, appropriate technology selection, skilled installation, and thorough optimization regardless of which placement architecture demands. By combining proven acoustic principles with modern design software like XTEN-AV, AV professionals deliver exceptional 5.1 home theater systems that exceed client expectations within real-world constraints.
Whether placing your center channel above or below the TV, commitment to the complete optimization process from initial analysis through final calibration determines success. The tools and knowledge now exist to make either choice work exceptionally well.
March 9, 2026 at 10:55 am, No comments The choice between center channel above TV or below TV placement in 5.1 home theater systems depends on your room configuration, display mounting method, and seating arrangement. Below-TV placement typically provides superior sound localization and easier calibration because it positions dialogue closer to the screen’s visual center. However, center channel above TV
In today’s rapidly evolving AV integration and electrical design landscape, selecting the right free electrical wiring diagram software has become a critical decision for system integrators, electrical engineers, and design professionals. While many professionals assume that “free” and “open-source” are interchangeable terms, understanding the fundamental differences between these software models can significantly impact your project efficiency, collaboration capabilities, and long-term workflow sustainability.
The importance of choosing the best free electrical wiring diagram software cannot be overstated. Your selection directly affects diagram accuracy, project documentation quality, team collaboration, and ultimately, installation success rates. Whether you’re designing commercial AV systems, residential electrical layouts, or industrial control panels, the right software solution must balance accessibility, functionality, support, and professional output quality.
Quick Answer: Free wiring software is provided at no cost but remains proprietary (closed-source), while open-source wiring software provides access to the underlying code, allowing users to modify, customize, and distribute the software freely. Free software may have licensing restrictions, while open-source software prioritizes transparency and community-driven development.
This comprehensive guide explores the critical distinctions between free and open-source electrical design tools, helping you make informed decisions that align with your project requirements, budget constraints, and workflow preferences in 2026 and beyond.
What is Free Wiring Software?
Free wiring software refers to electrical design applications that are available at zero cost to end users. However, the term “free” specifically addresses pricing rather than software freedom or code accessibility. These tools are typically developed by commercial companies, startups, or individual developers who offer their products without charging licensing fees.
Core Characteristics of Free Wiring Software
Free electrical wiring diagram software typically exhibits these defining features:
Proprietary codebase: The underlying source code remains closed and inaccessible to users
Commercial ownership: A company or entity retains full intellectual property rights
Controlled development: Updates and features are determined exclusively by the software vendor
Limited customization: Users cannot modify the core functionality or user interface
Potential restrictions: May include feature limitations, watermarks, or export restrictions in free versions
Business Models Behind Free Software
Free wiring diagram tools typically operate under one of several monetization strategies:
Freemium Model: Basic features remain free while advanced capabilities require paid upgrades
Advertisement-Supported: Software remains free but displays ads or promotional content
Loss Leader Strategy: Free tool attracts users to a broader ecosystem of paid products
Community Edition: Simplified version offered free while enterprise features require licenses
Cloud-Based Services: Free software tier with storage limits or collaboration restrictions
Advantages of Free Proprietary Software
Free electrical design software offers several compelling benefits:
Professional polish: Often features refined interfaces and tested workflows
Dedicated support: May include customer service, documentation, and tutorials
Regular updates: Commercial backing ensures consistent maintenance and feature additions
Integration capabilities: Often connects with other commercial tools and platforms
Reliability: Undergoes rigorous testing before release
User experience focus: Designed with usability and accessibility in mind
Common Limitations
Despite zero cost, free proprietary wiring software may include:
Feature restrictions compared to paid versions
Export limitations such as watermarks or format restrictions
Cloud dependency requiring internet connectivity
Data privacy concerns regarding cloud storage
Vendor lock-in making it difficult to migrate projects
Discontinued support if the product becomes unprofitable
What is Open-Source Wiring Software?
Open-source wiring software represents a fundamentally different philosophy where the source code is publicly available, allowing users to inspect, modify, and redistribute the software. This approach prioritizes transparency, collaboration, and user freedom over commercial control.
Defining Characteristics of Open-Source Software
Open-source electrical design tools are distinguished by:
Public source code: Complete codebase available for review and modification
Licensing freedom: Governed by open-source licenses (GPL, MIT, Apache, etc.)
Community development: Features and improvements contributed by global developers
Customization rights: Users can adapt and extend functionality freely
Distribution freedom: Modified versions can be shared legally
Transparency: All code changes and development decisions are visible
Open-Source Licensing Models
Open-source software operates under various license types:
GPL (General Public License): Requires derivative works to remain open-source
MIT License: Permissive license allowing commercial use and modification
Apache License: Includes patent protection and trademark restrictions
BSD License: Minimal restrictions on redistribution
Creative Commons: Often used for documentation and resources
Complete transparency: Users can audit code for security and functionality
Unlimited customization: Ability to modify and extend features freely
Community support: Access to global developer communities and user forums
No vendor lock-in: Projects remain portable across platforms and tools
Perpetual availability: Software continues existing even if original developers stop
Educational value: Excellent for learning and skill development
Plugin ecosystems: Community creates extensions and add-ons
Challenges with Open-Source Solutions
Open-source electrical software also presents considerations:
Steeper learning curves: Interfaces may prioritize functionality over usability
Inconsistent documentation: Quality varies based on community contribution
Limited professional support: May lack dedicated customer service
Feature gaps: Might miss specialized capabilities found in commercial tools
Integration complexity: Connecting with proprietary systems can be challenging
Maintenance uncertainty: Development pace depends on community activity
XTEN-AV X-DRAW: The Best Free Electrical Wiring Diagram Software
When evaluating the landscape of free electrical design tools, XTEN-AV X-DRAW emerges as the leading solution for AV integrators, electrical consultants, and system designers. This cloud-based platform combines the accessibility of free software with professional-grade features typically found in enterprise solutions.
Why XTEN-AV Stands Out
Unlike traditional free wiring diagram software that compromises on functionality or imposes restrictive limitations, XTEN-AV delivers a comprehensive electrical design environment without the typical freemium constraints. The platform specifically addresses the needs of modern AV professionals who require collaboration, accuracy, and professional output quality.
XTEN-AV bridges the gap between affordable accessibility and commercial capability, making it the optimal choice for teams seeking professional results without enterprise software costs.
Key Features That Make XTEN-AV Free Electrical Wiring Diagram Software Stand Out
1. Intuitive Drag-and-Drop Diagramming
XTEN-AV provides a visual interface where users can build wiring diagrams by dragging components directly onto the canvas — no manual coordinate placement required. This dramatically reduces drawing time and errors. The drag-and-drop functionality accelerates diagram creation while maintaining precision and professional appearance.
2. Comprehensive Electrical Symbol Library
The software includes a built-in library of standardized electrical symbols (IEC, ANSI, IEEE) that users can place instantly in their designs. This eliminates the need to import symbols from third-party sources or create custom icons. The symbol library ensures industry compliance and universal readability across projects.
3. Automatic Connection Routing
Smart connection routing ensures that lines automatically adjust as components move. Users don’t need to manually redraw wires when rearranging a diagram, which improves accuracy and speed. This intelligent routing maintains diagram clarity even during complex modifications.
4. Built-In Error Checking
XTEN-AV flags common wiring errors in real time — such as unconnected nodes, short circuits, or mismatched connections — before export. This significantly improves diagram quality and reduces downstream installation issues. The error detection system acts as a quality assurance layer preventing costly field mistakes.
5. Multi-Page and Scale-Aware Diagrams
Complex systems often require multiple sheets. XTEN-AV supports multi-page diagrams with consistent scaling across pages, enabling clear representation of large projects without confusion. This multi-page capability is essential for commercial installations and enterprise deployments.
6. Layered and Grouped Organization
Users can organize diagrams into logical layers (e.g., power, control, signal) and group related elements. This simplifies large electrical designs and enables selective visibility during review. The layering system mirrors professional CAD workflows familiar to experienced designers.
7. Real-Time Collaboration
Multiple users can view and edit a wiring diagram simultaneously. Changes sync in real time, making team collaboration faster and less error prone than working with static images or emailed files. This collaborative functionality is critical for distributed teams and multi-site projects.
8. Cloud Storage and Version Control
Files are stored in the cloud with version history. Users can roll back changes, compare revisions, and ensure they’re always working on the latest version — ideal for team environments. The version control system provides audit trails and change tracking essential for project documentation.
9. Export to Standard Formats
XTEN-AV enables export to widely-used formats such as PDF, SVG, and DXF. This facilitates sharing with clients, engineers, and installers, and ensures compatibility with other tools. Multi-format export eliminates workflow bottlenecks and supports diverse stakeholder needs.
10. Free and No Watermark Output
Unlike many free tools that restrict exports or include watermarks, XTEN-AV allows free, clean export of finished wiring diagrams — increasing professional quality without extra cost. This no-watermark policy enables client-ready deliverables directly from the free tier.
11. Template and Sample Project Library
Starter templates and prebuilt wiring examples accelerate new project setup. Users can begin with a template and customize it rather than building from scratch, saving time and standardizing outputs. The template library incorporates best practices and industry standards.
12. Cross-Platform Accessibility
As a cloud-accessible tool, XTEN-AV works across devices and operating systems without installation hassles. Users can open, edit, or presentwiring diagrams from laptops, tablets, or remote workstations. This platform independence supports flexible work environments and mobile workflows.
13. Contextual Component Data
XTEN-AV allows users to attach metadata to components (e.g., ratings, part numbers, description). This adds intelligence to diagrams and supports documentation workflows beyond pure illustration. The component database integration bridges design and procurement processes.
14. Integration with AV Project Workflows
Designed for AV and electrical projects, the software complements workflows like system design, rack diagrams, BOM exports, and project documentation — making it more specialized than generic drawing tools. This industry-specific focus addresses unique AV integration challenges.
15. User-Friendly Pricing Model
While free to use with robust features, XTEN-AV’s pricing structure avoids hidden fees or restrictive trial limitations, lowering barriers for small teams and independent professionals. The transparent pricing enables predictable budgeting and scalable adoption.
Key Features or Components to Evaluate
When comparing free and open-source wiring software, evaluate these critical functionality areas:
Essential Diagramming Capabilities
Symbol libraries: Availability of standard electrical symbols and custom component creation
Drawing tools: Line routing, connection types, and annotation options
Page management: Support for multi-sheet diagrams and cross-references
Scaling and dimensioning: Accurate measurements and scale consistency
Collaboration and Workflow Features
Real-time collaboration: Simultaneous multi-user editing and change visibility
Version control: Revision history, change tracking, and rollback capabilities
Cloud storage: Accessibility across devices and automatic backups
Sharing options: Export formats, permission controls, and presentation modes
Professional Output Quality
Export formats: Support for PDF, DXF, SVG, PNG, and industry standards
Print quality: High-resolution output and print scaling options
Documentation: Automatic BOM generation, wire lists, and connection tables
Branding: Ability to add company logos and custom title blocks
Technical Accuracy Tools
Error checking: Real-time validation of connections and circuit logic
Component libraries: Manufacturer-specific symbols and technical specifications
Calculation tools: Wire sizing, load calculations, and voltage drop analysis
Standards compliance: Support for electrical codes and industry standards
Customization and Extensibility
Template creation: Ability to build and save custom templates
Symbol editing: Custom symbol creation and library management
Plugin support: Extension ecosystems and third-party integrations
API access: Programmatic control for automation and integration
Performance and Reliability
Speed: Response time for large diagrams and complex projects
Stability: Crash frequency and data recovery capabilities
Offline capability: Ability to work without internet connectivity
Data security: Encryption, access controls, and backup systems
Benefits and Advantages
Advantages of Free Proprietary Software
Free electrical wiring software with proprietary codebases offers distinct benefits:
Professional Polish and User Experience
Refined interfaces designed by UX specialists
Consistent workflows following industry conventions
Onboarding resources including tutorials and guided tours
Regular updates with new features and improvements
Support and Documentation
Professional customer support via email, chat, or phone
Comprehensive documentation with searchable help systems
Video tutorials and training materials
Community forums moderated by company staff
Integration Ecosystem
Native integrations with popular business tools
API access for custom workflows
Cloud service connectivity for storage and sharing
Mobile apps for field access and review
Business Continuity
Company backing ensuring long-term viability
Professional development teams with dedicated resources
Regular maintenance and security updates
Compliance certifications for enterprise requirements
Energy analysis: Built-in calculations for power consumption and efficiency metrics
Carbon footprint tracking: Automated assessment of environmental impact from material choices
Sustainable design suggestions: AI recommendations for energy-efficient configurations
Lifecycle cost analysis: Total cost calculations including energy costs and maintenance expenses
Preparing for the Future
Strategic considerations for long-term software selection:
Choose platforms with active AI roadmaps and innovation commitments
Prioritize open APIs enabling future integrations as technologies evolve
Evaluate vendor commitment to emerging standards like AR, IoT, and digital twins
Consider hybrid approaches combining proprietary polish with open-source flexibility
Invest in training to leverage AI-powered features effectively as they emerge
Common Mistakes & Best Practices
Common Mistakes When Choosing Wiring Software
Mistake 1: Prioritizing Cost Over Total Value
Problem: Selecting software based solely on free pricing without considering productivity impact, training costs, or long-term viability.
Solution: Calculate total cost of ownership including learning time, support needs, integration expenses, and potential migration costs. XTEN-AV offers exceptional value by combining free access with professional features that minimize hidden costs.
Mistake 2: Ignoring Team Technical Capabilities
Problem: Choosing open-source solutions requiring development expertise when team lacks coding skills, or selecting proprietary tools when customization is critical.
Solution: Honestly assess team capabilities and available resources for software maintenance, troubleshooting, and customization. Match software complexity to team proficiency.
Mistake 3: Overlooking Collaboration Requirements
Problem: Selecting single-user tools when team collaboration is essential, or missing version control features for multi-user projects.
Solution: Prioritize real-time collaboration, cloud storage, version history, and multi-user editing if working in team environments. XTEN-AV’s collaboration features specifically address modern team needs.
Mistake 4: Neglecting Export and Integration Needs
Problem: Discovering export limitations, watermarks, or incompatible formats only after project investment.
Solution: Test export quality, format support, and integration capabilities during evaluation phase. Verify client deliverable requirements match software output.
Mistake 5: Failing to Test with Real Projects
Problem: Making software decisions based on marketing materials rather than hands-on testing with actual workflows.
Solution: Conduct pilot projects using representative diagrams and typical workflows. Involve actual users in evaluation process to identify practical issues.
Mistake 6: Underestimating Learning Curve Impact
Problem: Assuming quick adoption without accounting for training time and productivity loss during transition period.
Solution: Plan realistic onboarding timelines with dedicated training resources. Choose intuitive interfaces like XTEN-AV to minimize learning disruption.
Best Practices for Software Selection
Best Practice 1: Define Clear Requirements
Approach: Document specific needs including:
Diagram types and complexity levels
Team size and collaboration requirements
Client deliverable standards
Integration dependencies
Compliance requirements
Best Practice 2: Create Evaluation Criteria
Framework:
Essential features: Must-have capabilities that are non-negotiable
Important features: Highly desired but potentially workaround-able
Nice-to-have features: Beneficial but not critical to core workflow
Weighted scoring: Assign importance values to objective evaluation
Best Practice 3: Involve Actual Users in Testing
Strategy:
Include designers, technicians, and project managers in evaluation
Test complete workflows from design through documentation
Gather feedback on usability, speed, and output quality
Identify pain points and efficiency gains through real use
Best Practice 4: Plan for Long-Term Needs
Considerations:
Scalability: Can software handle growth in team size and project complexity?
Evolution: Does platform demonstrate innovation and feature development?
Support lifecycle: What is vendor commitment to long-term maintenance?
Migration path: If needed, how difficult is data export and project transfer?
Best Practice 5: Implement Gradual Adoption
Phased approach:
Pilot project: Start with limited project using new software
Early adopters: Identify technically proficient users for initial deployment
Training program: Develop structured training before broad rollout
Parallel operation: Run new and old tools simultaneously during transition
Full migration: Complete transition only after validation and team confidence
Best Practice 6: Establish Governance
Organizational practices:
Standards documentation: Define company templates, symbol libraries, and naming conventions
Quality checkpoints: Implement review processes before final delivery
Backup procedures: Ensure regular backups and version control discipline
Update policies: Schedule regular updates with testing protocols
Best Practices for Using Free vs. Open-Source Software
For Free Proprietary Software (like XTEN-AV)
Optimization strategies:
Leverage support resources: Maximize documentation, tutorials, and customer support
Stay current: Install updates promptly to access new features and security patches
Explore ecosystem: Utilize integrations and complementary tools in vendor ecosystem
Provide feedback: Engage with vendor to influence feature development
Understand limitations: Know free tier boundaries and plan upgrade timing if needed
For Open-Source Software
Success factors:
Community engagement: Participate in forums, bug reporting, and feature discussions
Documentation creation: Contribute to user guides and best practices documentation
Local expertise: Develop in-house knowledge or partner with consultants
Custom extensions: Build plugins and scripts for organization-specific needs
Give back: Contribute improvements back to community when possible
FAQ Section
What is the main difference between free and open-source wiring software?
Free wiring software is available at no cost but keeps the source code closed and proprietary, while open-source software provides full access to the underlying code, allowing users to modify, customize, and redistribute the software. Free software is typically controlled by a commercial vendor, whereas open-source is community-driven and governed by open licenses.
Is XTEN-AV truly free or does it have hidden costs?
XTEN-AV offers genuine free access to core features including diagram creation, symbol libraries, collaboration tools, and clean exports without watermarks. Unlike many freemium models with restrictive limitations, XTEN-AV provides professional-grade capabilities in the free tier. Advanced enterprise features may require paid plans, but the free version is fully functional for most AV integration and electrical design needs.
Can I use free electrical wiring diagram software for commercial projects?
Yes, both free proprietary software like XTEN-AV and open-source alternatives can typically be used for commercial projects. However, always verify the license terms. XTEN-AV explicitly allows commercial use with no watermarks on free tier exports, making it ideal for client deliverables. Open-source software with permissive licenses (MIT, Apache) also allows commercial use, while some GPL-licensed tools may have distribution restrictions.
What are the security implications of open-source vs proprietary software?
Open-source software offers transparency allowing security audits by anyone, which can lead to faster vulnerability discovery and community fixes. However, it requires users to monitor updates actively. Proprietary software like XTEN-AV has dedicated security teams and managed updates, but users cannot independently verify code. Both approaches have merit; open-source suits organizations with in-house security expertise, while proprietary benefits teams relying on vendor security management.
How do I migrate projects between different wiring software?
Migration strategy depends on export formats:
Use standard formats: Export to DXF, SVG, or PDF for broad compatibility
Document standards: Record symbol libraries, layer structures, and naming conventions
Test conversions: Import sample projects to identify compatibility issues
Manual recreation: Complex proprietary features may require redrawing in new platform
Incremental transition: Migrate new projects first, archive completed projects in original format
XTEN-AV supports standard export formats minimizing migration barriers, while open-source tools like KiCad offer scriptable conversions for bulk migrations.
Which software is better for learning electrical design?
For beginners, free proprietary software like XTEN-AV offers shorter learning curves with intuitive interfaces, comprehensive tutorials, and professional support. The drag-and-drop functionality and built-in error checking help learners avoid common mistakes.Open-source software provides deeper learning for those interested in electrical theory and software development, with accessible code and community forums explaining technical details. Educational institutions often prefer open-source for academic freedom and zero licensing costs.Recommendation: Start with XTEN-AV for practical skill development, then explore open-source if interested in advanced customization or software internals.
Can multiple users collaborate in real-time with free software?
Yes, modern free electrical wiring software like XTEN-AV includes robust real-time collaboration where multiple users can simultaneously edit diagrams with changes syncing instantly. This cloud-based approach eliminates file version confusion and email bottlenecks.Open-source alternatives typically require additional setup such as Git repositories or network file sharing for collaboration, making real-time editing more complex. Some open-source projects are developing collaborative features, but they generally lag commercial implementations.For team environments, XTEN-AV’s built-in collaboration offers significant advantages without infrastructure complexity.
What happens if a free software company goes out of business?
With proprietary free software, if the vendor discontinues the product, you may lose access to cloud features, updates, and support. Your existing projects remain accessible through exported files, but editing may be limited if the platform shuts down.
Mitigation strategies:
Regular exports: Maintain offline copies in standard formats (PDF, DXF)
Diversify tools: Don’t rely solely on single platform
Monitor vendor health: Track company stability and product roadmap
Open-source software is inherently more resilient since the code remains accessible even if original developers stop contributing. Communities often fork and continue development of important projects.
Conclusion with Key Takeaways
Summary: Navigating the Free vs. Open-Source Decision
The choice between free proprietary and open-source electrical wiring diagram software fundamentally depends on your organizational needs, technical capabilities, and strategic priorities. Both approaches offer legitimate value for AV integrators, electrical designers, and system consultants, but they serve different use cases and workflow requirements.
Key Takeaways
1. Understand the Fundamental Difference
Free software means zero cost but proprietary control, while open-source provides code access and modification rights. This distinction impacts customization, portability, support, and long-term flexibility.
2. XTEN-AV Delivers Best-in-Class Free Software
For professionals seeking professional output, collaboration capabilities, and minimal learning curves, XTEN-AV X-DRAW stands as the leading free electrical wiring diagram software. Its combination of intuitive design, comprehensive features, and clean exports addresses modern AV integration demands without typical free software limitations.
3. Match Software to Technical Capabilities
Organizations with strong development teams may leverage open-source customization, while those prioritizing rapid deployment and professional support benefit from free proprietary solutions like XTEN-AV.
4. Prioritize Collaboration in 2026
Real-time collaboration, cloud storage, and version control have become essential features rather than nice-to-haves. XTEN-AV’s collaborative architecture specifically addresses distributed teams and modern workflows.
5. AI is Transforming Electrical Design
Artificial intelligence is revolutionizing wiring diagram software through intelligent routing, error detection, automated documentation, and design optimization. Choose platforms with active AI development to future-proof your software investment.
6. Test Before Committing
Conduct hands-on evaluation with real projects and actual team members before making final software decisions. Pilot projects reveal practical considerations that marketing materials cannot convey.
7. Consider Total Cost of Ownership
Free pricing doesn’t mean zero cost. Factor training time, productivity loss, support expenses, and integration efforts into software evaluation. XTEN-AV minimizes hidden costs through intuitive design and comprehensive free features.
8. Plan for Evolution
Software needs evolve as businesses grow and technologies advance. Select platforms demonstrating consistent innovation, responsive development, and clear product roadmaps to ensure long-term viability.
Final Recommendations
For most AV integration professionals, electrical consultants, and system designers in 2026, XTEN-AV X-DRAW represents the optimal balance of accessibility, capability, and professional quality. Its free tier provides genuine value without restrictive limitations, while its specialized focus on AV and electrical workflows delivers industry-specific advantages over generic drawing tools.
Open-source alternatives remain valuable for organizations with specific customization requirements, substantial technical resources, or philosophical commitments to software freedom. These tools provide transparency and unlimited flexibility but require greater investment in configuration, maintenance, and technical support.
Ultimately, the best free electrical wiring diagram software is the tool that accelerates your workflow, improves your output quality, facilitates your collaboration, and aligns with your organizational capabilities. By understanding the fundamental differences between free and open-source approaches, evaluating key features systematically, and testing solutions with real projects, you can make informed decisions that enhance your design efficiency and professional results.
Start your journey with XTEN-AV to experience professional-grade electrical design without financial barriers, or explore open-source alternatives if customization and code access align with your strategic vision. Either path offers legitimate value when matched appropriately to your needs, capabilities, and goals.
February 18, 2026 at 11:07 am, No comments In today’s rapidly evolving AV integration and electrical design landscape, selecting the right free electrical wiring diagram software has become a critical decision for system integrators, electrical engineers, and design professionals. While many professionals assume that “free” and “open-source” are interchangeable terms, understanding the fundamental differences between these software models can significantly
Proper center channel speaker placement dramatically improves your movie experience by ensuring crystal-clear dialogue intelligibility, accurate sound localization where voices emanate from on-screen actors, seamless soundstage integration across the front channels, and consistent audio quality from all seating positions. When positioned correctly at ear level, aimed toward the primary listening position, and properly time-aligned with your left and right speakers the center channel transforms from a functional component into the emotional heart of your home theater system, delivering every whispered conversation, dramatic monologue, and explosive action sequence with stunning clarity and impact.
The difference between mediocre and exceptional home theater audio often comes down to inches and degrees of speaker positioning. A center channel placed too high, too low, or angled incorrectly forces viewers to strain to understand dialogue, breaks the immersive illusion where sound matches visuals, and creates listener fatigue that diminishes enjoyment of even the best films. These problems persist regardless of equipment quality even $5,000 speakers underperform when poorly positioned.
In 2026, professional AV integrators and discerning home theater enthusiasts increasingly turn to advanced Center Channel Speaker Placement Software to eliminate positioning guesswork and achieve cinema-quality results. These sophisticated platforms analyze room acoustics, simulate sound distribution patterns, and generate optimal placement recommendations based on scientific acoustic principles rather than trial-and-error experimentation.
Choosing the best Center Channel Speaker Placement Software has become essential for anyone serious about audio performance. The right software tools predict how placement decisions affect dialogue clarity, visualize coverage patterns across seating areas, and generate professional documentation all while saving time and preventing costly mistakes that compromise the movie watching experience.
This comprehensive guide explores exactly how proper centre speaker placement elevates your movie experience, the science behind optimal positioning, and the modern tools that make professional-quality installations accessible to integrators and enthusiasts alike.
Center channel speaker placement refers to the strategic positioning and angling of the single most critical component in your home theater audio system the speaker dedicated to reproducing dialogue, center-stage sound effects, and focal audio elements. This speaker handles approximately 60-70% of a typical movie soundtrack, making its placement the foundation upon which exceptional movie experiences are built.
The Role of the Center Channel in Movie Soundtracks
Film sound designers and mixing engineers rely heavily on the center channel to anchor the sonic narrative. When characters speak on screen, their voices route primarily to this channel, creating the illusion that sound emanates from their exact location. Sound effects tied to central screen action car engines in chase scenes, gunfire in action sequences, musical scores with centered instruments also route through the center speaker.
This concentration of critical content means center speaker position affects your movie experience more than any other single channel. While surround speakers provide ambiance and subwoofers deliver bass impact, the center channel carries the emotional weight of the narrative through dialogue and focal sound design.
Physical Positioning Considerations
Effective center channel placement involves multiple dimensions:
Horizontal alignment with the display screen centerline
Distance from acoustic boundaries (walls, TV screens, furniture)
Angling or toe-in toward primary and secondary listening positions
Time alignment with left and right front speakers
Physical mounting method ensuring stability and isolation
Each decision affects how sound waves propagate through your room, interact with surfaces and furniture, and ultimately reach your ears. Small positioning changes as little as 2-3 inches or 5-10 degrees of angle can produce noticeable improvements or degradations in dialogue clarity and soundstage coherence.
Integration with Complete Audio Systems
Your center channel doesn’t exist in isolation it functions as one component in a coordinated multi-channel audio system. Proper center speaker placement considers how this speaker integrates with:
Front left/right speakers creating the main soundstage
Surround speakers providing ambient and directional effects
Height channels in Dolby Atmos or DTS:X systems
Subwoofers handling low-frequency effects
Room acoustics including reflections, absorption, and resonances
Professional AV system design approaches center channel positioning holistically, ensuring this critical speaker complements rather than competes with other system elements.
Key Components of Proper Center Channel Speaker Placement
Ear Level Alignment and Vertical Positioning
The most fundamental principle of center speaker placement involves aligning the speaker’s acoustic center typically the midpoint between the tweeter and midrange driver with seated listeners’ ear height. For standard furniture, this typically means positioning the speaker 36-42 inches from the floor.
Ear level alignment ensures you receive the speaker’s on-axis frequency response as designed by the manufacturer. Most speakers exhibit frequency response variations when listened to off-axis, with high frequencies (critical for dialogue clarity) rolling off most dramatically. A speaker positioned 20+ inches above or below ear level may exhibit 6-10 dB of treble attenuation, making voices sound muffled and distant.
When perfect ear level positioning isn’t achievable such as with center channel above TV mounting or extreme below-screen placement proper angling compensates. Tilting the speaker to aim its acoustic axis directly at listeners preserves much of the on-axis response despite vertical offset.
Horizontal Screen Alignment
Positioning the center speaker precisely at the display’s horizontal centerline creates optimal sound localization where audio and visual elements converge. When an actor stands center-screen and speaks, their voice should appear to emanate from their exact location, not from an obviously off-center speaker position.
This audio-visual alignment is particularly critical for large displays (75+ inches) where even 12-18 inches of horizontal misalignment becomes perceptually obvious. Viewers’ brains naturally attempt to fuse audio and visual information misalignment creates cognitive dissonance that breaks immersion and reduces engagement with the film.
Use precise measurements to verify your center channel sits equidistant from both sides of the display. Professional installers employ laser levels and measuring tools to achieve accuracy within 1-2 inches, ensuring perfect alignment that viewers perceive subconsciously even if they don’t consciously notice speaker position.
Acoustic Boundary Distances
Boundary reinforcement the phenomenon where walls, floors, and furniture amplify certain frequencies when speakers sit too close significantly affects center channel performance. Positioning a speaker within 6-12 inches of a wall creates bass boost that makes the center channel sound warmer than your left/right speakers, destroying tonal consistency across the front soundstage.
Similarly, placing speakers too close to the TV screen creates acoustic reflections that arrive at listening positions slightly delayed from direct sound. These reflections cause comb filtering frequency response peaks and notches that color the sound and reduce dialogue clarity.
Maintain minimum 12-18 inch clearance from walls and 4-6 inches from the display screen when possible. If space constraints force closer placement, use acoustic treatment (absorption panels) on nearby surfaces to minimize problematic reflections.
Speaker Angle and Aiming Strategy
Center speaker position often requires off-axis mounting center channel above TV or below-screen placement where the speaker sits significantly above or below ear level. Strategic angling compensates for this vertical offset, directing the speaker’s acoustic axis toward listeners rather than firing straight ahead.
Calculate required angles using basic trigonometry: Angle = arctan(height difference / listening distance). For a speaker 24 inches above ear level at 10 feet listening distance, aim downward approximately 13 degrees. Most articulating mounts and angled platforms provide 0-30 degrees of adjustment, accommodating most placement scenarios.
Horizontal toe-in also matters. While center channels should generally point straight ahead when centered, subtle angling (2-5 degrees) can improve coverage for wide seating arrangements or compensate for furniture asymmetries affecting acoustic reflections.
Time Alignment and Phase Coherence
Sound travels at approximately 1 foot per millisecond (343 meters per second). When your center channel sits 3 feet closer to listeners than your front left/right speakers, sound from the center arrives 3 milliseconds earlier. This time arrival mismatch causes phase interactions that create comb filtering and hollow out the midrange, degrading dialogue clarity and soundstage depth.
Modern AV receivers include distance/delay settings that compensate for physical positioning differences. Measure the actual distance from each front speaker to your primary listening position, then enter these values in your receiver. The processor delays closer speakers, ensuring time-aligned sound arrival that preserves phase coherence and creates cohesive front soundstage imaging.
Professional calibration often requires precision within ±6 inches (±0.5 milliseconds), achievable with careful measurement and acoustic analysis software that verifies time alignment through impulse response measurements.
Mechanical Isolation and Stability
Placing center channels directly on TV stands or media consoles without vibration isolation allows cabinet resonances to excite furniture vibrations. This acoustic coupling creates muddy bass, dynamic compression, and dialogue smearing that obscures subtle details and reduces impact during loud passages.
Isolation solutions include purpose-designed speaker stands that mechanically decouple speakers from supporting surfaces, isolation pads made from sorbothane or foam that absorb vibrations, and wall mounts that bypass furniture entirely. Even inexpensive isolation products produce noticeable improvements in clarity and definition.
Ensure physical stability as well speakers that wobble or shift during loud playback create inconsistent performance and potential safety hazards. Use appropriate mounting hardware rated for your speaker’s weight, and verify furniture can support combined equipment loads without sagging or flexing.
Benefits of Proper Center Channel Speaker Placement for Movie Watching
Dramatically Enhanced Dialogue Intelligibility
The most immediate and impactful benefit of optimal center channel placement is transformative dialogue clarity. When positioned at ear level and aimed properly, every word from whispered secrets to shouted commands comes through with exceptional intelligibility. Viewers no longer need to increase volume during quiet conversations or enable subtitles to follow complex dialogue.
This clarity enhancement stems from preserving the speaker’s on-axis frequency response in the critical 2-8 kHz range where speech consonants and vocal clarity live. Proper placement also minimizes acoustic reflections that smear time domain information, helping brains process rapid speech patterns and distinguish between similar-sounding words.
The impact extends beyond mere comprehension dialogue intelligibility affects emotional connection to characters and story. When you clearly hear every nuance of an actor’s performance, every emotional inflection and subtle delivery choice, you engage more deeply with the narrative, making films more impactful and memorable.
Accurate Sound Localization and Immersive Imaging
Proper centre speaker placement creates the “magic” where sound appears to emanate from precise on-screen locations rather than from obvious speaker positions. When an actor speaks while standing left of center, their voice pans smoothly from the center channel to the left speaker, tracking their exact screen position throughout the movement.
This sound localization accuracy tricks your brain into perceiving a continuous acoustic soundstage behind the screen rather than discrete point sources. The speaker hardware “disappears,” leaving only the sonic storytelling. Action sequences gain visceral impact when explosions, gunfire, and vehicle sounds emanate from their exact visual positions, synchronizing audio and visual impact for maximum emotional effect.
For home theater enthusiasts, this audio-visual alignment represents the difference between watching a movie and experiencing it. The immersion achieved through proper placement justifies significant equipment investments and careful installation effort.
Consistent Performance Across All Seating Positions
Strategic center speaker positioning and angling ensures everyone watching not just the person in the sweet spot enjoys quality audio. While left/right speakers typically serve a narrower listening area, the center channel must deliver dialogue clarity to all seats, including those significantly off the room centerline.
Proper vertical positioning near ear level, appropriate horizontal dispersion characteristics, and calculated angling distribute sound evenly across the entire viewing area. This “democratization” of audio quality eliminates complaints from family members about poor sound from their seats, making every position valuable for movie nights.
Professional installations serving multi-row seating particularly benefit from optimized center channel placement. Strategic elevation with downward angling serves both front and rear rows effectively, ensuring consistent dialogue intelligibility regardless of where viewers sit.
Seamless Front Soundstage Integration
When your center speaker position is optimized relative to left and right speakers, the three front channels blend into a cohesive soundstage with smooth panning, consistent tonal balance, and uniform spatial imaging. Sounds move fluidly across the front without obvious “jumps” between speakers or tonal shifts as sound objects transition between channels.
This seamless integration particularly benefits music scores and stereo music playback in multi-channel systems. Orchestra performances, concert recordings, and musically-rich films present balanced frequency response and natural spatial depth when front channels work in harmony rather than competing or contradicting each other.
Timbre matching between speakers matters, but even perfectly matched speakers sound disjointed when poorly positioned. Proper placement realizes the full potential of your equipment investment, revealing nuances and details that justify premium speaker purchases.
Maximized Dynamic Range and Emotional Impact
Optimally positioned center channels reproduce both whisper-quiet dialogue and explosive sound effects without dynamic compression or distortion. When speakers don’t fight acoustic reflections, boundary reinforcement, or cabinet resonances from poor placement, they deliver their full dynamic range, creating visceral impact during crescendos while preserving delicate details during quiet passages.
This expanded dynamic capability enhances the emotional impact of films. Sudden loud effects create genuine startle responses, intimate conversations draw you in with their subtlety, and the contrast between quiet and loud moments generates tension and release that storytellers deliberately crafted.
Movie soundtracks are mastered with significant dynamic range blockbusters often feature 30-40 dB swings between quiet and loud moments. Proper center speaker placement ensures your system can reproduce this range faithfully, delivering the movie experience as directors and sound designers intended.
Reduced Listening Fatigue and Enhanced Enjoyment
Poor center channel placement forces your brain to work harder processing distorted, unclear, or spatially-confused audio information. This cognitive effort creates listening fatigue viewers feel tired, distracted, or mentally exhausted after movies, even if they don’t consciously identify audio problems as the cause.
Properly positioned speakers reduce this cognitive load. Clear dialogue, accurate localization, and consistent tonal balance allow effortless audio processing, letting viewers focus entirely on story, character, and visual elements. Extended viewing sessions become more enjoyable, and viewers emerge from films feeling energized rather than drained.
This fatigue reduction proves particularly valuable for home theater enthusiasts who regularly watch multiple films or enjoy marathon viewing sessions of TV series with complex dialogue and rapid scene changes.
Professional-Quality Results from Consumer Equipment
Perhaps surprisingly, proper center speaker placement often matters more than equipment quality. A modestly-priced speaker positioned optimally outperforms expensive models placed poorly. This democratizes access to exceptional home theater audio careful attention to placement fundamentals delivers results previously requiring five-figure equipment investments.
Professional AV integrators understand this reality, prioritizing placement optimization before recommending equipment upgrades. When clients with disappointing systems contact them, the first step involves evaluating existing speaker positions and room acoustics rather than immediately specifying new gear.
For enthusiasts on budgets, this knowledge is empowering exceptional movie experiences don’t require unlimited spending, just careful application of acoustic principles and willingness to experiment with placement adjustments.
Step-by-Step Guide to Achieving Proper Center Channel Speaker Placement
Step 1: Measure Your Room and Seating Configuration
Begin with precise measurements of your space:
Room dimensions (length, width, ceiling height)
Seated ear height at all viewing positions (typically 36-42 inches)
Distance from screen to primary listening position
Document these measurements in a floor plan diagram. Professional AV integrators use design software for this documentation, but even hand-drawn sketches with accurate dimensions suffice for personal installations.
Identify your primary listening position typically the center seat in the front row which becomes the reference point for all subsequent positioning decisions.
Step 2: Determine Ideal Center Speaker Height
Calculate optimal center speaker height by measuring seated ear level at your primary position. The speaker’s acoustic center (midpoint between tweeter and midrange) should align with this height when possible.
If your display and furniture configuration prevents perfect alignment, determine whether center speaker above TV or below-screen placement brings you closer to the target. Measure the vertical offset and calculate required aiming angle using:
Mark your display screen’s horizontal centerline and plan to position your center channel precisely at this point. Measure from both screen edges to verify accuracy within 1-2 inches.
If physical constraints (furniture design, equipment placement) prevent perfect centering, aim for minimal offset (under 6 inches) and compensate with slight horizontal angling toward the centerline.
Step 4: Evaluate Acoustic Boundary Clearances
Check distances from your planned speaker position to nearby surfaces:
Front wall: Maintain 12-24 inches minimum
Display screen: Keep 4-6 inches clearance
Side furniture: Allow 8-12 inches minimum
Floor/ceiling: Ensure adequate vertical clearance for sound dispersion
If constraints force closer boundary proximity, identify problematic surfaces and plan for acoustic treatment (absorption panels) to minimize reflections.
Step 5: Select or Verify Center Channel Speaker
Ensure your chosen speaker fits available space while meeting performance requirements:
Physical dimensions compatible with mounting location
Dispersion characteristics appropriate for your room and seating
Timbre matching with existing left/right speakers
Power handling adequate for your AV receiver and typical listening levels
Sensitivity rating appropriate for room size and amplifier power
Consult manufacturer specifications for recommended placement guidelines some speakers perform better in specific orientations or positions.
Step 6: Install Mounting Hardware or Prepare Furniture
Implement your physical mounting solution:
For Wall Mounting:
Locate studs or install blocking for secure attachment
Install articulating wall mount with appropriate tilt range
Plan in-wall wire routing for clean installation
Verify mount weight capacity exceeds speaker weight by 50%+
For Furniture Placement:
Position isolation pads or speaker stands on furniture
Check that speaker sits securely without wobble or flex
Use a laser level or smartphone level app to verify precise angles. Small adjustments of 2-3 degrees can produce noticeable acoustic improvements.
Step 8: Verify Time Alignment with Front Speakers
Measure distances from all three front speakers to your primary listening position:
Center channel to listening position
Left speaker to listening position
Right speaker to listening position
Ideally, all three should be within 6 inches of each other. Note the differences and prepare to enter delay values in your AV receiver to compensate.
Step 9: Run AV Receiver Calibration
Connect your speaker and run your AV receiver’s automatic calibration system:
Audyssey MultEQ (Denon/Marantz)
Dirac Live (various manufacturers)
YPAO (Yamaha)
MCACC (Pioneer)
Anthem ARC (Anthem)
These systems measure your speaker positions, frequency response, and room acoustics, then optimize distance settings, level adjustments, crossover points, and equalization. Follow the manufacturer’s instructions for microphone placement, typically measuring from 6-8 positions throughout the listening area.
Review the calibration results verify detected speaker distances match your physical measurements within 1-2 feet. If significant discrepancies exist, remeasure manually and input corrected values.
Step 10: Test with Reference Content and Fine-Tune
Evaluate your center channel placement using familiar reference material:
Dialogue-heavy films with challenging whispered conversations
Action movies with complex sound design and rapid panning
Concert recordings with centered vocalists
Test discs with speaker position verification tracks
Listen from your primary position first, then evaluate from all seating locations. Note any issues:
Muffled or unclear dialogue
Voices appearing to come from wrong screen location
Tonal imbalance between center and left/right speakers
Dramatic performance differences between seats
Make minor adjustments an inch of height, 2-3 degrees of angle and retest. Small refinements often produce noticeable improvements in clarity and imaging.
Step 11: Document Final Configuration
Record your final speaker position and settings:
Take photographs from multiple angles
Measure and record exact height, angle, and distances
Export AV receiver settings for backup
Create written documentation of all specifications
This documentation proves invaluable for troubleshooting, future upgrades, or explaining your configuration to service technicians.
Comparison: Good vs Poor Center Channel Placement Impact on Movie Experience
Aspect
Proper Center Channel Placement
Poor Center Channel Placement
Dialogue Clarity
Every word crystal clear from whispers to shouts; no strain to understand conversations; subtle vocal inflections audible
Muffled, indistinct dialogue; constant volume adjustments needed; viewers enable subtitles or miss important plot points
Sound Localization
Voices emanate from exact on-screen actor positions; seamless audio-visual alignment; speakers “disappear” perceptually
Obvious disconnect between screen visuals and audio location; voices seem to float above/below actors; breaks immersion
Tonal Balance
Consistent frequency response as sounds pan across front soundstage; natural, neutral voice reproduction
Noticeable tonal shifts between channels; center sounds warmer/thinner than L/R; unnatural voice coloration
Coverage Uniformity
All seating positions enjoy quality audio; minimal performance variation across room; everyone satisfied
Single “golden seat” with acceptable sound; other positions suffer severe degradation; family complaints
Dynamic Range
Full reproduction from quietest whispers to loudest explosions; visceral impact during action; subtle details preserved
Maximizes investment; reveals capability of quality components; justifies premium spending
Wastes potential; expensive speakers sound disappointing; questions equipment quality rather than placement
AI and Future Trends in Speaker Placement
The Digital Transformation of Home Theater Design
The home theater and AV integration industry is undergoing revolutionary change driven by artificial intelligence, machine learning, and cloud computing. Traditional speaker placement relied on decades of experience, acoustic intuition, and significant trial-and-error experimentation. Modern AI-powered design tools codify this expertise into algorithms that predict placement outcomes with unprecedented accuracy.
Center Channel Speaker Placement Software represents the cutting edge of this transformation, enabling designers to simulate acoustic performance before purchasing equipment or breaking drywall. These platforms analyze thousands of variables simultaneously room dimensions, furniture positions, seating layouts, speaker specifications, acoustic materials generating optimized recommendations that would take human acousticians hours to calculate manually.
XTEN-AV X-DRAW: The Best Center Channel Speaker Placement Software
For professional AV integrators, system designers, and home theater consultants, XTEN-AV X-DRAW stands as the industry’s most advanced Center Channel Speaker Placement Software. This cloud-based platform combines sophisticated acoustic modeling, comprehensive product databases, and intuitive workflow tools to streamline design while delivering exceptional results.
XTEN-AV specifically addresses the challenges of optimizing movie experience through precise speaker placement, providing features that transform how professionals approach home theater installation.
Key Features That Make XTEN-AV Center Channel Speaker Placement Software Stand Out
1. Intelligent Speaker Placement Simulation
XTEN-AV allows designers to virtually position center channel speakers within a room layout before installation. This simulation capability helps visualize sound distribution, dialogue clarity, and alignment with the display, enabling precise planning without trial-and-error adjustments.
The platform’s acoustic engine predicts how different center speaker positions affect dialogue intelligibility, frequency response, and coverage patterns across all seating positions. Designers compare multiple placement strategies side-by-side, selecting the configuration that delivers optimal movie experience for specific client requirements.
2. Automated Room-Based Calculations
The software analyzes room dimensions, seating positions, and speaker specifications to suggest optimal speaker placement. Instead of relying on manual acoustic calculations, the platform generates data-driven placement recommendations that improve sound balance and dialogue intelligibility.
XTEN-AV’s automation eliminates human calculation errors and ensures consistent results across projects. The platform considers room modes, standing waves, boundary reinforcement, and dispersion patterns simultaneously, identifying placement strategies that maximize performance within real-world constraints.
3. AI-Powered Product Search and Selection
XTEN-AV integrates an AI-driven search engine that helps users quickly find compatible speakers and AV equipment. Designers can explore thousands of AV products and instantly match them with the room layout and audio requirements.
The AI learns from historical project data, understanding which center channel models perform best in specific scenarios. It considers room size, seating distance, budget parameters, and aesthetic preferences to recommend speakers that will deliver exceptional movie experiences reliably.
4. Integrated Speaker Layout Tools
The platform includes advanced speaker layout and positioning tools that allow AV designers to accurately place center channel speakers and other audio components within a floor plan. These tools automatically generate diagrams and layouts to guide installation.
Designers drag-and-drop speakers onto accurate floor plans, with the software providing instant feedback on spacing, angles, and acoustic implications. Measurement overlays display distances and clearances automatically, ensuring specifications meet both acoustic and practical installation requirements.
5. Large AV Product Library
XTEN-AV provides access to a massive database of over 1.5 million AV products from thousands of brands. This enables system designers to select the exact center channel speaker model and ensure compatibility with the rest of the audio system.
The database includes detailed technical specifications, frequency response data, dispersion patterns, dimensional drawings, and mounting options for each product. This comprehensive information allows accurate acoustic modeling and ensures specified equipment will physically fit in planned locations.
6. Automated AV System Design Workflow
The software streamlines the entire AV design process by combining speaker placement, system diagrams, rack layouts, and wiring plans within a single platform. This reduces design time and ensures consistent system documentation.
Rather than juggling multiple applications for different design phases, XTEN-AV provides end-to-end workflow integration. Changes to speaker positions automatically update wiring diagrams, equipment lists, and installation documentation, maintaining consistency across all project materials.
7. Real-Time Acoustic Planning Support
By considering speaker dispersion, listening distance, and room acoustics, XTEN-AV helps designers fine-tune placement for maximum dialogue clarity and balanced sound coverage across the listening area.
The platform’s acoustic engine provides real-time feedback as designers adjust speaker positions. Visual indicators highlight potential problems like off-axis listening, boundary interference, or inadequate coverage, allowing instant corrections before finalizing designs.
8. Visual Floor Plan Integration
Users can upload or create accurate floor plans and place speakers directly inside the room layout. This visual approach helps identify acoustic issues such as improper spacing, obstructions, or incorrect angles before installation.
XTEN-AV supports CAD imports, image overlays, and built-in drawing tools for creating precise layouts. The visual interface makes it easy to communicate design concepts to clients and installation teams, reducing misunderstandings that lead to errors and callbacks.
9. Professional Documentation and Export Options
XTEN-AV automatically generates technical diagrams, speaker placement layouts, and installation documentation that can be exported as PDFs or shared with installers and clients.
Documentation includes detailed dimensional drawings, elevation views, wiring diagrams, equipment specifications, and installation instructions. This professional-quality documentation ensures installers understand design intent and execute installations accurately, reducing callbacks and maximizing client satisfaction.
10. Cloud-Based Collaboration
Because XTEN-AV is a cloud platform, teams can collaborate on AV system designs in real time, making it easier for integrators, consultants, and engineers to review and refine center channel placement decisions.
Multiple team members access the same design simultaneously, with changes visible instantly to all collaborators. Version control tracks design evolution, comment threads facilitate discussion, and approval workflows streamline client sign-off processes.
Emerging AI Technologies Enhancing Movie Experiences
Looking forward, artificial intelligence will continue revolutionizing how we design and optimize home theater systems:
Predictive analytics will analyze viewing habits and content preferences to optimize speaker placement for specific movie genres
Computer vision will analyze room photos to automatically generate accurate floor plans and identify optimal speaker positions
Machine learning will improve recommendations based on feedback from thousands of installations
Augmented reality integration will allow clients to “see” proposed speaker positions in their actual rooms before installation
Voice-controlled optimization will enable natural language adjustments: “Improve dialogue clarity for the center seat”
Professional integrators adopting these technologies today position themselves as industry leaders, delivering superior movie experiences while operating more efficiently than competitors using traditional methods.
Common Mistakes in Center Channel Speaker Placement
Mistake #1: Placing Center Channel Far Off Ear Level Without Proper Angling
The Problem: Positioning the center speaker 20+ inches above or below seated ear level without calculating and implementing appropriate downward or upward angling causes severe off-axis frequency response degradation. High frequencies containing speech consonants roll off dramatically, making dialogue sound muffled and distant.
The Solution: If center channel above TV placement forces vertical offset, calculate required aiming angle using trigonometry: arctan(height difference / distance). Use articulating wall mounts or angled platforms to achieve precise targeting of the acoustic axis toward listeners’ ears.
Mistake #2: Positioning Too Close to Acoustic Boundaries
The Problem: Placing speakers within 6-8 inches of walls or the TV screen creates excessive boundary reinforcement that boosts bass frequencies unnaturally and generates acoustic reflections causing comb filtering in the midrange. The center channel sounds warmer than left/right speakers, destroying tonal consistency.
The Solution: Maintain minimum 12-18 inch clearance from walls and 4-6 inches from display screens. If space constraints force closer placement, apply acoustic treatment (absorption panels) to nearby surfaces and expect to use corrective EQ during calibration.
Mistake #3: Neglecting Time Alignment Compensation
The Problem: Failing to measure and compensate for distance differences between front speakers creates phase interactions that hollow out the midrange, reduce dialogue clarity, and destroy cohesive soundstage imaging. Even 12-18 inches of mismatch produces audible degradation.
The Solution: Measure actual distances from all three front speakers to the primary listening position. Enter accurate values in your AV receiver’s distance settings, allowing the processor to delay closer speakers and achieve proper time alignment.
Mistake #4: Using Mismatched Speaker Models
The Problem: Pairing a center channel from a different manufacturer or product line than your front left/right speakers creates tonal discontinuity as sounds pan across the front soundstage. Voices and effects shift timbre unnaturally, breaking immersion and revealing the speaker configuration.
The Solution: Always use timbre-matched speakers across all three front channels ideally from the same product series with identical driver technology. If budget constraints exist, prioritize matching the front three speakers even if it means using less expensive surrounds initially.
Mistake #5: Failing to Isolate Speaker from Supporting Surfaces
The Problem: Placing center channels directly on TV stands or furniture without vibration isolation allows cabinet resonances to excite furniture vibrations, creating muddy bass, dynamic compression, and dialogue smearing that obscures details.
The Solution: Use isolation pads, sorbothane feet, or dedicated speaker stands that mechanically decouple speakers from supporting structures. Even inexpensive isolation products produce noticeable improvements in clarity and definition.
Mistake #6: Over-Relying on Room Correction Instead of Proper Placement
The Problem: Expecting automatic calibration systems to fix fundamental placement errors leads to disappointing results. DSP processing cannot overcome severe positioning problems without introducing phase rotation, pre-ringing, and other artifacts that degrade sound quality in different ways.
The Solution: Start with acoustically sound physical placement following fundamental principles. Then use room correction for fine-tuning correcting minor frequency response variations and optimizing crossovers. Think of calibration as polish, not a repair tool for bad placement.
Mistake #7: Ignoring Seating Position Variation
The Problem: Optimizing speaker placement only for the primary “golden seat” while neglecting other positions creates dramatic performance disparities. Family members in off-center seats experience poor dialogue clarity, tonal imbalance, and uneven coverage, leading to complaints and dissatisfaction.
The Solution: Test performance from all intended seating positions during setup. Make placement and aiming adjustments that balance performance across the entire listening area rather than maximizing one position at others’ expense.
The Problem: Configuring center channels as “Large” or setting crossover frequencies below 60 Hz forces small speakers to reproduce bass content they can’t handle, causing dynamic compression, port noise, and dialogue distortion during loud passages.
The Solution: Configure center channels as “Small” with 80 Hz crossover frequency in most systems. This sends deep bass to subwoofers designed for this duty, allowing the center channel to focus on midrange and treble where dialogue lives. Adjust upward to 100-120 Hz for very small speakers.
Best Practices for Optimal Movie Audio Experience
Prioritize Dialogue Intelligibility Above All Else
When making placement trade-offs, prioritize configurations that maximize dialogue clarity. The movie experience depends more on understanding every word of the script than on perfect soundstage width or bass extension. Position and angle your center speaker to deliver optimal on-axis frequency response to primary listeners, even if this requires aesthetic compromises.
Maintain Timbre Consistency Across Front Channels
Use timbre-matched speakers from the same product line for all three front channels. Even if budget constrains individual speaker quality, maintaining consistency across front channels produces better results than mixing premium and budget speakers from different manufacturers. Tonal coherence as sounds pan across the soundstage matters more than individual speaker specifications.
Measure Precisely, Adjust Carefully
Invest in basic measurement tools tape measures, laser levels, SPL meters and use them consistently. Precise placement within 1-2 inches and angles within 2-3 degrees produces audibly better results than eyeballing positions. Small adjustments made carefully often yield surprisingly large improvements in dialogue clarity and imaging.
Calibrate Properly After Physical Placement
Run your AV receiver’s automatic calibration system after achieving optimal physical placement. These systems work best when starting from acoustically sound positions. Review automatic results critically verify detected distances match measurements, check level settings seem reasonable, and evaluate EQ curves for excessive correction that might indicate placement problems.
Test with Diverse Content
Evaluate your setup using various movie genres and audio formats:
Dialogue-heavy dramas test speech intelligibility
Action blockbusters evaluate dynamic range and localization
Animated films often feature challenging vocal processing
Concert films test tonal balance and spatial imaging
Reference test discs provide objective evaluation tools
This comprehensive testing reveals strengths and weaknesses across different content types, guiding final refinements.
Document Everything for Future Reference
Create detailed documentation of your final configuration measurements, photographs, AV receiver settings, equipment models. This information proves invaluable when troubleshooting problems, making upgrades, or explaining your setup to service technicians. Professional design software automates documentation, but even manual records in a notebook provide significant value.
Consider Professional Calibration for Premium Systems
For high-end home theater installations or when DIY calibration yields unsatisfying results, professional acoustic calibration services provide expert optimization. Certified ISF or HAA technicians use advanced measurement equipment and expertise to extract maximum performance from your system, often revealing capabilities you didn’t know existed.
Embrace Continuous Improvement
Speaker placement isn’t a one-time decision rooms change with furniture additions, seasonal decorating, and equipment upgrades. Periodically reassess your configuration, rerun calibration, and experiment with minor adjustments. Many enthusiasts discover significant improvements through ongoing refinement over months and years.
FAQ Section
Q: How much does proper center channel speaker placement actually improve movie quality?
A: The impact is substantial and immediately noticeable. Proper center channel placement can transform dialogue intelligibility from requiring subtitles to crystal clarity, improve sound localization from obviously artificial to convincingly realistic, and enhance emotional engagement from detached viewing to fully immersive experiences. Professional acoustic measurements show properly-placed speakers outperform poorly-positioned models costing 2-3x more. Many home theater enthusiasts report that optimizing speaker positions delivered greater improvement than any equipment upgrade they’ve made.
Q: What is the single most important factor in center speaker placement?
A: Vertical positioning relative to seated ear level represents the single most critical factor. The center channel’s acoustic center should align within ±10 inches of listeners’ ears, or be angled precisely to aim the acoustic axis at ear level if perfect height alignment isn’t achievable. This positioning preserves on-axis frequency response in the 2-8 kHz range where speech intelligibility lives. Get height right first, then optimize horizontal alignment, boundary distances, and time alignment.
Q: Can I achieve good results with center channel above TV placement?
A: Absolutely. Center channel above TV mounting delivers excellent results when implemented properly. Calculate the required downward aiming angle based on the vertical distance from ear level and listening distance, then use articulating wall mounts to achieve this angle precisely. Maintain adequate clearance from the ceiling (12+ inches) to minimize acoustic reflections. Many professional home theater installations use above-screen placement successfully, achieving dialogue clarity indistinguishable from ear-level positioning through proper angling.
Q: Do I need expensive Center Channel Speaker Placement Software?
A: For professional AV integrators handling multiple projects, placement software like XTEN-AV X-DRAW provides immediate ROI through time savings, error prevention, and professional documentation capabilities. A single prevented callback often pays for software subscriptions. For DIY enthusiasts working on personal single-room projects, basic acoustic calculator tools available online combined with careful measurement suffice. However, even home theater hobbyists benefit from the precision and confidence that comprehensive design software provides, especially for complex rooms or high-end systems.
Q: How do I know if my current center channel placement is optimal?
A: Evaluate these indicators: Can you clearly understand all dialogue without adjusting volume or enabling subtitles? Do voices appear to emanate from actors’ exact screen positions? Does the tonal balance remain consistent as sounds pan from left to center to right? Do all seating positions provide quality audio, not just the center seat? If you answer “no” to any question, placement optimization will yield improvements. Use acoustic measurement software like REW (Room EQ Wizard) to objectively evaluate frequency response, impulse response, and time alignment for definitive assessment.
Q: Should I place my center speaker above or below the TV?
A: The decision depends on your specific setup. Below-screen placement generally achieves closer ear-level alignment, requiring less angling and potentially delivering slightly more natural dialogue reproduction. However, it requires adequate furniture depth and may conflict with TV stands or soundbars. Center channel above TV mounting provides cleaner sight lines, avoids furniture space conflicts, and works well with wall-mounted displays, but requires proper downward angling. Both positions deliver excellent results when implemented correctly choose based on your room’s physical constraints and aesthetic preferences.
Q: How important is time alignment between my center and left/right speakers?
A: Time alignment is critical for achieving cohesive front soundstage imaging and optimal dialogue clarity. When your center channel sits significantly closer or farther than front left/right speakers, the resulting time arrival differences create phase interactions that hollow out the midrange and reduce speech intelligibility. Differences as small as 1-2 feet (1-2 milliseconds) produce audible degradation. Always measure actual distances and use your AV receiver’s delay settings to compensate, ensuring time-aligned sound arrival that preserves phase coherence across the front channels.
Q: Can proper placement compensate for lower-quality center channel speakers?
A: To a significant extent, yes. Proper speaker placement extracts maximum performance from any speaker, often making modestly-priced models positioned optimally outperform premium speakers placed poorly. However, placement cannot overcome fundamental limitations tiny satellite speakers lack the driver surface area to reproduce midrange with authority, and budget models may exhibit frequency response irregularities that placement can’t fix. The ideal approach combines quality speakers appropriate for your room size with optimal placement that realizes their full potential.
Conclusion: Key Takeaways
Proper center channel speaker placement represents the single most impactful optimization you can make to your home theater system, transforming ordinary movie watching into extraordinary cinematic experiences. The benefits extend far beyond technical improvements crystal-clear dialogue, accurate sound localization, seamless soundstage integration, and consistent performance across all seating create emotional connections to stories and characters that justify the time and effort required for optimal positioning.
Critical principles for maximizing your movie experience:
Position the center channel’s acoustic center at or near seated ear level (36-42 inches)
Calculate and implement proper aiming angles when ear-level positioning isn’t achievable
Maintain adequate clearance from acoustic boundaries (walls, TV screens, furniture)
Measure and compensate for distance differences between front speakers using delay settings
Use timbre-matched speakers across all three front channels for tonal consistency
Implement mechanical isolation to prevent furniture resonances from degrading performance
Run comprehensive AV receiver calibration after achieving optimal physical placement
Test with diverse content from all seating positions before finalizing the configuration
For professional AV integrators, mastering center channel placement differentiates your services in competitive markets. Clients remember exceptional dialogue clarity and immersive sound imaging long after forgetting equipment brand names. Delivering consistently outstanding movie experiences through precise speaker positioning builds reputations that generate referrals and repeat business.
The emergence of advanced Center Channel Speaker Placement Software like XTEN-AV X-DRAW has democratized access to professional-quality design tools. These platforms eliminate guesswork, prevent costly mistakes, and generate documentation that ensures installation teams execute designs accurately. The time savings and error prevention typically provide ROI on the first or second project, making such tools essential for serious integrators.
For home theater enthusiasts, understanding speaker placement principles empowers you to achieve results previously requiring professional installation services. The knowledge that exceptional movie experiences depend more on careful positioning than equipment budgets is liberating anyone willing to measure precisely, calculate angles accurately, and experiment patiently can create reference-quality home theaters that rival commercial cinemas.
Whether you’re designing your first system or optimizing an existing installation, prioritize center channel placement as the foundation of exceptional movie audio. The difference between disappointing and extraordinary home theater experiences often measures in inches and degrees precision that separates those who merely watch movies from those who truly experience them.
March 5, 2026 at 12:16 pm, No comments Proper center channel speaker placement dramatically improves your movie experience by ensuring crystal-clear dialogue intelligibility, accurate sound localization where voices emanate from on-screen actors, seamless soundstage integration across the front channels, and consistent audio quality from all seating positions. When positioned correctly at ear level, aimed toward the primary listening position, and
Setting up a sound system for church requires significantly more planning than simply hanging speakers and connecting cables. Professional church audio setup balances speech intelligibility for sermons, music reproduction for worship, volunteer accessibility, and architectural aesthetics. The foundation of any successful installation begins with choosing the best church sound system design software to model acoustic behavior, optimize coverage, and prevent costly mistakes before physical work begins.
Modern church sound system design software like XTEN-AV X-DRAW enables AV integrators and technical directors to visualize speaker placement, simulate sound coverage patterns, predict SPL distribution, and generate precise equipment specifications. This planning phase eliminates the most common setup failures: inadequate coverage, improper aiming, equipment incompatibility, and insufficient acoustic performance.
This guide provides a comprehensive roadmap for setting up church audio equipment—from initial planning through final commissioning—ensuring your sound system setup for church delivers professional results.
What is Church Sound System Setup?
Church sound system setup is the physical implementation process that transforms design specifications into functioning church audio equipment installations. Unlike design (which focuses on planning), setup encompasses hands-on execution: mounting hardware, routing cables, connecting components, configuring digital signal processing, optimizing performance, and training operators.
Professional church audio setup requires 2-8 weeks depending on system complexity, worship space size, and equipment sophistication.
Key Components Required for Church Sound System Setup
Essential Audio Equipment
Speaker Systems Main PA speakers provide primary coverage for congregations. Options include powered speakers (built-in amplification), passive speakers (external amplifiers), line array systems (for large spaces), or point source speakers (smaller churches). Subwoofers handle low frequencies (20-120 Hz) essential for contemporary worship music, while fill speakers address coverage gaps and stage monitors serve performers.
Mixing and Control Equipment The mixing console serves as the control center. Digital mixing consoles offer scene recall, remote control, and built-in effects processing, while analog mixers provide simpler operation. Digital signal processors (DSPs) deliver speaker management, feedback suppression, EQ, compression, and architectural audio routing. Modern systems use networked audio protocols like Dante for flexible signal distribution.
Microphone Systems Wireless microphone systems provide mobility for pastors and worship leaders, including handheld mics, lavalier microphones, and headset mics. Wired microphones at podiums ensure reliable transmission. Direct boxes (DI boxes) convert instrument signals for long cable runs.
Testing Equipment Professional setup requires audio analyzers for acoustic measurement, cable testers, multimeters, and spectrum analyzers for wireless frequency coordination.
Benefits of Proper Church Sound System Setup
Enhanced Worship Experience
Professionally executed church audio setup ensures even sound coverage throughout the sanctuary—eliminating dead zones and hot spots. High speech intelligibility (measured via Speech Transmission Index or STI) means every sermon word is understood. Proper setup achieves STI scores above 0.65 (good) or 0.75+ (excellent), ensuring message clarity.
Technical Reliability
Correct installation practices prevent failures:
Proper gain structure eliminates noise and distortion
Well-designed systems with intuitive digital mixing consoles, preset scenes, clear labeling, and comprehensive documentation empower volunteers to achieve professional results with minimal training. Remote control capabilities allow experienced operators to provide remote guidance during services.
Cost Efficiency
Professional setup prevents expensive problems: correct equipment specification eliminates returns, proper installation reduces service calls, quality connections prevent cable replacement, and comprehensive documentation simplifies future modifications. The incremental cost of professional installation is recovered through avoided problems and extended equipment life.
Scalability
Systems installed with expansion in mind accommodate future growth: modular signal routing adds channels without rewiring, networked audio infrastructure scales easily, DSP platforms accept software updates, and adequate conduit simplifies cable additions.
Step-by-Step Guide to Setting Up a Church Sound System
Step 1: Complete Professional System Design
Before beginning physical setup, ensure a complete church sound system design exists—preferably created using professional church sound system design software. This design should include detailed speaker placement, complete equipment lists, signal flow diagrams, cable schedules, rack elevations, and installation drawings.
Why Professional Design Software Matters Choosing the best church sound system design software dramatically impacts setup success. Inferior tools produce inaccurate predictions, while premium platforms like XTEN-AV X-DRAW provide precise acoustic modeling, verified manufacturer data, and real-world performance simulation.
Step 2: Install Acoustic Treatment
Complete acoustic treatment before equipment installation:
Mount absorption panels to control reflections
Install bass traps in corners for low-frequency control
Hang ceiling clouds or distributed panels
Apply diffusion panels where specified
Target reverberation times typically range from 1.2-1.8 seconds for contemporary worship and 1.8-2.5 seconds for traditional liturgical services. Professional acoustic consultants specify appropriate treatment types and placement.
Step 3: Install Infrastructure
Electrical Systems
Install dedicated circuits for audio equipment
Place equipment racks at designed locations
Install power distribution units
Provide surge protection and power conditioning
Cable Pathways
Install conduit for cable protection
Run cable trays or J-hooks for overhead routing
Ensure adequate bend radius
Pull strings through long conduit runs
Structural Mounting
Install speaker rigging points in ceiling structure
Mount wall brackets for speakers
Verify all hardware is rated for equipment weight
Step 4: Mount and Position Speakers
Follow design specifications precisely:
Measure and mark mounting positions from design drawings
Install mounting hardware at marked locations
Mount speakers securely with appropriate brackets
Aim speakers precisely according to design angles (use laser level)
Verify clearances for coverage patterns
Connect speaker cables with proper gauge for distance and power
Speaker Placement Critical Points:
Main PA speakers: Above and in front of first row, angled to cover rear seating
Subwoofers: Floor level, often center stage or under stage
Fill speakers: Under-balcony areas, front rows, distant seating
Stage monitors: Per worship leader preferences
Step 5: Install Processing and Control Equipment
Equipment Rack Assembly
Install power distribution at rack bottom
Mount amplifiers with adequate ventilation spacing
Install DSP processors in accessible locations
Mount wireless mic receivers with front panel access
Position network switches for Dante systems
Implement proper cable management
Mixing Console Installation
Place at mix position with clear stage view
Ensure operator can hear room acoustics directly
Provide adequate work surface space
Install cable drops from equipment rack
Set up remote control if system supports it
Step 6: Run All Audio Cabling
Cable Routing Best Practices:
Separate audio cables from power cables (minimum 12″ spacing)
XTEN-AV X-DRAW: The Best Church Sound System Design Software
Professional church sound system design software separates successful installations from problematic ones. XTEN-AV X-DRAW has emerged as the premier platform for worship space audio planning, addressing every aspect of church audio equipment specification with precision.
Key Features That Make XTEN-AV Church Sound System Design Software Stand Out
1. Drag-and-Drop System Layout A visual, drag-and-drop interface lets designers map out physical spaces and audio components quickly without complex commands. You can place speakers, mixers, amps, and acoustic objects intuitively, dramatically speeding up early design stages.
2. Accurate Acoustic Modeling XTEN-AV delivers realistic sound propagation simulation, factoring in room dimensions, surface materials, and speaker characteristics. This enables prediction of SPL (sound pressure level) distribution, coverage uniformity, and potential acoustic issues before deploying hardware.
3. Extensive Manufacturer Database Included device libraries contain detailed specifications for hundreds of pro audio brands—loudspeakers, subwoofers, mixers, and processors—which ensures designers work with real-world parameters rather than approximations.
4. Frequency Response & Coverage Visualization The software provides frequency-specific coverage maps, letting you visualize how different bands behave throughout the worship space. This is critical for ensuring even speech intelligibility and music fidelity across the congregation.
5. Room Acoustics Tools You can model reflection paths, reverberation characteristics, and absorption effects based on architectural features. These tools help anticipate problematic echoes and optimize acoustic treatment placement.
6. Multi-Zone Sound System Planning For churches with multiple areas (sanctuary, overflow rooms, lobbies), XTEN-AV supports multi-zone planning with separate processing logic, enabling independent volume control, DSP configurations, and routing for each zone.
7. Bill of Materials & Specification Export Once a system is designed, the software generates detailed hardware lists and technical documents that can be used for procurement, budgeting, and installation planning. This reduces guesswork and clarifies requirements for vendors and installers.
8. Integration With Control and DSP Platforms XTEN-AV can incorporate control logic and DSP parameter planning for platforms like Q-SYS, Dante-enabled systems, or other networked audio environments. This helps designers plan both signal flow and processing strategies.
9. Team Collaboration & Revision Tracking Design work can be shared among team members with versioning control, annotations, and markup tools. This ensures stakeholders—from AV designers to project managers—stay aligned throughout iterations.
10. Customizable Templates and Workflows The software supports reusable templates for common church layouts and system types. This saves time on repeat projects and helps standardize best practices across multiple builds.
Why XTEN-AV X-DRAW Stands Out for Church Setup
XTEN-AV X-DRAW specifically addresses the unique challenges of church sound equipment installation. Its accurate acoustic modeling validates that planned setups will deliver predicted performance. The extensive manufacturer database ensures equipment compatibility throughout the signal chain. Frequency-specific coverage visualization helps installers understand why specific speaker positions and aiming angles were chosen, improving installation accuracy.
For AV integrators specializing in worship spaces, XTEN-AV X-DRAW represents the industry standard for church sound system design software, providing the precision and documentation needed for successful installations.
Setup Comparison: Different Church Sizes
Small Church Setup (Under 200 Seats)
Equipment Configuration:
Compact powered speakers (2-4 units)
Small digital mixer (12-16 channels)
Basic wireless mics (2 channels)
Minimal acoustic treatment
Setup Timeline: 1-2 days DIY Feasibility: Possible with guidance Setup Cost: $500-$2,000 laborBest Practices:
Use powered speakers to eliminate separate amplifiers
Select all-in-one systems for simplicity
Prioritize ease of operation
Invest in acoustic treatment even for basic systems
Setup Timeline: 4-8 weeks DIY Feasibility: Professional only Setup Cost: $25,000-$100,000+ labor
Best Practices:
Engage specialized church AV integrators
Use XTEN-AV X-DRAW for design
Implement redundancy for critical components
Establish ongoing maintenance contracts
AI and Future Trends in Church Sound System Setup
Artificial Intelligence in Audio Systems
AI-Powered Auto-Mixing
Modern AI algorithms analyze multiple microphone inputs in real-time, automatically adjusting levels to prioritize active speakers while reducing feedback potential. Products like Shure’s IntelliMix and Yamaha’s ADECIA dramatically simplify volunteer operation of complex church audio setups.
Machine Learning for Acoustic Optimization
AI-driven acoustic analysis software measures room characteristics and automatically generates optimal EQ curves, speaker delays, and processing parameters. These systems continuously adapt to changing conditions, learning from operator adjustments.
Predictive Maintenance
AI monitoring systems analyze equipment performance data to predict potential failures before they occur. Network-enabled audio devices report operational metrics—amplifier temperature, signal levels—enabling proactive maintenance scheduling.
Emerging Setup Technologies
Self-Calibrating Speaker Systems
New active speaker technology includes built-in measurement microphones that automatically measure room acoustics, generate custom EQ curves, adjust time alignment, and adapt to changing conditions—simplifying setup for smaller churches.
Cloud-Based System Configuration
Cloud platforms enable remote system setup, configuration backup, automatic firmware updates, performance monitoring, and collaborative setup with multiple technicians—reducing on-site time requirements.
Augmented Reality Installation Guides
AR applications overlay installation information onto physical spaces, showing speaker coverage patterns, cable routing paths, and equipment placement at actual locations—bridging the gap between design software and physical installation.
Common Mistakes and Best Practices
Critical Setup Mistakes to Avoid
Inadequate Pre-Installation Planning Mistake: Beginning installation without complete design documentation
Solution: Use proper cable management techniques; separate power and audio; label every cable
Incorrect Gain Structure Mistake: Random level setting, excessive input gain, insufficient gain Consequence: Poor signal-to-noise ratio, distortion, limited dynamic range
Solution: Follow systematic gain structure procedures from input to output
Skipping System Tuning Mistake: Assuming system will perform correctly without measurement Consequence: Poor intelligibility, uneven coverage, tonal problems
Solution: Use professional acoustic measurement tools; apply corrective EQ; verify performance
No Documentation Mistake: Failing to document configuration, settings, cable routing Consequence: Difficult troubleshooting, impossible modifications, knowledge loss
Solution: Create comprehensive as-built documentation; save configuration files; maintain backups
Best Practices for Success
Methodical Installation Approach:
Complete infrastructure before equipment
Install and test in logical sequence
Test each subsystem before proceeding
Document as work progresses
Reserve adequate time for tuning
Quality Over Speed:
Aim speakers precisely
Make proper cable terminations
Perform thorough testing
Don’t skip acoustic measurement
Verify all functions before completion
Leverage Professional Tools:
Use church sound system design software like XTEN-AV X-DRAW
Quality cable testing equipment
Professional acoustic measurement tools
Proper installation tools
Implement Proper Grounding:
Establish single-point ground
Use balanced connections
Verify cable shields connect properly
Isolate audio from building ground if necessary
Use power conditioning
Frequently Asked Questions About Church Sound System Setup
How long does it take to set up a church sound system?
Setup timelines vary by system complexity:
Small systems (under 200 seats): 1-2 days for installation, plus 2-4 hours tuning
Medium systems (200-800 seats): 5-10 working days for installation, plus 1-2 days commissioning
Large systems (800+ seats): 4-8 weeks including infrastructure, installation, integration, and training
These assume complete design documentation exists, all equipment is delivered, and infrastructure work is completed. Projects without proper planning frequently double these timelines.
Can I install a church sound system myself?
DIY feasibility depends on several factors:When DIY is Appropriate:
Small churches with simple systems
Basic equipment (powered speakers, simple mixer)
Team member with audio/electrical experience
Professional design documentation to follow
Access to technical support
When Professional Installation Required:
Medium or large churches (200+ seats)
Networked audio systems
Line array or complex speaker systems
Multi-zone audio distribution
Licensed electrician work needed
Even with DIY, engage professionals for speaker aiming, system tuning, and operator training—typically $1,000-$3,000 but ensures proper performance.
What tools do I need to set up a church sound system?
Essential Installation Tools:
Cordless drill and impact driver
Wire strippers and cutters
Measuring tape (100′ length)
Laser level for speaker aiming
Ladder (appropriate height)
Cable tester (XLR and RJ45)
Multimeter for electrical verification
Soldering iron for XLR termination
Label maker
Audio analyzer and measurement microphone
Professional installations require the complete toolkit including specialized testing equipment.
How do I know if speakers are positioned correctly?
Good positioning produces even volume (±3 dB), consistent tone front to rear, clear speech intelligibility, and minimal ceiling reflections.
What is proper gain structure and why does it matter?
Gain structure is systematic signal level setting throughout the audio system to optimize signal-to-noise ratio while preserving headroom for peaks.Why It Matters:
Poor gain structure causes noise (insufficient input gain) or distortion (excessive input gain)
Proper gain structure provides maximum signal-to-noise ratio, adequate headroom, consistent performance, and optimal equipment operation
Proper Setting Procedure:
Set microphone preamp for -20 to -10 dB average levels
Set channel faders to unity (0 dB)
Combine channels for -10 to -6 dB at mix bus
Set master fader to unity
Adjust amplifier gain for 70-80% of max power at normal levels
How often does a church sound system need maintenance?
Maintenance Schedule:Weekly (10-15 minutes):
Verify functionality
Check wireless mic batteries
Test microphone channels
Clean visible mic grills
Monthly (30-45 minutes):
Clean microphone capsules
Inspect cable connections
Backup mixer and DSP settings
Test backup systems
Quarterly (1-2 hours):
Update firmware
Clean equipment ventilation
Inspect speaker connections
Review documentation
Annual (4-8 hours, professional recommended):
Professional acoustic measurement
Comprehensive equipment inspection
Deep cleaning
Update wireless frequency coordination
Refresher operator training
Well-maintained systems operate reliably for 15-20 years before requiring major replacements.
What should I do if the system doesn’t sound right after setup?
Systematic Troubleshooting:Step 1: Identify the specific problem (no sound, distortion, thin tone, feedback, uneven coverage)Step 2: Verify basic functionality (power on, mutes off, faders raised, cables connected)Step 3: Check gain structure (input gains appropriate, no clipping, adequate levels)Step 4: Review system configuration (DSP routing, speaker management settings, mixer routing)Step 5: Measure acoustic performance (frequency response, STI scores, speaker polarity)Step 6: Consult design documentation (verify installation matches specifications)Step 7: Seek professional assistance (manufacturer support, AV integrator, acoustic consultant)Don’t accept poor performance—properly designed and setup systems should sound excellent throughout the worship space.
Conclusion: Key Takeaways for Church Sound System Setup
Successfully setting up a church sound system requires methodical planning, skilled execution, proper testing, and comprehensive documentation. The foundation of every successful installation is professional design through specialized church sound system design software like XTEN-AV X-DRAW.
Essential Setup Principles
1. Design Before Implementation: Never begin physical setup without complete design documentation. Professional church sound system design software creates installation roadmaps ensuring successful implementation.2. Infrastructure First: Complete acoustic treatment, electrical circuits, conduit, and mounting hardware before equipment arrives.3. Systematic Installation: Execute setup in logical phases—speakers first, electronics second, interconnections third, configuration fourth, tuning finally. Test each subsystem thoroughly.4. Continuous Verification: Test cables before termination, verify equipment before mounting, measure coverage before tuning, document settings before training.5. Professional Tuning is Essential: Professional acoustic measurement and system tuning transform adequate installations into excellent systems.
The Value of XTEN-AV X-DRAW
Choosing the best church sound system design software like XTEN-AV X-DRAW transforms setup from guesswork to precision execution. Its drag-and-drop interface, accurate acoustic modeling, extensive manufacturer database, frequency visualization, and automated documentation create installation guides ensuring consistent, successful results.
Critical Success Factors
Adequate time allocation: Allow sufficient time for each phase, especially measurement and tuning
Proper tools: Use professional-grade installation, testing, and measurement equipment
Thorough training: Train all volunteers from basic operation to advanced troubleshooting
Ongoing maintenance: Establish clear maintenance schedules and assign responsibility
Moving Forward
Whether installing a best sound system for small church with basic equipment or deploying sophisticated networked audio infrastructure for large sanctuaries, the principles remain constant: plan thoroughly using church sound system design software, execute systematically, test continuously, tune professionally, document completely, and train comprehensively.Your worship space deserves professional-quality sound. Start with proper design using XTEN-AV X-DRAW, follow systematic setup procedures, invest in professional tuning, and commit to ongoing maintenance. The result will be church audio equipment that serves faithfully for decades, enhancing every sermon, elevating every song, and enabling ministry to reach every congregation member with crystal-clear audio quality.Sound system setup for church is an investment in your ministry’s effectiveness. Execute it properly, and your congregation will experience worship audio that enhances rather than distracts—the hallmark of truly professional church sound equipment installation.
March 3, 2026 at 10:43 am, No comments Setting up a sound system for church requires significantly more planning than simply hanging speakers and connecting cables. Professional church audio setup balances speech intelligibility for sermons, music reproduction for worship, volunteer accessibility, and architectural aesthetics. The foundation of any successful installation begins with choosing the best church sound system design software
Audio signal flow diagram makers integrate with AV rack design tools through unified data architectures, shared component libraries, bidirectional synchronization, and automated cross-referencing—enabling AV integrators and system designers to create cohesive documentation where logical signal paths, physical equipment layout, and installation details remain perfectly aligned throughout the design process.
An audio signal flow diagram maker that seamlessly connects with rack elevation tools eliminates the redundant work of designing the same system twice: once for functional architecture and again for physical implementation. This integration ensures that when you specify a DSP in your signal flow diagram, it automatically appears in the appropriate rack position with correct dimensions, power requirements, and mounting specifications—and changes in either view propagate instantly to maintain consistency.
Choosing the best audio signal flow diagram maker with robust rack design integration fundamentally transforms AV workflow efficiency. Instead of juggling multiple disconnected tools and manually ensuring consistency between logical and physical documentation, integrated platforms provide a single source of truth where system architecture, equipment layout, cabling infrastructure, and bills of materials all derive from the same underlying data model.
This comprehensive guide explores how modern audio signal flow diagram makers like XTEN-AV X-DRAW achieve seamless integration with rack design tools, examines the technical mechanisms enabling bidirectional data flow, and provides practical strategies for leveraging integrated workflows to reduce errors, accelerate project timelines, and deliver professional documentation that serves every stakeholder from initial concept through final commissioning.
What Is Audio Signal Flow Diagram and AV Rack Design Integration?
Understanding the Two Documentation Types
Signal Flow Diagrams: Logical System Architecture
Audio signal flow diagrams visualize how signals move through a system functionally:
Primary Purpose:
Show signal routing from sources to destinations
Illustrate processing chains and signal transformations
Document gain structure and level management
Communicate system capabilities to clients and stakeholders
Key Characteristics:
Component-level representation (each box = one device)
Emphasis on signal path logic over physical location
Connection types (analog, digital audio, network protocols)
Hierarchical organization by function
Clear indication of signal flow direction
Typical Contents:
Input devices: Microphones, line sources, media players
XTEN-AV X-DRAW’s rich audio component library includes comprehensive dual attributes, ensuring every device works seamlessly across both signal flow and rack elevation views.
Intelligent Object Mapping
Automatic View Translation
When you place a component in one view, integration automatically represents it appropriately in others:
From Signal Flow to Rack:
Component added to signal flow creates rack reservation
System selects appropriate rack position based on:
Equipment type and typical placement conventions
Available rack space in assigned equipment locations
Power distribution proximity
Thermal management considerations
Cable routing efficiency
From Rack to Signal Flow:
Equipment placed in rack diagram appears in signal flow
Why XTEN-AV X-DRAW Is the Best Audio Signal Flow Diagram Maker for Integrated Workflows
Purpose-Built Integration Architecture
XTEN-AV X-DRAW stands as the best audio signal flow diagram maker specifically because it was designed from the ground up with AV workflow integration as a core principle, not an afterthought.
Key Features That Make XTEN-AV Audio Signal Flow Diagram Maker Stand Out
1. Intuitive Drag-and-Drop Interface
Users can visually construct signal flow diagrams by dragging components (e.g., mixers, amplifiers, DSPs, speakers) onto the canvas and connecting them with lines. This eliminates manual coordinate placement and accelerates diagram creation. The same interface seamlessly transitions to rack design mode, maintaining consistency across documentation types.
2. Rich Audio Component Library
XTEN-AV includes an extensive library of prebuilt audio components and standard symbols. Users don’t need to import custom images—everything from microphones to line arrays is ready to use. Critically, each component includes both logical attributes for signal flow and physical specifications for rack layout, enabling seamless integration.
3. Smart Auto-Routing
Connections between audio elements automatically route themselves based on layout changes. Users can rearrange blocks without manually redrawing lines, saving time and reducing visual clutter. This intelligence extends to suggesting optimal rack positions based on signal routing.
4. Real-Time Validation and Error Checking
The tool highlights common signal flow issues—such as disconnected paths, improper routing, or missing links—as the diagram is being built. Additionally, it validates physical constraints like rack space, power capacity, and mounting compatibility across integrated views.
5. Multi-Layered Diagrams
XTEN-AV supports layered signal flow diagrams, allowing users to separate logical signal paths (e.g., front of house vs. monitors, analog vs. digital) for easier readability and planning. These layers map intelligently to physical rack locations and zones.
6. Reusable Templates
Prebuilt templates for common audio setups—such as live sound rigs, conference room systems, and distributed audio—help users start faster and follow best-practice layouts. Templates include both signal flow and rack organization patterns that work together.
7. Cloud-Based Collaboration
Multiple stakeholders (e.g., AV designers, engineers, integrators) can work on the same diagram simultaneously, with changes syncing in real time. This accelerates teamwork and reduces version conflicts across all integrated views—signal flow, racks, wiring, and BOMs.
8. Cross-Page and Scalable Outputs
Complex audio systems can span multiple pages with consistent scaling and clear connections across sheets, making them easier to print or share with clients and installers. Rack diagrams maintain the same cross-referencing across multiple equipment locations.
9. Export to Standard Formats
Diagrams can be exported to universally accepted file types such as PDF, SVG, and DXF, enabling easy sharing with non-users or inclusion in larger project documentation. All integrated views export together or separately as needed.
10. Component Metadata and Tagging
Users can attach metadata (e.g., specifications, part numbers, descriptions) to components in the diagram. This turns visual diagrams into richer documentation assets that serve both logical signal flow and physical rack implementation equally.
11. Cloud Storage with Version History
Files are stored in the cloud with version tracking, allowing users to revert to earlier versions, review changes, and maintain an audit trail of diagram iterations. All integrated views share the same version history, preventing documentation drift.
12. Cross-Device Accessibility
As a web-based application, the audio signal flow diagram maker works across operating systems and devices—from desktops to tablets—without requiring local installation. Access both signal flow and rack diagrams from anywhere, including job sites.
13. Seamless Integration with AV Workflows
XTEN-AV integrates signal flow diagrams into related AV design artifacts like rack diagrams, wiring diagrams, and bills of materials (BOM), creating a cohesive project ecosystem. This is the defining feature that sets XTEN-AV apart from all competitors.
14. Template Customization and Reuse
Users can save their own custom templates and reuse them across projects, improving consistency and standardization within teams or organizations. Templates preserve both signal flow and rack organization patterns simultaneously.
15. Beginner-Friendly but Professional-Grade
The tool is accessible for users who are new to signal flow design, yet robust enough for professional audio engineers. Its clean interface reduces the learning curve compared to traditional CAD tools, while integrated workflows provide enterprise-level capabilities.
Integration Features Other Tools Lack
XTEN-AV’s competitive advantages for integrated workflows:
Automatic Rack Generation: One-click creation of rack elevations from signal flow diagrams
Bidirectional Synchronization: Changes in either view update the other instantly Physical
Constraint Validation: Real-time checking of space, power, and thermal limits
Unified Component Database: Single components serve both logical and physical needs
Cross-View Navigation: Click any component to see all related representations
Integrated BOM Generation: Equipment lists combine signal flow and rack components seamlessly
Power Budget Tracking: Automatic calculation across racks from component specifications
Thermal Analysis: Heat load calculations from integrated equipment data
Cable Requirement Calculation: Connection counts from signal flow inform rack cabling plans
Comparison: Integrated Workflow vs Separate Tools
Traditional Approach: Multiple Disconnected Tools
Typical Tool Stack
Many AV integrators use separate applications:Signal Flow Creation:
Installation delays from inadequate cable information
Best Practice:
Specify cable types for each signal path in signal flow
Verify connector compatibility between linked components
Calculate cable lengths from rack positions with overhead
Include patch cords, adapter cables, and specialty interconnects
Use integration to generate comprehensive cable schedules
Add cable management hardware to rack designs
Document termination standards (wiring, pinouts)
5. Poor Version Control Across Views
Mistake: Making changes in one view without verifying propagation to others.
Risks:
Signal flow and rack diagrams becoming misaligned
BOM not reflecting current design
Installation from outdated documentation
Client approvals based on superseded versions
Best Practice:
Use cloud-based collaboration with automatic synchronization
Verify changes appear in all relevant views
Leverage XTEN-AV’s version history for audit trails
Implement approval workflows before finalizing
Archive major revision milestones
Communicate changes to all stakeholders
Generate documentation from same version source
Professional Best Practices for Integration
Design Process Excellence
Start Holistically:
Begin with both logical signal flow and physical rack locations in mind
Consider installation logistics during conceptual design
Engage installation teams early for input
Document constraints and assumptions clearly
Iterative Refinement:
Use real-time validation feedback to guide design
Refine rack organization based on cable routing efficiency
Optimize signal flow when physical constraints dictate
Balance ideal architecture with practical implementation
Validation Checkpoints:
Verify consistency across signal flow and rack diagrams at milestones
Review power calculations and thermal analysis
Check BOM completeness including cables and accessories
Validate against client requirements and specifications
Documentation Standards
Comprehensive Deliverables:
Provide both signal flow and rack diagrams together
Include cross-references between documentation types
Export unified packages with all views
Generate appropriate formats for each audience
Clear Presentation:
Use consistent labeling schemes across all views
Apply color coding uniformly
Include legends explaining symbols and conventions
Add notes documenting design decisions and special requirements
Collaboration Optimization
Team Coordination:
Define clear responsibilities for signal flow vs. rack design
Use cloud-based tools for simultaneous access
Establish review cycles with all stakeholders
Leverage comment systems for feedback management
Client Engagement:
Present integrated documentation showing complete system
Demonstrate how changes impact all aspects
Provide access to current designs for review
Use visualizations for non-technical understanding
Frequently Asked Questions About Signal Flow and Rack Design Integration
Q1: How does integration between signal flow and rack design actually work technically?
A: Integration works through a unified component database where each equipment item contains both logical attributes (signal types, channel counts, processing) and physical attributes (dimensions, weight, power, mounting). When you place a component in your signal flow diagram using XTEN-AV X-DRAW, the system creates a linked instance that also appears in rack diagrams with appropriate physical representation. Bidirectional synchronization means changes in either view automatically update the other through shared data relationships. The platform maintains cross-references between views, validates physical constraints in real-time, and generates unified documentation from the same source data, ensuring perfect consistency across all project artifacts.
Q2: Can I start with rack design instead of signal flow, or must I begin with logical architecture?
A: XTEN-AV’s flexible integration supports either starting point. You can begin by designing rack elevations with specific equipment, and the system will generate corresponding signal flow diagram elements showing logical relationships. Alternatively, start with signal flow architecture and let the platform automatically generate rack layouts. Most professionals prefer starting with signal flow to establish functional requirements before physical constraints, but renovation projects or equipment-driven designs may benefit from rack-first approaches. Regardless of entry point, the integration maintains consistency and allows refinement in either view as the design evolves.
Q3: What happens if equipment physically won’t fit the automatically generated rack layout?
A: XTEN-AV’s real-time validation prevents this problem by checking rack space availability continuously. If you add components to signal flow that exceed available rack unit (RU) capacity, the system immediately flags the constraint violation with visual warnings. You can then:
Manually adjust rack positions to optimize space usage
Add additional racks to accommodate all equipment
Replace larger devices with rack-optimized alternatives
Use remote I/O or distributed equipment to reduce main rack density The integration ensures you discover and resolve physical constraints during design, not during installation when changes are expensive and time-consuming.
Q4: How does integrated workflow handle multi-location systems with equipment in different rooms?
A: Multi-layered diagrams and zone-based organization handle distributed systems elegantly. Tag each component in your signal flow with its physical location (control room, stage, FOH booth, back-of-house, etc.). XTEN-AV automatically generates separate rack diagrams for each location, showing only equipment assigned to that space. The signal flow diagram shows the complete system architecture with connections spanning locations, while rack diagrams display location-specific physical implementations. Cable length calculations account for inter-rack and inter-room routing distances. BOM generation can aggregate across all locations or separate by installation area for staged implementation and contractor coordination.
Q5: Can integration calculate power requirements and verify electrical capacity?
A: Yes, power budget tracking is a critical integration feature. Each component’s metadata includes power specifications (voltage, current draw, BTU heat generation). As you add equipment to signal flow, the system:
Accumulates total power consumption per rack
Compares against PDU ratings and circuit capacity
Flags when total load exceeds available power
Calculates heat dissipation requiring cooling
Recommends power distribution strategies You can specify PDU models with known capacities, and the integration validates that all equipment power requirements fit within electrical infrastructure, preventing overload scenarios that could cause equipment damage or circuit breakers tripping.
Q6: What if I need to use components from manufacturers not in the standard library?
A: XTEN-AV provides comprehensive tools for custom component creation. You can:
Import manufacturer specifications from datasheets
Add metadata (model numbers, part numbers, pricing)
Save to organization library for reuse across projects Template customization features let you create consistent components matching your standards and preferences. Once created, custom components integrate seamlessly with standard library items, appearing in both signal flow and rack diagrams with full validation and BOM generation support.
Q7: How does integration help with installation documentation and field changes?
A: Integrated workflows transform installation support. Cross-device accessibility means installers can access both signal flow and rack diagrams on tablets at job sites. When field conditions require changes:
Update either signal flow or rack diagram on-site
Changes synchronize automatically via cloud-based collaboration
Remote engineers see modifications in real-time
Documentation updates instantly across all views
As-built drawings reflect actual installed configuration Cross-referencing helps installers understand how physical connections relate to logical signal paths, improving troubleshooting efficiency. XTEN-AV’s unified documentation prevents the common problem of disconnected field notes requiring manual consolidation after completion.
Conclusion: Key Takeaways
The Transformation Integration Delivers
The integration of audio signal flow diagram makers with AV rack design tools represents a fundamental evolution in professional AV system design workflows—moving from disconnected documentation requiring manual synchronization to unified platforms where logical and physical representations maintain perfect alignment automatically.
Essential Conclusions for AV Professionals
1. Integration Delivers Measurable Business Value
The benefits of integrated signal flow and rack design extend beyond convenience:
60-70% reduction in design time per project
90-95% fewer specification errors and inconsistencies
Earlier procurement enabling better pricing and delivery
Faster installation from accurate, coordinated documentation
Higher client satisfaction through professional deliverables
Improved profitability from efficiency and quality gains
2. Unified Data Architecture Is the Foundation
Effective integration requires component libraries where each equipment item contains both:
Logical attributes for signal flow (signal types, processing, routing)
Physical specifications for rack design (dimensions, weight, power) This dual-attribute architecture enables automatic translation between views while maintaining consistency through shared metadata and synchronized updates.
3. Bidirectional Synchronization Eliminates Manual Work
Changes in either signal flow or rack diagrams propagate automatically:
Add component to signal flow → appears in rack elevation
Modify equipment in rack → updates in signal flow
Remove item from either → disappears from both
Change specifications → reflects everywhere instantly This bidirectional relationship prevents the version conflicts and documentation drift that plague disconnected workflows.
4. Real-Time Validation Catches Issues During Design
Integrated platforms validate across both logical and physical domains:
Cross-view consistency (specifications matching, no orphans)
Installation viability (cable lengths, access, practical considerations) Catching problems during design costs minutes to fix versus hours or days during installation.
5. XTEN-AV X-DRAW Sets the Integration Standard
XTEN-AV X-DRAW stands as the best audio signal flow diagram maker for integrated workflows because:
15 Specialized Features specifically designed for AV integration:
Intuitive drag-and-drop interface across both signal flow and rack views
Rich audio component library with complete dual-attribute metadata
Smart auto-routing in signal flow with intelligent rack placement
Real-time validation across logical and physical constraints
Multi-layered diagrams supporting complex distributed systems
Reusable templates for both architecture and physical layout
Cloud-based collaboration with unified version control
Cross-page scalability for large installations
Export flexibility to all standard formats
Component metadata serving both functional and physical needs
Version history maintaining consistency across views
Cross-device accessibility from design desk to job site
Seamless AV workflow integration with racks, wiring, and BOMs
Leverage cloud collaboration for stakeholder coordination
Monitor metrics quantifying efficiency and quality gains
The era of disconnected signal flow and rack design tools creating manual synchronization burdens is ending. Professional AV integrators and system designers who embrace integrated platforms like XTEN-AV X-DRAW gain competitive advantages through faster design cycles, higher quality documentation, and installation efficiency that translates directly to project profitability and client satisfaction.
Stop designing your systems twice. Integrate your workflows and transform your results.
February 24, 2026 at 11:06 am, No comments Audio signal flow diagram makers integrate with AV rack design tools through unified data architectures, shared component libraries, bidirectional synchronization, and automated cross-referencing—enabling AV integrators and system designers to create cohesive documentation where logical signal paths, physical equipment layout, and installation details remain perfectly aligned throughout the design process. An audio signal
Signal Flow Diagrams are essential technical documents in audiovisual system integration, serving as visual roadmaps that define how audio signals, video signals, and control data traverse through complex AV installations. As AV technology evolves and systems become increasingly sophisticated, two fundamental questions dominate professional discussions: How detailed should a Signal Flow Diagram be? and Can AI automatically create Signal Flow Diagrams?
Choosing the best Signal Flow Diagram approach—whether manual creation, template-based design, or AI-powered automation—directly impacts project timelines, installation accuracy, client satisfaction, and ultimately, profitability for AV integrators and consultants. This comprehensive guide explores the optimal detail levels for various AV projects and reveals how AI-driven tools are revolutionizing signal flow diagram creation for professional system designers.
What is a Signal Flow Diagram?
A Signal Flow Diagram (also referred to as a signal path diagram, system flow diagram, or AV block diagram) is a technical illustration that visually represents the logical flow of audio, video, and control signals through an audiovisual system. Unlike equipment lists or physical wiring diagrams, signal flow diagrams focus on the functional relationships between AV components and the signal routing that enables system operation.
Primary Functions of Signal Flow Diagrams
Signal flow diagrams serve multiple critical purposes throughout the AV project lifecycle:
Design Documentation: Providing a visual blueprint for system architecture and signal routing decisions that stakeholders can review and approve.
Installation Guidance: Giving field technicians clear instructions about which devices connect to each other, through which ports, using which cable types.
Programming Reference: Enabling control system programmers to understand signal paths and switching matrices for automation logic development.
Troubleshooting Tool: Allowing service technicians to quickly trace signal paths, identify failure points, and diagnose system malfunctions.
Client Communication: Helping non-technical stakeholders understand system functionality and signal routing without requiring deep technical knowledge.
Documentation Archive: Creating permanent records for facility management, future upgrades, and system modifications.
Components Always Present in Signal Flow Diagrams
Professional signal flow diagrams consistently include:
Device Blocks: Representing all AV equipment including sources (PCs, media players, cameras), processors (DSPs, scalers, matrix switchers), amplifiers, displays, and control systems
Connection Lines: Showing signal paths between devices with directional arrows indicating flow direction
Signal Type Labels: Identifying signal formats such as HDMI, SDI, analog audio, Dante, AES/EBU, or control protocols
Input/Output Identifiers: Specifying which device ports connect to each other
Signal Flow Direction: Clearly indicating upstream sources and downstream destinations
The level of detail beyond these basics varies dramatically based on project requirements and intended use.
How Detailed Should a Signal Flow Diagram Be?
Determining the appropriate detail level for signal flow diagrams represents one of the most common challenges for AV integrators and system designers. Too little detail creates ambiguity and installation errors. Excessive detail buries critical information in unnecessary complexity.
Professional AV installations in corporate, education, or hospitality settings
Design development and consultant review
Most commercial AV projects requiring complete technical documentation
Installation packages for moderately experienced teams
What’s Included:
Full manufacturer and model numbers for all devices
Specific input/output port numbers for each connection
Detailed signal format specifications (HDMI 2.0 4K60, XLR Balanced, RS-232)
Cable type requirements and maximum length specifications
Signal processing stages explicitly shown
Network connections and IP addresses if applicable
Control signal paths clearly identified
Example: “Laptop HDMI Out → DM-MD8X8 Input 3 (HDMI 2.0, 4K30, 15m max CL3) → Display-Left HDMI In 1”Advantages: Provides complete information for accurate installation and equipment procurement. Enables precise BOM generation. Sufficient for most commercial projects.Limitations: Can become complex for very large systems. May overwhelm non-technical viewers.Time to Create: 2-4 hours manually for typical conference room, 15-30 minutes with AI-powered platforms like XTEN-AV X-DRAW.
Power requirements for each device (voltage, wattage, PoE specifications)
Rack location and U-space assignments
Network VLAN assignments and bandwidth calculations
Redundancy paths and failover configurations
Grounding and shielding requirements
Testing checkpoints and validation criteria
Example: “BRP-CONF-01 HDMI Out 1 (Pin 19 +5V) → C-HDMI-045 (15m CL3-rated) → MTX-MAIN-01 In 7 (Rack A, U12) → [detailed technical specs continue]”Advantages: Eliminates virtually all ambiguity. Enables precise installation execution by any qualified team. Comprehensive troubleshooting reference.Limitations: Very time-consuming to create manually. Can be overwhelming to read. Requires significant technical expertise to develop accurately.Time to Create: 8-20 hours manually for complex system, 1-3 hours with advanced AI tools.
Level 5: As-Built Documentation (Maximum Detail)
Appropriate For:
Permanent facility records and operations manuals
Mission-critical systems requiring comprehensive maintenance documentation
Government projects with strict documentation requirements
Historic preservation of major installations
Transfer of system ownership to facility management teams
What’s Included:
Everything from Level 4, plus:
Actual field-installed equipment with serial numbers
Precise cable routing paths and physical locations
Deviation documentation from original design
Field modification notes and engineering changes
Testing results and performance measurements
Configuration files and firmware versions
Warranty information and service contacts
Photographic documentation of installations
Example: Complete system record documenting every aspect of the installed system for long-term maintenance and future modifications.Advantages: Permanent comprehensive record. Invaluable for system modifications, troubleshooting, and facility management.Limitations: Extremely time-consuming. Only justified for specific project types or requirements.Time to Create: Must be compiled during and after installation. Ongoing documentation process.
Decision Matrix: Choosing the Right Detail Level
Project Type
Recommended Detail Level
Rationale
Residential Media Room
Level 2
Simple systems, experienced installers
Small Huddle Space
Level 2-3
Basic commercial requirement
Standard Conference Room
Level 3
Professional installation standard
Large Boardroom
Level 3-4
Complexity demands precision
Auditorium/Theater
Level 4
Mission-critical, complex systems
Multi-Building Campus
Level 4
Coordination across multiple teams
Broadcast Facility
Level 4-5
Zero-tolerance for errors
Emergency Operations Center
Level 4-5
Redundancy and reliability critical
The Golden Rule of Signal Flow Diagram Detail
Include the minimum detail necessary for successful project execution, but no less.Ask these qualifying questions:
Who will use this diagram? (Sales team vs. engineering team vs. installation crew)
What decisions does it support? (Budget approval vs. equipment procurement vs. physical installation)
What’s the system complexity? (Single room vs. multi-zone vs. campus-wide)
What’s the installer experience level? (Senior engineer vs. junior technician)
What are the consequences of errors? (Minor inconvenience vs. mission-critical failure)
Pro Tip: Create multiple versions at different detail levels for different stakeholders: simplified client-facing diagrams, detailed engineering specifications, and field-ready installation guides.
Key Components of a Well-Detailed Signal Flow Diagram
Regardless of detail level, certain components must be accurate and clear to ensure signal flow diagram effectiveness.
1. Device Identification and Specifications
Every AV device requires:
Minimum (All Detail Levels):
Device type (Display, Projector, DSP, Matrix Switcher, Amplifier)
Investing time in appropriate signal flow diagram detail delivers measurable returns across the project lifecycle.
For AV Integrators
Reduced Installation Time: Clear port-level specifications eliminate field guesswork, cutting installation hours by 25-40% on complex projects.
Fewer Change Orders: Identifying design conflicts and missing equipment during planning prevents expensive on-site corrections and scope creep.
Lower Material Waste: Accurate cable type and length specifications minimize over-ordering, reducing material costs by 15-20%.Faster Troubleshooting: When systems malfunction, detailed signal flow diagrams enable rapid fault isolation, reducing service calls and truck rolls.
Improved Team Coordination: Installers, programmers, and project managers work from the same reference, reducing miscommunication and rework.
Higher Win Rates: Detailed technical documentation in proposals demonstrates competency and professionalism, differentiating from competitors with generic quotes.
For AV Consultants
Design Validation: Detailed signal flow diagrams from integrators prove technical feasibility and reveal potential design flaws before construction.
Objective Bid Comparison: Evaluating competing proposals becomes standardized when all integrators provide equivalent detail levels.
Quality Control: During construction, consultants can verify as-built conditions match approved signal flow specifications
.Reduced Liability: When system failures occur, detailed design documentation definitively establishes whether issues stem from design errors or installation mistakes.
Client Communication: Explaining system architecture to non-technical facility owners becomes simpler with well-crafted visual documentation.
For System Designers
Design Confidence: Documenting signal paths at appropriate detail levels forces thorough consideration of system architecture, revealing problems during planning rather than installation.
Knowledge Transfer: Detailed diagrams enable smooth project handoffs between design teams, installation crews, and programming staff.
Portfolio Quality: Professional signal flow documentation showcases technical capabilities to potential clients and employers.
Standards Compliance: Systematic detail ensures adherence to AVIXA standards, manufacturer specifications, and building codes.
Scalability: Well-documented designs serve as templates for future similar projects, accelerating subsequent work.
For End Users and Facility Managers
Operational Understanding: Appropriate detail levels help facility staff comprehend system operation without overwhelming technical complexity.
Maintenance Efficiency: Service technicians can quickly identify component locations, signal paths, and replacement specifications from comprehensive documentation.
Future Expansion: Understanding existing system architecture enables cost-effective technology upgrades and capacity additions.
Vendor Independence: Clear system documentation prevents vendor lock-in and enables competitive bidding for future work.
Reduced Downtime: When failures occur, detailed signal flow diagrams accelerate troubleshooting and repair, minimizing operational disruption.
Can AI Automatically Create Signal Flow Diagrams?
The short answer: Yes, artificial intelligence can now automatically create professional Signal Flow Diagrams, and the technology has matured significantly in 2026.
The Evolution of AI in AV Design
First Generation (2018-2021): Basic template systems that selected pre-drawn diagrams based on simple equipment lists. Limited customization and no true intelligence.
Second Generation (2022-2023): Rule-based automation that could connect devices based on compatibility databases. Still required significant manual intervention and lacked contextual understanding.
Third Generation (2024-2026): True AI-powered platforms like XTEN-AV X-DRAW leveraging machine learning and natural language processing to generate, validate, and optimize signal flow diagrams from high-level system requirements.
How AI Signal Flow Diagram Creation Works
Modern AI-powered platforms employ multiple intelligence layers:
1. Requirements Interpretation
AI systems can process:
Natural Language Input: “I need a conference room with 4 HDMI laptops, wireless presentation, 2 displays, and ceiling speakers with DSP processing”
System Specifications: Structured equipment lists, room dimensions, usage patterns, and performance requirements
AI Processing: Natural Language Processing (NLP) algorithms parse requirements, identify AV components, understand spatial relationships, and extract functional specifications.
2. Device Selection and Compatibility Validation
AI recommends appropriate equipment based on:
Signal format requirements and compatibility
Input/output counts matching source and destination quantities
Manufacturer preferences and equipment availability
Budget parameters and cost optimization
Historical performance data from similar projects
Validation: Machine learning models trained on thousands of successful installations ensure device compatibility and identify potential integration issues.
3. Intelligent Signal Routing
AI automatically maps signal paths by:
Identifying logical connections between sources and destinations
Routing through appropriate processing stages (switchers, scalers, DSPs)
Selecting optimal signal formats for each segment
Calculating cable lengths and suggesting extenders where needed
Implementing redundancy for critical paths when required
Optimizing for signal quality, latency, and cost efficiency
Smart Routing: Algorithms understand that a microphone cannot connect directly to a speaker—AI automatically inserts mixer, DSP, amplifier, and crossover stages.
4. Real-Time Error Detection and Correction
AI continuously validates the evolving signal flow diagram:
Compatibility Checking: Flagging mismatched signal types, bandwidth limitations, and protocol incompatibilities
Completeness Verification: Identifying unconnected inputs/outputs, missing power supplies, and orphaned devices
Best Practice Enforcement: Ensuring balanced audio connections, proper impedance matching, HDCP compliance chains, and grounding standards
Optimization Suggestions: Recommending equipment consolidation, alternative routing, or cost-saving substitutions
Self-Correction: When errors are detected, AI suggests specific fixes: “Add HDMI-to-SDI converter between Device A and Device B”
5. Automatic BOM Synchronization
AI-generated diagrams dynamically link to Bills of Materials:
Real-Time Updates: Adding a device to the signal flow diagram instantly updates equipment lists, quantities, and pricing
Change Propagation: Modifying a device model automatically adjusts signal path specifications, BOM, and documentation
Procurement Optimization: AI identifies opportunities to consolidate devices, bulk-purchase cables, or substitute equivalent equipment for cost savings
6. Multi-Version Generation
Advanced AI can create multiple design alternatives automatically:
Budget Versions: “Good-Better-Best” system designs at different price points Configuration Options: Multiple operating modes for flexible spacesManufacturer Variations: Equivalent designs using different equipment vendorsFuture-Proofing Options: Base system plus expansion capabilities
Current Capabilities and Limitations (2026)
What AI Does Exceptionally Well
✓ Rapid diagram generation from system requirements (minutes vs. hours) ✓ Compatibility validation across thousands of device combinations ✓ Standard system designs (conference rooms, classrooms, huddle spaces) ✓ Error detection for common signal flow mistakes ✓ BOM accuracy and real-time synchronization ✓ Multiple design iterations for comparison ✓ Standards enforcement (AVIXA, manufacturer specs) ✓ Documentation consistency across projects
Where AI Still Benefits from Human Expertise
△ Highly unique custom designs without precedent △ Aesthetic and artistic judgments for experiential installations △ Complex political/organizational constraints in large institutions △ Extreme budget optimization requiring deep market knowledge △ Integration with legacy or obsolete equipment △ Unusual spatial or architectural challengesThe Reality: AI handles 85-90% of signal flow diagram creation tasks autonomously. Human designers focus on the creative, strategic, and exceptional situations where AI needs guidance.
The ROI of AI-Generated Signal Flow Diagrams
Time Savings:
Manual creation: 4-20 hours for complex systems
AI-assisted creation: 15 minutes to 2 hours
Savings: 80-95% reduction in drafting time
Error Reduction:
Manual error rate: 15-25% of complex diagrams contain connectivity mistakes
AI validation error rate: <2%
Result: 90% fewer field corrections and change orders
Financial Impact: Single project example (Large conference room):
Design time saved: 12 hours × $75/hour = $900
Field corrections avoided: 8 hours × $95/hour = $760
Change order elimination: $1,200
Total value: $2,860 per project
For an integrator completing 50 projects annually, AI-powered signal flow tools deliver $143,000 in direct value, easily justifying any reasonable software subscription cost.
Step-by-Step: How AI-Based Signal Flow Generation Works
Let’s examine the practical workflow for creating signal flow diagrams using AI-powered platforms like XTEN-AV X-DRAW.
Step 1: Project Setup and Requirements Input
Action: Define the project parameters and system requirements.Methods:
Natural language description: Type or dictate system goals in plain English
Structured forms: Fill in fields for room size, user count, applications, budget
Equipment selection: Choose from device library or specify preferred components
Template starting point: Select similar past projects as foundations
Example Input: “Corporate boardroom for 20 people. Need wireless presentation from any laptop, 2x 85-inch displays, video conferencing with ceiling mic array and soundbar, touch panel control. Budget $75K.”AI Processing: Platform interprets requirements, identifies necessary AV components, and determines system architecture.
Step 2: AI Generates Initial Signal Flow Diagram
Automated Process:
Device Selection: AI recommends appropriate equipment:
Wireless presentation gateway (4K-capable)
2x Large format displays (85″, 4K)
Video conferencing codec
Ceiling mic array with Dante output
Dante-compatible soundbar
Control processor with touchpanel
Network switch for AV-over-IP and control
Required cables and mounting hardware
Signal Path Creation: AI auto-maps connections:
Wireless gateway → HDMI → Displays
Video conference codec → HDMI → Displays
Ceiling mics → Dante → Codec audio input
Codec audio output → Dante → Soundbar
All devices → Control processor (TCP/IP via network)
User touchpanel → Control processor
Processing Stages: AI inserts necessary intermediate devices:
HDMI matrix for source switching to dual displays
Network switch with VLAN separation for AV traffic
Result: Complete initial signal flow diagram appears in 30-90 seconds.
Step 3: Review and Customization
Designer Actions:Verify Equipment Selections: Confirm AI-recommended devices match client preferences, manufacturer standards, or existing infrastructure compatibilityAdjust Signal Paths: Modify routing if alternative signal flows are preferredAdd Specialized Requirements: Insert recording devices, streaming encoders, additional displays, or zone controls not identified by initial AI analysisRefine Detail Level: Adjust port labeling, cable specifications, and annotation detail based on project needsXTEN-AV Platform: Provides drag-and-drop interface for rapid adjustments. Changes automatically trigger compatibility rechecking and BOM updates.
Step 4: AI Validation and Error Detection
Automatic Checks:Signal Compatibility: Verifying all connections use compatible signal formatsPort Availability: Ensuring sufficient inputs/outputs on all devicesBandwidth Validation: Confirming network capacity for AV-over-IP streamsPower Requirements: Checking PoE budget, circuit capacity, and UPS sizingDistance Limitations: Flagging cable runs exceeding maximum lengths for signal typesMissing Devices: Identifying required components (power supplies, converters, extenders)Feedback: AI highlights issues with color-coding and provides specific correction suggestions:
🔴 “Error: HDMI run exceeds 15m maximum. Add HDBaseT extender.”
Academic learning environments teaching signal flow principles
One-off unusual designs without precedent
Budget-constrained situations where software investment isn’t justified
Not Recommended For:
Professional commercial installations
Projects with consultant oversight
Time-sensitive proposals
Complex multi-zone systems
Repeat/similar projects (where AI or templates deliver ROI)
The Hybrid Approach: Best of Both Worlds
Many successful AV integrators employ hybrid workflows:
AI generates initial design rapidly (XTEN-AV)
Designer reviews and applies creative customization
AI validates modifications for technical accuracy
Manual refinements for aesthetic presentation
AI synchronizes final BOM and pricing
Result: Speed and accuracy of AI combined with human creativity and judgment.
XTEN-AV X-DRAW: The Best AI-Powered Signal Flow Diagram Generator for 2026
For AV integrators, consultants, and system designers seeking the optimal balance of automation, accuracy, and flexibility, XTEN-AV X-DRAW represents the industry’s most advanced signal flow diagram generation platform.
Why XTEN-AV X-DRAW Leads the AI Signal Flow Market
Unlike general diagramming tools or first-generation AV software with basic automation, XTEN-AV delivers purpose-built AI intelligence specifically engineered for audiovisual system integration.
Key Features That Make XTEN-AV Signal Flow Diagram Stand Out
1. AI-Powered Signal Flow Automation
XTEN-AV’s signal flow tool leverages intelligent automation to generate structured diagrams based on system inputs. Instead of manually connecting each device, the platform auto-maps signal paths between sources, DSPs, amplifiers, and endpoints—reducing drafting time and human error.Why it matters: Faster project turnaround and improved design accuracy for AV integrators.Real-World Performance:
Intelligence Depth: The AI doesn’t just connect devices—it understands signal flow logic. When you add a microphone, XTEN-AV automatically includes mixer, DSP, amplifier, and speaker stages with appropriate signal processing.
2. Drag-and-Drop Device Library
The tool includes a comprehensive AV device library with pre-configured components such as:
Displays (LCD, LED, projection, video walls)
Projectors (laser, lamp, ultra-short-throw)
DSPs (Biamp, QSC, Crestron, Symetrix, BSS)
Matrix switchers (Crestron, Extron, Kramer, Atlona, Black Box)
Sources (PCs, media players, wireless presentation, document cameras)
Users can quickly drag devices onto the canvas and build structured signal paths in minutes.Advantage: Eliminates repetitive diagram creation and speeds up conceptual design. Every device includes accurate input/output configurations, signal format capabilities, and specifications—no need to reference datasheets.Library Updates: XTEN-AV continuously updates the device library with new product releases, ensuring access to current manufacturer offerings.
3. Auto-Connection & Smart Routing
XTEN-AV intelligently suggests and auto-connects compatible input and output ports. It understands:
Analog vs. digital signals (prevents incompatible connections)
Audio vs. video paths (maintains signal type purity)
Balanced vs. unbalanced connections (suggests appropriate matching)
Benefit: Minimizes wiring mistakes and ensures technically correct routing.Intelligent Prevention: The system blocks illogical connections. You cannot connect an HDMI output to an SDI input without adding a format converter—XTEN-AV either prevents the connection or automatically suggests the required intermediate device.Smart Suggestions: When you connect a 4K source to a 1080p display, XTEN-AV prompts: “Downscaling required. Add scaler between devices?”
4. Real-Time Error Detection
The platform identifies common signal flow mistakes such as:
Unconnected outputs (sources not routed anywhere)
Mismatched signal types (analog to digital without conversion)
Overloaded DSP channels (too many inputs for available processing)
Incorrect routing paths (signals passing through inappropriate devices)
Bandwidth violations (network capacity exceeded for AV-over-IP)
Distance limitations exceeded (HDMI beyond 15m without extenders)
Power requirement gaps (missing PoE budget, phantom power)
HDCP breakage (non-compliant device in content protection chain)
This validation layer helps designers avoid costly on-site troubleshooting.Visual Feedback: Errors appear with color-coded indicators:
🔴 Critical errors (system won’t function)
🟡 Warnings (may cause problems)
🟢 Validated (technically correct)
Correction Guidance: Each error includes specific remediation steps: “Add XLR-to-Dante adapter between mic and network” or “Install HDMI repeater for 25m run.”
5. Automatic BOM (Bill of Materials) Generation
Signal flow diagrams automatically sync with the project’s Bill of Materials.When you update:
Add/remove devices
Change models
Modify quantities
Adjust configurations
The BOM updates in real time.Impact: Accurate proposals, streamlined procurement, and fewer scope mismatches.Bidirectional Sync: Changes flow both ways:
Modify the signal flow diagram → BOM updates automatically
Change equipment in BOM → Signal flow diagram updates with new device specifications
Training materials (operational guides for end users)
This removes the need for third-party diagram tools.One-Click Proposal Generation: XTEN-AV assembles complete proposals including:
Executive summary
System overview with high-level signal flow diagram
Detailed specifications with technical signal flow diagram
Equipment schedule with photos and descriptions
Pricing tables and payment terms
Project timeline and milestones
Warranty information and support plans
Format Flexibility: Export to PDF, Word, PowerPoint, or web-based interactive proposals.
8. Scalable for Any Project Size
From small conference rooms to complex multi-zone hospitality or campus-wide AV deployments, the tool supports scalable architecture and structured routing.Small Projects (Single Rooms):
Rapid drag-and-drop design
Template starting points for common room types
Instant BOM and pricing
Medium Projects (Multi-Room Facilities):
Zone-based organization
Shared resource management (central DSP, distribution amplifiers)
Hierarchical diagrams showing system and zone levels
Large Projects (Campus/Enterprise):
Building-level architecture
Centralized equipment rooms with distributed endpoints
Network backbone visualization
Multi-designer collaboration
Phased implementation planning
Architectural Intelligence: XTEN-AV understands master/slave relationships, signal distribution hierarchies, and centralized vs. distributed system topologies.
9. Custom Labeling & Branding
Users can:
Add company branding (logos, colors, fonts, headers/footers)
Create style templates for different project types
Define cable color standards for visual clarity
This enhances professional presentation quality.Brand Consistency: Every proposal, signal flow diagram, and documentation package automatically matches your corporate identity, creating professional consistency that elevates perceived value.Template Library: Save company-specific templates for:
Standard conference room configurations
Typical classroom layouts
Hospitality patterns
Corporate office standards
Result: New projects start from proven templates, accelerating design while maintaining consistency.
Installation teams (simplified field guides, mobile-friendly formats)
CAD integration (DWG, DXF for architectural drawings)
Third-party software (Visio XML, SVG for consultants)
Web embedding (interactive HTML diagrams)
Documentation archives (version-controlled PDF libraries)
Ensuring smooth communication between sales, design, and execution teams.Multi-Audience Optimization: Export the same project as:
High-level block diagram for client executive presentation
Detailed technical diagram for consultant review
Port-by-port installation guide for field technicians
Interactive web diagram for facility manager training
All generated from single source project.
XTEN-AV X-DRAW: Transforming the AV Design Process in 2026
XTEN-AV X-DRAW delivers more than diagram automation—it represents a complete design ecosystem that unifies conceptualization, documentation, proposal generation, procurement, and project management into a seamless cloud-based platform.Key Differentiators:
True AI intelligence vs. simple template systems
Complete project lifecycle coverage vs. point tools
Real-time collaboration vs. file-based workflows
Built-in validation vs. manual error checking
Dynamic BOM sync vs. disconnected systems
For AV professionals competing in 2026’s demanding market, XTEN-AV X-DRAW provides the technological foundation to deliver faster, more accurate, and more profitable projects while building reputations for excellence.
AI & Future Trends in Signal Flow Diagram Design
The rapid advancement of artificial intelligence in AV system design shows no signs of slowing. Understanding emerging trends helps AV professionals prepare for the next evolution.
Current State: AI-Assisted Design (2026)
Today’s AI platforms provide:Intelligent Automation: Auto-routing, device selection, compatibility validationError Prevention: Real-time checking against thousands of known failure modesOptimization: Suggesting cost reductions, performance improvements, or alternative approachesLearning: Improving suggestions based on user corrections and project outcomesIntegration: Unifying signal flow, BOM, pricing, proposals, and documentation
Near-Term Evolution (2027-2028)
Generative AI Design Exploration
Capability: AI generates multiple complete system designs from high-level goals.Example: “Design three auditorium systems: budget option $150K, mid-tier $250K, premium $400K.”Output: Three fully-specified signal flow diagrams, BOMs, proposals, and performance comparisons in minutes.Impact: Designers rapidly explore design space, presenting clients with optimized alternatives for informed decision-making.
Natural Language Design Modification
Capability: Conversational AI enables verbal design adjustments.Example: “Add a third display in the back of the room, fed from the main matrix, controlled by the same touchpanel.”AI Response: Signal flow diagram updates automatically with new display, cable run, matrix output, and control integration—BOM and pricing adjust instantly.Impact: Design iterations occur at conversation speed rather than manual drafting speed.
Predictive Performance Modeling
Capability: AI predicts system performance before installation.Metrics:
Audio intelligibility scores based on room acoustics and speaker placement
Video quality predictions considering cable lengths and signal processing
Network latency calculations for AV-over-IP systems
System reliability probability based on equipment selection
Impact: Designers identify potential performance problems during planning, not after installation.
Learning from Installation Outcomes
Capability: AI analyzes project outcomes to improve future designs.Data Sources:
Installation time actual vs. estimated
Change orders and their causes
Commissioning issues and resolutions
Client satisfaction ratings
Long-term reliability data
Impact: AI continuously improves recommendations, avoiding equipment or configurations with poor field performance track records.
Mid-Term Innovation (2029-2030)
Autonomous System Optimization
Capability: AI autonomously optimizes existing designs for multiple objectives.Optimization Goals:
Cost minimization while maintaining performance
Energy efficiency reduction
Installation time reduction
Long-term maintenance cost reduction
Scalability for future expansion
Process: AI explores thousands of equipment combinations and routing variations, identifying Pareto-optimal solutions.Impact: Human designers review and select from AI-generated optimal solutions rather than manually iterating designs.
Digital Twin Integration
Capability: Virtual replicas of physical AV systems enable pre-deployment testing.Applications:
Test control system programming in virtual environment before installation
Simulate room acoustics and audio coverage
Model network traffic patterns for AV-over-IP
Train facility staff on virtual systems before physical systems exist
Impact: Dramatically reduced commissioning time and post-installation troubleshooting.
Augmented Reality Design Visualization
Capability: AR overlays signal flow diagrams and equipment locations onto physical spaces.Use Cases:
Designers visualize equipment placement in actual rooms during site surveys
Installers see cable routing paths overlaid on walls and ceilings
Clients experience system interfaces in their actual spaces before installation
Service technicians see signal flow overlaid on equipment racks during troubleshooting
Impact: Bridging the gap between abstract diagrams and physical installations.
Long-Term Vision (2031+)
Fully Autonomous System Design
Capability: AI designs complete AV systems with minimal human input.Input: Building plans, room usage descriptions, budget, performance requirementsOutput: Complete system design, signal flow diagrams, installation plans, equipment procurement, and commissioning proceduresHuman Role: Reviewing, approving, and providing creative guidance on AI-generated designs rather than creating from scratch
Predictive Maintenance Integration
Capability: Signal flow diagrams become living documents updated with real-time system health.Features:
Equipment status indicators showing operational health
Predictive failure warnings: “HDMI extender showing early failure signs”
Automated replacement recommendations with updated BOMs
Proactive service scheduling before failures occur
Impact: Signal flow diagrams evolve from static design documents to dynamic operational dashboards.
Self-Optimizing Systems
Capability: Installed systems automatically adjust signal routing based on usage patterns and performance data.Examples:
Audio mixing parameters self-tune based on room occupancy and ambient noise
Video routing anticipates user needs based on historical patterns
Network paths dynamically optimize for lowest latency
Energy consumption minimizes during low-usage periods
Impact: AV systems continuously improve performance without manual intervention.
Preparing for the AI-Driven Future
For AV Professionals:Embrace AI Tools Now: Gain experience with current AI platforms like XTEN-AV to build competency before AI becomes universalDevelop Complementary Skills: Focus on creative problem-solving, client relationships, strategic planning, and complex troubleshooting—areas where human expertise remains valuableContinuous Learning: Stay current with emerging AI capabilities and industry trendsStrategic Thinking: Shift from manual execution to design validation, quality control, and optimization reviewThe Future Reality: AI won’t eliminate AV designers—it will amplify their capabilities, enabling individual professionals to handle projects of unprecedented complexity while delivering superior quality at higher speed.
Common Mistakes in Signal Flow Diagram Creation
Even with AI assistance, understanding common errors helps designers avoid pitfalls and validate automated outputs.
Mistake #1: Insufficient Detail for Project Complexity
Problem: Creating overly simplified diagrams for complex systems or excessively detailed diagrams for simple installations.Example: A multi-zone auditorium documented with only a high-level block diagram lacking port assignments—installers guess connections, resulting in cross-wired zones.Solution: Match detail level to project requirements using the five-level framework outlined earlier. When uncertain, err toward more detail for complex projects.AI Prevention: XTEN-AV automatically adjusts detail level recommendations based on system complexity detected during design.
Mistake #2: Missing Signal Processing Stages
Problem: Showing direct connections between devices that require intermediate signal processing.Example: Microphone to speaker without indicating mixer, DSP, amplifier, and crossover stages.Consequence: BOM missing critical equipment, budget estimates wildly inaccurate, installation impossible to execute as documented.Solution: Every signal transformation (level, format, impedance) requires an explicit processing device in the diagram.AI Prevention: Smart routing automatically inserts required intermediate devices when you connect incompatible equipment.
Mistake #3: Inconsistent Naming Across Documents
Problem: Devices labeled differently in signal flow diagrams, equipment schedules, cable schedules, and control system programming.Example: “Display 1” in signal flow, “MON-CONF-01” in equipment list, “Left Screen” in cable schedule, “TP_DISPLAY_LEFT” in control code.Consequence: Installation confusion, programming errors, documentation useless for troubleshooting.Solution: Establish naming convention standards before starting documentation. Use consistent device IDs across all project documents.AI Prevention: XTEN-AV enforces naming consistency automatically—one device ID propagates to all documents.
Mistake #4: Ignoring Network Infrastructure for Networked AV
Problem: Treating Dante, NDI, or SDVoE as simple point-to-point connections without documenting network requirements.Example: Signal flow diagram shows Dante microphones to Dante speakers with a line, but network switch, VLANs, multicast, and bandwidth not specified.Consequence: Installation teams deploy inadequate network infrastructure, system experiences dropouts, latency, or complete failure.Solution: For networked AV, create supplementary network topology diagrams showing switch specifications, port assignments, VLAN configuration, and bandwidth calculations.AI Prevention: XTEN-AV automatically includes network infrastructure requirements when AV-over-IP devices are added.
Mistake #5: Unclear Signal Flow Direction
Problem: Connection lines without directional arrows or bidirectional arrows on unidirectional connections.Example: Line between matrix switcher and display without arrow—is this an output or an input?Consequence: Installers connect devices backward, signals don’t flow, time wasted troubleshooting.Solution: Every connection requires a directional arrow. Bidirectional arrows only for truly bidirectional signals (interactive displays, control processors).AI Prevention: Automated routing applies correct directionality based on device types and port functions.
Mistake #6: Missing Cable Specifications
Problem: Signal flow diagrams showing connections without cable type, length limitations, or special requirements.Example: “Source to Display” without specifying HDMI 2.0, maximum 15m, CL3-rated cable.Consequence: Installers use incorrect cable types, runs exceed maximum distances, code violations, signal failures.Solution: Annotate every connection with cable type, signal format, maximum length, and jacket rating (Level 3 detail minimum).AI Prevention: Smart routing automatically adds cable specifications based on signal types and distances calculated from room layouts.
Mistake #7: No Validation or Peer Review
Problem: Designers finalize signal flow diagrams without validation checks or peer review.Example: Signal flow diagram completed and sent to installation without anyone catching a mismatched signal type or missing device.Consequence: Expensive field corrections, project delays, damaged reputation.Solution: Implement mandatory peer review processes. Use validation checklists. Have different team member review before finalizing.AI Prevention: Real-time error detection provides continuous validation, catching most issues during creation.
Mistake #8: Static Diagrams for Flexible Systems
Problem: Single signal flow diagram for systems that operate in multiple configurations or modes.Example: Flexible classroom that operates in lecture mode, collaboration mode, and video conference mode—only one configuration documented.Consequence: Programming team doesn’t understand all operating modes, client disappointed that system capabilities aren’t fully realized.Solution: Create multiple diagrams for different operating modes or use annotations indicating switching states and mode-specific routing.AI Prevention: XTEN-AV supports multiple configuration views within single project, showing different signal routing for different operational modes.
Mistake #9: Overlooking Control System Details
Problem: Signal flow diagrams focus on audio/video while giving control systems minimal attention.Example: Control processor shown connected to devices with generic “Control” label—no indication of protocols, addresses, or port numbers.Consequence: Programming team lacks information for control system development, project delayed during commissioning.Solution: Document control connections with same detail level as audio/video: control protocol (RS-232, TCP/IP), port numbers, IP addresses, baud rates.AI Prevention: Intelligent device library includes control specifications—when you connect control processor, AI suggests appropriate protocols and settings.
Mistake #10: No As-Built Updates
Problem: Original design diagrams never updated to reflect actual field conditions and installation deviations.Example: Design specified equipment location A, but field conditions required location B. Diagram never updated. Service technician wastes hours searching wrong location.Consequence: Documentation becomes useless for troubleshooting and maintenance. Future modifications based on incorrect information.Solution: Implement mandatory as-built documentation process. Field teams update diagrams during installation. Final deliverable reflects actual installed system.AI Prevention: Cloud-based collaboration enables real-time updates from field teams. Mobile access lets installers update diagrams on-site.
Best Practices for Creating Effective Signal Flow Diagrams
Implementing these professional practices ensures consistently high-quality signal flow documentation.
Practice #1: Start with Clear Requirements
Process:
Document project goals and system functions
Identify all sources, processors, and destinations
Understand usage scenarios and operational modes
Establish budget parameters and equipment preferences
Clarify documentation requirements and detail expectations
Benefit: Complete requirements prevent mid-design changes and rework.
Practice #2: Select Appropriate Detail Level
Process:
Assess project complexity (single room vs. multi-zone vs. campus)
Consider installer experience (seasoned professionals vs. junior technicians)
Evaluate stakeholder needs (client proposal vs. engineering documentation)
Determine consequences of errors (minor inconvenience vs. mission-critical)
Choose detail level from five-level framework
Benefit: Optimal detail balances clarity with completeness.
Practice #3: Use Standard Symbols and Conventions
Standards:
Device blocks: Rectangles with equipment names
Signal lines: Solid lines with directional arrows
Control signals: Dashed lines (distinct from audio/video)
Network connections: Different color or line style
Placement: Use callout boxes or legends to avoid cluttering the main diagram.Benefit: Critical information immediately visible without referencing separate documents.
Practice #7: Create Multiple Views for Complex Systems
View Types:
System overview: High-level block diagram for executives
Zone diagrams: Detailed views of each functional area
Technical specification: Port-level detail for installation
Network topology: Infrastructure and VLAN layout
Control architecture: User interfaces and automation logic
Benefit: Each stakeholder receives appropriately detailed documentation.
Practice #8: Validate Before Finalizing
Validation Checklist:
✓ Every output connected to appropriate input
✓ No orphaned devices (equipment not in signal path)
✓ Signal types compatible at every connection
✓ Processing stages present for all transformations
✓ Cable specifications complete
✓ Control connections documented
✓ Network requirements specified (if applicable)
✓ Device naming consistent across documents
✓ Peer review completed
Benefit: Catches errors during design when fixes cost minutes, not hours or days.
Practice #9: Leverage AI Tools Where Appropriate
AI Applications:
Initial diagram generation from requirements
Compatibility validation
Error detection
BOM synchronization
Multi-version creation
Human Oversight:
Design intent validation
Creative optimization
Client-specific customization
Final quality review
Benefit: AI handles repetitive tasks and technical validation. Humans focus on strategy and creativity.
Practice #10: Maintain As-Built Documentation
Process:
Installation teams note all deviations from design
Field updates captured in cloud platform or mobile app
Commissioning reveals final configurations
As-built diagrams created incorporating all changes
Documentation delivered to client as permanent record
Benefit: Facility managers and service technicians work from accurate system documentation.
FAQ Section: Signal Flow Diagram Questions Answered
How detailed should a Signal Flow Diagram be for a conference room?
For a standard conference room, use Level 3 detail: Include full manufacturer and model numbers, specific input/output port numbers, signal format specifications (HDMI 2.0 4K60), cable types, and maximum lengths. This provides sufficient information for accurate equipment procurement and installation without overwhelming complexity.Example: “Laptop-01 HDMI Out → MTX-CONF-01 Input 3 (HDMI 2.0, 4K30, Cat6 15m max) → Display-Left HDMI In 1”
Can AI create Signal Flow Diagrams without any human input?
Partially. Modern AI like XTEN-AV X-DRAW can generate complete signal flow diagrams from system requirements (room size, device counts, functions), select appropriate equipment, route signals, and validate compatibility. However, human input remains valuable for creative customization, client-specific preferences, unusual constraints, and final quality review. The optimal workflow combines AI speed and accuracy with human judgment and creativity.
What’s the difference between high-level and detailed Signal Flow Diagrams?
High-level diagrams (Level 1-2) show major equipment categories and basic signal flows—appropriate for client presentations and budget estimates. Detailed diagrams (Level 3-4) include specific models, port numbers, cable specifications, and network topology—necessary for installation and equipment procurement. Choose based on audience and purpose: executives need high-level, installers need detailed.
Should Signal Flow Diagrams include network infrastructure?
Yes, for networked AV systems (Dante, NDI, SDVoE, control over IP). Include network switches with specifications, VLAN assignments, bandwidth calculations, IP addressing, and multicast requirements. Networked AV fails when network infrastructure is inadequate—documenting requirements in signal flow diagrams ensures proper installation. For simple systems without AV networking, network infrastructure can be omitted.
How do I show multiple operating modes in one Signal Flow Diagram?
Three approaches:
Separate diagrams for each mode (“Presentation Mode,” “Video Conference Mode,” “Training Mode”)
Layered diagram showing all connections with color-coding or line styles indicating which are active in each mode
Annotations describing switching configurations: “Display-Left shows Matrix Out 1 in presentation mode, Out 3 in video conference mode”
For systems with many modes, separate diagrams provide clearest communication. For few modes, annotations work well.
What software is best for creating Signal Flow Diagrams in 2026?
AI-powered platforms like XTEN-AV X-DRAW lead the market, offering intelligent automation, error detection, BOM integration, and 10x speed improvements over manual tools. Traditional options (Visio, Lucidchart) remain viable for very simple systems or budget constraints, but lack AV-specific intelligence and validation capabilities. Professional AV integrators increasingly adopt specialized platforms for competitive advantage.
How long should it take to create a Signal Flow Diagram?
Manual creation:
Simple huddle room: 1-2 hours
Standard conference room: 3-6 hours
Large boardroom: 6-10 hours
Multi-room: 15-30 hours
AI-assisted (XTEN-AV):
Simple huddle room: 5-10 minutes
Standard conference room: 15-30 minutes
Large boardroom: 30-60 minutes
Multi-room: 2-4 hours
Time savings: 80-95% with AI platforms while improving accuracy.
Should I create separate diagrams for audio, video, and control?
Depends on complexity:Combined diagram (most cases): Shows all signals on one diagram using color-coding or line styles to differentiate—works well for small to medium systems.Separate diagrams (complex systems): Creates distinct audio routing diagram, video routing diagram, and control architecture diagram—appropriate for large installations where combined diagram becomes too cluttered.Best practice: Start with combined diagram. If readability suffers, split into separate signal-specific diagrams.
How do I handle revisions and version control for Signal Flow Diagrams?
Essential practices:
Version numbering: v1.0 (initial), v1.1 (minor revision), v2.0 (major revision)
Revision history: Document what changed in each version
Date stamps: Clear dating on all diagrams
Archive previous versions: Never overwrite—maintain complete history
Approval signatures: Track who approved each version
Cloud platforms like XTEN-AV automate version control with complete change history, rollback capabilities, and activity logging.
What are the most common Signal Flow Diagram mistakes to avoid?
Top errors:
Mismatched signal types (analog to digital without conversion)
Missing processing stages (mic to speaker without DSP/amp)
Inconsistent naming across documents
Insufficient detail for project complexity
No validation or peer review
Ignoring network infrastructure for networked AV
Missing cable specifications
Unclear signal flow direction
Static diagrams for flexible systems
No as-built updates after installation
Prevention: Use AI validation tools, implement peer review, and follow best practices outlined in this guide.
Conclusion: Key Takeaways for Signal Flow Diagram Excellence
Signal Flow Diagrams remain the cornerstone of successful AV system integration, serving as the universal language that connects designers, installers, programmers, and facility managers throughout the project lifecycle and beyond.
Essential Principles for Detail Level Selection
Match complexity to context: Simple systems require basic block diagrams. Complex installations demand port-level specifications. The five-level framework provides clear guidance:
Level 1 (Conceptual): Sales presentations and budget estimates
Level 2 (System Overview): Basic client proposals and simple systems
Level 3 (Technical Specification): Professional commercial installations (most common)
Level 4 (Engineering Specification): Complex multi-zone and mission-critical systems
Level 5 (As-Built Documentation): Permanent facility records
Golden Rule: Include the minimum detail necessary for successful project execution, but no less.
The AI Revolution in Signal Flow Design
AI-powered platforms like XTEN-AV X-DRAW have fundamentally transformed signal flow diagram creation:Speed: 10x faster than manual methods (minutes vs. hours) Accuracy: 90% fewer errors through built-in validationIntegration: Dynamic BOM synchronization eliminating data entry Collaboration: Cloud-based real-time teamwork Intelligence: Smart routing and compatibility checking prevent common mistakesReality Check: AI doesn’t replace AV designers—it amplifies their capabilities, enabling professionals to handle more projects with higher quality while focusing on strategic thinking and creative problem-solving.
Best Practices for Professional Success
Start with complete requirements before drawing
Choose appropriate detail levels for each audience and purpose
Implement consistent naming conventions across all documents
Leverage AI tools for speed, accuracy, and validation
Perform peer reviews before finalizing
Create multiple views for complex systems (overview, technical, installation)
Document network infrastructure for networked AV
Maintain as-built documentation reflecting actual installations
Use color-coding and annotations for clarity
Continuously update knowledge as AI capabilities evolve
The Competitive Advantage
AV integrators who master both fundamental signal flow principles AND modern AI-powered tools gain decisive competitive advantages:Faster proposals: Deliver comprehensive designs in hours instead of days Higher accuracy: Fewer change orders and field corrections protect margins Professional differentiation: Detailed technical documentation wins competitive bids Scalability: Handle more projects without proportionally increasing design staffClient satisfaction: Clear documentation and error-free installations build reputation
Action Steps for AV Professionals
For Integrators:
Evaluate current signal flow diagram processes for time waste and error rates
Trial AI-powered platforms like XTEN-AV on actual projects
Calculate ROI based on time savings and error reduction
Train entire team on best practices and chosen tools
Standardize company-wide approaches to documentation
For Designers:
Master both traditional signal flow principles AND modern AI tools
Build expertise in detail level selection for different project types
Develop validation checklists for quality control
Create personal templates for common system types
Stay current with emerging AI capabilities and industry trends
For Consultants:
Specify minimum detail levels in project specifications
Require AI-validatedsignal flow diagrams from integrators
Use signal flow accuracy as evaluation criterion in bid reviews
Maintain independent validation tools and expertise
Educate clients on value of professional system documentation
The Path Forward
As AI technology continues advancing, the line between designer and design tool blurs. The most successful AV professionals won’t resist this evolution—they’ll embrace it, combining human creativity, strategic thinking, and relationship skills with AI-powered speed, accuracy, and scale.Signal Flow Diagrams will remain central to AV system integration, but how they’re created will continue evolving rapidly. The choice facing AV professionals is clear: adapt to AI-augmented workflows now, or fall behind competitors who do.The future of AV design isn’t human OR AI—it’s human AND AI, working in powerful partnership to deliver audiovisual systems of unprecedented quality, reliability, and sophistication.Your next step: Evaluate whether your current signal flow diagram processes deliver the speed, accuracy, and competitive advantage your business demands in 2026. If not, AI-powered platforms like XTEN-AV X-DRAW provide the solution.
February 27, 2026 at 11:13 am, No comments Signal Flow Diagrams are essential technical documents in audiovisual system integration, serving as visual roadmaps that define how audio signals, video signals, and control data traverse through complex AV installations. As AV technology evolves and systems become increasingly sophisticated, two fundamental questions dominate professional discussions: How detailed should a Signal Flow Diagram