
May 25, 2026 at 11:07 am,
No comments
In the world of professional AV system design, precision is everything. When planning projection installations for conference rooms, home theaters, classrooms, or corporate environments, AV integrators face a critical decision: which calculation tool should they use? While many professionals casually use terms like screen size calculator, throw distance calculator, and monitor size calculator interchangeably, these tools serve fundamentally different purposes and produce distinctly different outputs.
The core difference is simple yet crucial: A projector screen size calculator determines the optimal display dimensions based on viewing requirements, room geometry, and audience needs. In contrast, a throw distance calculator determines where to physically position a projector to achieve a specific screen size based on the projector’s optical characteristics. Understanding this distinction is essential because using the wrong tool at the wrong stage of design leads to specification errors, installation complications, and dissatisfied clients.
The importance of choosing the best monitor size calculator or screen sizing tool cannot be overstated in 2026’s increasingly complex AV landscape. With the proliferation of ultra-short-throw projectors, laser projection systems, 4K and 8K resolution displays, and hybrid meeting environments, the stakes for accurate calculations have never been higher. Professional-grade tools like XTEN-AV that integrate both screen sizing and throw distance calculations within unified AV design workflows have become indispensable for competitive integration firms.
This comprehensive guide clarifies the differences between these essential calculation tools, explains when to use each, and demonstrates how modern platforms integrate both functions for seamless project planning. Whether you’re a seasoned AV consultant or new to projection system design, understanding these distinctions will improve your specification accuracy, installation efficiency, and professional credibility.
Key Takeaways
-
Screen size calculators determine optimal display dimensions based on viewing requirements, while throw distance calculators determine projector placement for specific screen sizes
-
Screen sizing should occur first in the design workflow, followed by throw distance verification and projector selection
-
AVIXA DISCAS standards provide professional guidelines for screen sizing, while throw ratio specifications govern distance calculations
-
Viewing distance, content type, and audience seating drive screen size recommendations
-
Projector optical characteristics including throw ratio, zoom range, and lens shift determine feasible throw distances
-
Using tools in the wrong sequence results in compromised designs that prioritize equipment over viewing experience
-
Professional platforms like XTEN-AV integrate both calculators within comprehensive AV workflows
-
Screen size calculators answer “How large should the display be?” while throw distance calculators answer “Where should the projector go?”
-
Resolution, ambient light, and viewing purpose significantly impact screen sizing but have limited effect on pure throw distance
-
Modern AI-enhanced calculators now perform both functions simultaneously with room constraint analysis
-
Throw distance limitations can force screen size compromises in space-constrained environments
-
Integrated calculation tools reduce design errors and accelerate project workflows by 40-60%
-
Brand-specific projector databases ensure throw calculations use accurate optical specifications rather than generic estimates
What is a Projector Screen Size Calculator?
A projector screen size calculator is a specialized tool designed to determine the optimal display dimensions for a specific viewing environment and audience configuration. Unlike simple dimension converters, professional screen size calculators analyze multiple factors to recommend display sizes that maximize viewing comfort, content readability, and visual immersion.
Primary Function and Purpose
The fundamental purpose of a screen size calculator is answering the question: “How large should the display be for this application?” This determination requires analyzing:
Viewing distance – The distance from the primary seating position to the screen surface
Audience distribution – Multiple seating rows, viewing angles, and sight line considerations
Content type – Whether viewers will watch cinematic entertainment, review business presentations, or analyze detailed data
Display resolution – Full HD, 4K, 8K, or other native resolutions affecting pixel visibility
Viewing purpose – General viewing, basic decision making, or analytical decision making per AVIXA standards
Room constraints – Physical limitations including wall dimensions, architectural features, and installation boundaries
How Screen Size Calculators Work
Professional screen size calculators employ mathematical formulas derived from human visual acuity studies and industry standards. The calculation process follows this logical flow:
-
Input collection – Gathering viewing distance, room dimensions, content type, and resolution specifications
-
Standards application – Applying AVIXA DISCAS guidelines or other professional standards based on viewing purpose
-
Dimensional calculation – Computing screen height, width, and diagonal based on recommended viewing angles
-
Constraint verification – Ensuring recommendations fit within physical room limitations
-
Resolution optimization – Adjusting for pixel density at specified viewing distances
-
Output generation – Providing screen dimensions with supporting viewing distance ranges
What Screen Size Calculators Don’t Do
It’s crucial to understand what screen size calculators do not calculate:
❌ Projector placement positions – Where to physically install the projector
❌ Throw distance requirements – How far the projector needs to be from the screen
❌ Projector model selection – Which specific projector models work for the application
❌ Lens specifications – What throw ratio or zoom range is required
❌ Brightness requirements – How many lumens the projector needs
These functions fall to throw distance calculators, brightness calculators, and projector selection tools – which is why professional platforms integrate multiple calculation types within unified workflows.
Viewing-Centric Design Philosophy
Screen size calculators embody a viewer-first design philosophy: the display should be sized to optimize the audience experience, not merely to accommodate available equipment. This approach ensures:
-
Comfortable viewing without neck strain or eye fatigue
-
Adequate detail visibility for rear-row viewers
-
Immersive experiences for entertainment content
-
Professional compliance with industry standards
-
Future-proof installations that work with various content types
By starting the design process with screen sizing rather than equipment selection, AV professionals create installations that truly serve their intended purpose.
What is a Throw Distance Calculator?
A throw distance calculator is a specialized tool that determines the physical placement distance required between a projector lens and a screen surface to achieve a specific image size. Unlike screen size calculators that determine what size to display, throw distance calculators determine where to place equipment to create that size.
Primary Function and Purpose
The fundamental purpose of a throw distance calculator is answering: “Where should the projector be positioned to achieve the desired screen size?” This requires analyzing:
Screen width – The horizontal dimension of the display (critical for throw ratio calculations)
Projector throw ratio – The optical characteristic expressing distance-to-width relationship
Lens specifications – Fixed focal length, zoom range, or interchangeable lens capabilities
Zoom position – Where within the zoom range the lens will operate
Lens shift capabilities – Vertical and horizontal offset ranges
Mounting constraints – Ceiling height, architectural obstructions, and installation limitations
How Throw Distance Calculators Work
Throw distance calculators employ optical formulas specific to projector lens characteristics. The calculation process follows this technical workflow:
-
Projector selection – Identifying specific projector model with known throw ratio specifications
-
Screen dimension input – Entering desired screen width (not diagonal) and aspect ratio
-
Throw ratio application – Applying formula: Throw Distance = Screen Width × Throw Ratio
-
Zoom range analysis – Calculating minimum and maximum throw distances for zoom lenses
-
Lens shift calculation – Determining vertical and horizontal offset capabilities
-
Mounting position recommendation – Specifying distance from screen and height above floor
-
Installation guidance – Providing mounting dimensions and alignment references
What Throw Distance Calculators Don’t Do
Throw distance calculators have specific functional limitations:
❌ Screen size determination – They don’t calculate what size screen you need
❌ Viewing optimization – They don’t consider audience comfort or viewing angles
❌ Content readability – They don’t ensure text visibility or detail perception
❌ Standards compliance – They don’t verify AVIXA or other professional guidelines
❌ Resolution matching – They don’t optimize pixel density for viewing distance
Throw distance calculators assume you already know the desired screen size and simply need to determine projector placement to achieve it. This makes them the second step in projection system design, not the first.
Equipment-Centric Technical Focus
Throw distance calculators embody an equipment-centric approach: given specific optical characteristics of a chosen projector, where must it be positioned? This technical focus ensures:
-
Accurate projector placement preventing image size errors
-
Installation feasibility verification before equipment purchase
-
Mounting infrastructure planning for construction coordination
-
Lens selection guidance for projectors with multiple lens options
-
Troubleshooting capabilities for existing problematic installations
By providing precise positioning data, throw distance calculators translate abstract screen sizes into concrete installation specifications that technicians can execute in the field.
The Critical Difference
The essential distinction: Screen size calculators optimize for human viewers, while throw distance calculators optimize for optical physics. Professional AV design requires both, used in proper sequence.
Key Features or Components
Understanding the core components of each calculator type reveals why both are necessary for professional projection system design:
Screen Size Calculator Components
1. Viewing Distance Analysis Module
Analyzes primary viewing position, secondary seating rows, and maximum viewing distances to establish the range of audience positions requiring accommodation.
XTEN-AV specifically implements multi-row analysis, ensuring rear-row visibility doesn’t come at the expense of front-row comfort – a critical balance generic calculators miss.
2. AVIXA DISCAS Standards Engine
Applies professional display sizing standards based on viewing purpose:
General Viewing – Entertainment-optimized with 30-40° viewing angles
Basic Decision Making – Collaboration spaces ensuring minimum character heights
Analytical Decision Making – Data-intensive applications with fine detail visibility requirements
This standards-based approach distinguishes professional tools from consumer calculators using arbitrary multipliers.
3. Resolution Optimization Algorithm
Factors display resolution into viewing distance recommendations:
-
Full HD (1920×1080) calculations with traditional pixel visibility thresholds
-
4K UHD (3840×2160) enabling closer viewing without pixelation
-
8K resolution support for future-ready large-format installations
XTEN-AV’s resolution-aware calculations ensure screen recommendations match the content quality viewers will actually experience.
4. Room Constraint Integration
Analyzes physical limitations including:
-
Wall dimensions and available screen mounting space
-
Ceiling height affecting screen vertical positioning
-
Architectural features like columns, beams, or windows
-
Door clearances and furniture placement requirements
This spatial intelligence prevents recommending screens that won’t physically fit the installation environment.
5. Content Type Classification
Adjusts calculations based on primary use case:
Cinematic content – Optimizing for immersive viewing and entertainment value
Business presentations – Ensuring text readability and graphic clarity
Video conferencing – Balancing life-size participant rendering with comfort
Data visualization – Prioritizing fine detail perception and analytical accuracy
Different content demands different sizing strategies – a nuance professional calculators incorporate.
Throw Distance Calculator Components
1. Projector Specification Database
Maintains comprehensive optical characteristics for thousands of projector models:
Throw ratio ranges – Exact minimum/maximum ratios for zoom lenses
Lens shift specifications – Vertical and horizontal offset percentages
Native resolution – Confirming pixel count and aspect ratio
Throw distance formulas – Manufacturer-specific calculation methods
XTEN-AV’s product database updates continuously, ensuring calculations use current specifications rather than outdated data.
2. Optical Calculation Engine
Performs precise projector placement mathematics:
Throw distance = Screen Width × Throw Ratio (base formula)
Zoom range analysis – Calculating usable positioning flexibility
Lens shift translation – Converting percentage offsets to physical dimensions
Keystone compensation – Determining angle limitations to avoid distortion
Offset positioning – Handling off-center installations when necessary
3. Mounting Position Visualizer
Generates installation specifications:
Distance from screen – Precise throw distance measurement
Height above floor – Ceiling mount or table position elevation
Horizontal offset – Left/right displacement from screen center
Vertical offset – Up/down displacement from screen center
Installation tolerance – Acceptable positioning variation ranges
4. Zoom Position Optimizer
For variable throw projectors, determines:
Optimal zoom setting – Balancing image quality and positioning flexibility
Wide-angle limitations – Understanding maximum screen size at minimum throw
Telephoto constraints – Recognizing minimum screen size at maximum throw
Image quality considerations – Identifying sweet spot in zoom range
5. Multi-Projector Array Support
Advanced calculators handle complex configurations:
Edge-blending calculations – Overlap regions for seamless stitching
Stacked projector positioning – Dual-projector setups for increased brightness
Video wall geometries – Multi-screen arrays with coordinated placement
Throw distance variations – Managing different projectors in same installation
Integrated Platform Components (XTEN-AV Advantage)
XTEN-AV Screen Size Calculator uniquely combines both calculator types with additional workflow integration:
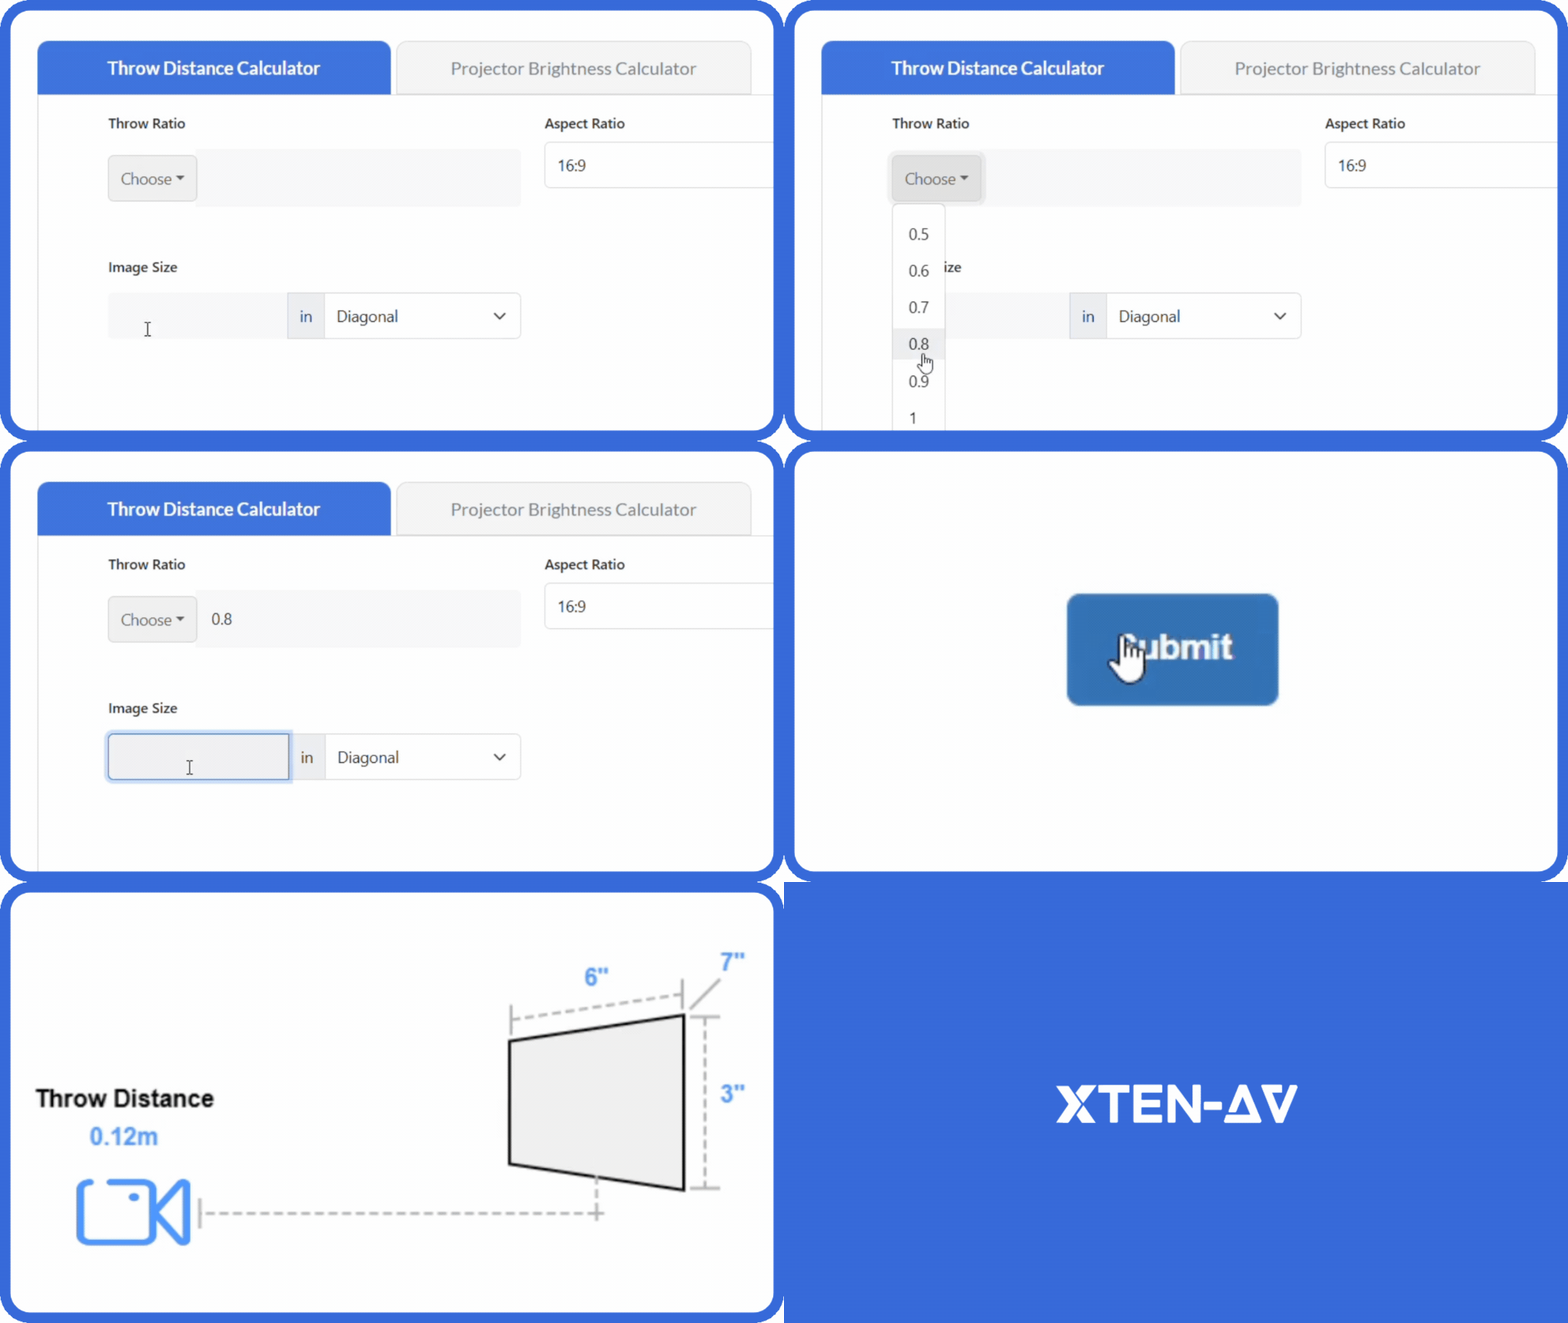
Unified calculation interface – Seamlessly transitioning between screen sizing and throw distance calculations
X-DRAW CAD integration – Automatically generating installation drawings from calculation data
x.doc proposal generation – Creating professional client documentation with specifications
Brightness calculator – Coordinating lumen requirements with screen and placement decisions
Product recommendation engine – Suggesting compatible projectors, screens, and mounts meeting all calculated requirements
Brand filtering – Enabling manufacturer preference alignment (Samsung, Sony, Epson, Panasonic, Christie, Barco)
This ecosystem approach transforms isolated calculations into integrated design workflows, dramatically accelerating project development while improving accuracy.
Step-by-Step Explanation or Use Cases
Understanding when and how to use each calculator type requires examining complete design workflows across different application scenarios:
Use Case 1: Conference Room Projection System Design
Scenario: 20′ × 15′ conference room with 10′ ceiling, primary seating 12 feet from front wall, requires video conferencing and presentation capabilities.
Step 1: Screen Size Calculation First
Tool: Screen Size Calculator (XTEN-AV)
Inputs:
-
Viewing distance: 12 feet (primary seating)
-
Maximum viewing distance: 18 feet (rear seating)
-
Viewing purpose: Basic Decision Making (collaborative work)
-
Room dimensions: 20′ × 15′ × 10′ ceiling
-
Content resolution: 4K UHD (future-proof)
Process: Calculator applies AVIXA DISCAS standards for Basic Decision Making, factoring 4K resolution benefits for closer viewing.
Output:
-
Recommended screen diagonal: 100-110 inches
-
Optimal screen width: 87-96 inches (16:9 aspect ratio)
-
Screen height: 49-54 inches
-
Bottom edge height: 40-42 inches above floor
Rationale: Screen size ensures rear-row viewers can read standard presentation text while front-row participants don’t experience neck strain.
Step 2: Throw Distance Calculation Second
Tool: Throw Distance Calculator (XTEN-AV)
Inputs:
-
Desired screen size: 110″ diagonal (96″ width)
-
Room throw distance: 18-20 feet available (room length minus screen depth)
-
Ceiling height: 10 feet
-
Mounting preference: Ceiling-mounted for clean aesthetics
Process: Calculator identifies projectors with appropriate throw ratios for available space.
Required throw ratio: 18-20 feet ÷ 8 feet width = 2.25-2.5:1 range
Output:
-
Recommended projector category: Standard throw (2.0-2.5:1)
-
Specific models: Epson Pro-L1500, Sony VPL-PHZ10, Panasonic PT-RZ570 (examples)
-
Exact throw distance: 19.2 feet for 2.0:1 projector with zoom
-
Mounting height: 8.5 feet above floor (with lens shift)
-
Vertical offset: 30% lens shift places lens above screen top
Result: Complete specification with both optimal screen size and precise projector placement.
Use Case 2: Home Theater Rear-Constrained Room
Scenario: Dedicated home theater, 16′ × 12′ room, seating 10 feet from screen, cinema-focused viewing.
Step 1: Screen Size Calculation
Inputs:
-
Viewing distance: 10 feet
-
Viewing purpose: General Viewing (cinematic immersion)
-
Resolution: 4K UHD
-
Room constraints: 12-foot width limits screen width to ~10 feet maximum
Output:
Compromise: Recommend 110″ screen as maximum feasible size.
Step 2: Throw Distance Reality Check
Available throw distance: 16′ – 2′ (seating depth) – 0.5′ (screen depth) = 13.5 feet maximum
Required throw ratio: 13.5 feet ÷ 7.6 feet width (110″ screen) = 1.77:1 maximum
Problem identification: Standard throw projectors (2.0:1+) won’t fit.
Solution: Short-throw projector recommendation (1.3-1.5:1 range)
Result: Throw distance calculator reveals screen size calculator’s recommendation requires short-throw technology.
Also read: How Many Lumens Do You Need for a Home Theater Projector?
Use Case 3: Classroom with Fixed Projector Budget
Scenario: Educational classroom, existing ceiling-mounted projector with 1.8:1 throw ratio, 25-foot room, determining optimal screen size.
Step 1: Throw Distance Constraint (Reverse Calculation)
Known variables:
Calculation: Maximum screen width = 22 feet ÷ 1.8 = 12.2 feet width
Maximum screen size: Approximately 165″ diagonal (16:9 aspect ratio)
Step 2: Viewing Distance Verification
Rear-row viewing distance: 28 feet from screen
Screen size calculator check: For Analytical Decision Making (educational content), 28-foot viewing distance requires minimum 130″ screen for text readability.
Conclusion: Existing projector position can accommodate adequate screen size (165″ maximum exceeds 130″ minimum requirement).
Result: Throw distance calculator confirmed existing installation supports screen size calculator’s minimum requirements.
Use Case 4: Worship Facility Large Venue
Scenario: Large worship space, 80-foot deep sanctuary, extreme viewing distances, multiple seating areas.
Step 1: Screen Size for Multiple Viewing Zones
Viewing distances:
Screen size calculator recommendation:
Step 2: Throw Distance for Ultra-Large Screens
200″ screen requirements:
Required throw ratio: 50 feet ÷ 14.6 feet = 3.4:1 throw ratio
Projector category: Long-throw or high-magnification zoom lens required
Challenge: Limited projector models with 3.4:1+ throw ratios
Alternative consideration: LED video wall instead of projection for extreme distances
Result: Throw distance calculator reveals projection limitations, suggesting display technology alternatives.
Use Case 5: Hybrid Meeting Space with Flexibility Requirements
Scenario: Corporate training room serving multiple functions – presentations, video conferencing, collaborative work, requiring motorized screen that retracts when not needed.
Step 1: Multi-Purpose Screen Sizing
Dual requirements:
-
Presentation mode: 12-foot viewing distance, Basic Decision Making
-
Video conferencing: 8-foot viewing distance (standing briefings)
Screen size calculator output:
-
Presentation optimization: 100″ screen
-
Video conferencing: 80″ screen would suffice
-
Recommendation: 100″ motorized screen serving both purposes
Step 2: Projector Placement for Flexible Use
Throw distance: 18 feet available
Throw ratio calculation: 18 feet ÷ 8.3 feet (100″ width) = 2.16:1
Projector recommendation: Standard throw with zoom flexibility (1.8-2.5:1 range)
Zoom positioning: Mid-range zoom setting allows ±10% screen size adjustment if needed
Result: Integrated calculation ensures motorized screen coordinates properly with projector capabilities.
Projector Screen Size Calculator vs Throw Distance Calculator
Understanding the direct comparisons between these calculator types clarifies their distinct roles in professional AV design:
Comparison Table: Core Differences
|
Feature |
Screen Size Calculator |
Throw Distance Calculator |
|
Primary Question |
“How large should the display be?” |
“Where should the projector go?” |
|
Design Phase |
First – establishes viewing requirements |
Second – determines equipment placement |
|
Key Input |
Viewing distance, audience layout |
Screen size, projector specifications |
|
Primary Output |
Screen dimensions (width, height, diagonal) |
Throw distance, mounting position |
|
Focus |
Viewer comfort and content readability |
Optical physics and equipment capabilities |
|
Standards Used |
AVIXA DISCAS, SMPTE, THX |
Projector manufacturer specifications |
|
Considers Resolution |
Yes – affects viewing distance recommendations |
No – resolution doesn’t change throw distance |
|
Considers Content Type |
Yes – different content requires different sizing |
No – content type irrelevant to optics |
|
Room Analysis |
Viewing angles, seating layout, sight lines |
Physical constraints, mounting locations |
|
Flexibility |
Can recommend various screen sizes |
Limited by projector’s fixed optical characteristics |
|
Professional Compliance |
Ensures AVIXA and industry standards |
Ensures optical feasibility |
|
Equipment Agnostic |
Yes – focuses on viewing needs first |
No – requires specific projector selection |

When to Use Screen Size Calculator
Use screen size calculators when:
✅ Starting new project design – Establishing baseline display requirements
✅ Determining viewing requirements – Understanding what size creates optimal viewing
✅ Evaluating room suitability – Assessing if space can accommodate adequate screen sizes
✅ Comparing display technologies – Deciding between projection, LED walls, or flat panels
✅ Establishing project budgets – Determining display size drives equipment costs
✅ Presenting to clients – Explaining why specific sizes are recommended
✅ Meeting compliance requirements – Ensuring AVIXA or other standards adherence
✅ Multi-room standardization – Developing consistent sizing criteria across facility
When to Use Throw Distance Calculator
Use throw distance calculators when:
✅ Projector already selected – Determining placement for known equipment
✅ Screen size already determined – Finding where projector must go to achieve target size
✅ Evaluating existing installations – Troubleshooting placement issues
✅ Comparing projector options – Assessing which models fit available throw distances
✅ Installation planning – Providing precise mounting specifications to technicians
✅ Ceiling mount design – Calculating exact position relative to screen
✅ Retrofit projects – Working with existing architectural constraints
✅ Lens selection – Choosing appropriate zoom range or interchangeable lens
The Correct Design Sequence
Professional AV design follows this logical workflow:
Phase 1: Screen Size Calculation
-
Analyze viewing requirements and audience layout
-
Apply AVIXA standards for viewing purpose
-
Determine optimal screen dimensions
-
Verify room constraints accommodate recommendations
Phase 2: Projector Category Selection
-
Identify throw distance available in room
-
Calculate throw ratio range required for screen size
-
Determine short-throw, standard-throw, or long-throw category
-
Narrow projector options to feasible throw ratio range
Phase 3: Throw Distance Verification
-
Select specific projector model from feasible options
-
Calculate exact throw distance using model specifications
-
Verify zoom position within acceptable range
-
Confirm lens shift capabilities handle mounting constraints
Phase 4: Integration and Refinement
-
Coordinate screen placement with projector position
-
Verify cable routing and power requirements
-
Confirm sight line clearances and accessibility
-
Generate installation documentation
Wrong Sequence Warning: Starting with projector selection before screen sizing often results in displays sized for equipment convenience rather than viewing optimization – a common mistake in inexperienced designs.
AI or Future Trends
Artificial intelligence and machine learning are revolutionizing AV calculation tools, with significant developments emerging in 2026:
AI-Enhanced Calculation Intelligence
Modern platforms increasingly incorporate AI algorithms that:
Learn from installation history – Analyzing thousands of completed projects to refine recommendations
Predict client preferences – Suggesting configurations matching similar past projects
Optimize cost-performance tradeoffs – Balancing viewing quality with budget constraints
Detect design conflicts – Identifying problematic configurations before specification
XTEN-AV’s AI features (rolling out in late 2026) will include predictive recommendation engines that automatically suggest optimal configurations based on room type, viewing purpose, and historical success patterns.
Automated Room Analysis with Computer Vision
3D room scanning technology now enables:
Smartphone room scanning – Using LiDAR sensors to capture precise room dimensions
Automatic obstruction detection – Identifying structural elements, lighting fixtures, and architectural features
Sight line visualization – Generating 3D models showing viewing angles from all seating positions
AR projection previews – Augmented reality overlays showing projected image sizes in actual spaces
Site survey automation – Eliminating manual measurement errors and accelerating data collection
By 2027, AI-powered room analysis will likely become standard in professional AV calculators, with XTEN-AV already beta-testing these capabilities.
Machine Learning Projector Recommendations
AI algorithms now analyze:
Performance characteristics – Learning which projectors consistently meet specifications
Reliability patterns – Identifying models with better long-term performance
Installation feedback – Incorporating technician reports about ease of installation
Client satisfaction data – Weighting end-user experience in recommendations
Pricing trends – Optimizing for current market conditions and availability
This experience-based intelligence exceeds simple specification matching, delivering recommendations based on real-world performance rather than manufacturer claims alone.
Integrated Virtual Design and Visualization
Future platforms will offer:
Virtual walkthroughs – VR experiences showing proposed installations from audience perspective
Dynamic simulation – Real-time adjustments to screen sizes and projector positions with instant visualization
Collaborative design – Multi-user environments where designers, clients, and stakeholders interact with 3D models
Content preview – Showing actual presentation materials or video content at calculated sizes
Lighting simulation – Modeling ambient light effects on image quality throughout day
These immersive design tools will transform client presentations and reduce post-installation surprises.
Predictive Maintenance and Lifecycle Management
AI-enhanced calculators increasingly consider:
Total cost of ownership – Factoring lamp replacement, filter maintenance, and energy consumption
Lifespan projections – Predicting when equipment will require replacement
Technology evolution – Anticipating when resolution standards or display technologies will obsolete current designs
Upgrade pathways – Designing systems that can accommodate future improvements
XTEN-AV’s roadmap includes lifecycle management modules that track installations over time, alerting integrators to maintenance needs and upgrade opportunities.
Automated Code Compliance Verification
AI systems now verify:
Accessibility standards – Ensuring ADA compliance for screen heights and viewing angles
Building codes – Checking fire safety requirements for ceiling penetrations and wiring methods
Electrical requirements – Validating circuit capacity for power demands
Industry standards – Confirming AVIXA, SMPTE, CEDIA guideline adherence
This automated compliance checking reduces liability risks and prevents costly code violations.
Sustainability and Environmental Optimization
2026 platforms incorporate:
Energy efficiency analysis – Comparing power consumption across projector options
Carbon footprint calculations – Measuring environmental impact of equipment choices
Sustainable material recommendations – Suggesting screens and mounts with recycled content
Lifecycle environmental cost – Factoring disposal and recycling considerations
As sustainability becomes central to corporate values, AV calculators help integrators align technical designs with environmental goals.
Common Mistakes or Best Practices
AV professionals must avoid critical errors when using calculation tools:
Common Mistakes to Avoid
Mistake 1: Using Calculators in Wrong Sequence
Error: Selecting projector first, then trying to determine appropriate screen size
Consequence: Screen sizing constrained by equipment limitations rather than viewing needs
Best Practice: Always calculate screen size based on viewing requirements before selecting projector or determining throw distance
Mistake 2: Confusing Screen Diagonal with Width
Error: Using screen diagonal measurement in throw distance formulas that require width
Consequence: Throw distance errors of 20-40%, causing installation failures
Best Practice: Verify whether calculator requires diagonal, width, or height – most throw calculators use width
Mistake 3: Ignoring Resolution Impact on Screen Sizing
Error: Using identical screen sizes for Full HD and 4K installations at same viewing distance
Consequence: Undersized 4K screens that don’t leverage resolution advantages
Best Practice: Use resolution-aware calculators like XTEN-AV that adjust recommendations based on pixel density
Mistake 4: Overlooking Lens Shift Limitations
Error: Assuming projectors can be mounted anywhere relative to screen with keystone correction
Consequence: Severe image distortion, brightness loss, and resolution degradation from excessive keystoning
Best Practice: Verify lens shift capabilities and position projector within manufacturer’s recommended offset ranges
Mistake 5: Using Generic Consumer Calculators for Commercial Projects
Error: Relying on TV-sizing calculators or consumer-focused tools for professional installations
Consequence: Designs lacking AVIXA compliance, commercial display requirements, and professional workflow support
Best Practice: Use AV-specific platforms like XTEN-AV designed for commercial applications and professional standards
Mistake 6: Neglecting Multiple Seating Row Analysis
Error: Optimizing screen size only for front-row viewing
Consequence: Rear-row viewers unable to read content or perceive details
Best Practice: Analyze all seating positions simultaneously, balancing front-row comfort with rear-row visibility
Mistake 7: Forgetting Ambient Light in Screen Sizing
Error: Calculating screen dimensions without considering room brightness and resulting projector brightness requirements
Consequence: Undersized projectors producing dim, washed-out images on oversized screens
Best Practice: Integrate ambient light analysis with screen sizing and projector lumen calculations
Best Practices for Professional AV Design
Best Practice 1: Document Calculation Assumptions
Always record:
-
Viewing distances used in calculations
-
Viewing purpose selection rationale
-
Resolution assumptions and future upgrade plans
-
Ambient light measurements and control capabilities
-
Seating layout configurations analyzed
This documentation supports client presentations and provides installation team context.
Best Practice 2: Validate with Multiple Tools
Cross-check critical projects using:
-
Primary calculator (XTEN-AV for integrated workflow)
-
Secondary calculator for validation
-
Manual calculations for spot-checking critical dimensions
Redundant verification prevents costly specification errors.
Best Practice 3: Consider Technology Alternatives
When throw distance calculators reveal projection limitations:
-
Evaluate ultra-short-throw alternatives
-
Consider LED display walls instead of projection
-
Assess flat panel arrays for smaller screens
-
Explore hybrid solutions combining technologies
XTEN-AV’s integrated platform automatically suggests alternatives when constraints exist.
Best Practice 4: Plan for Future Content Evolution
Future-proof designs by:
-
Specifying 4K or 8K resolution even if current content is Full HD
-
Sizing screens to accommodate higher resolution advantages
-
Selecting projectors with firmware upgrade capabilities
-
Designing infrastructure for technology swaps without construction
Screen size calculators should use future resolution rather than current content specifications.
Best Practice 5: Incorporate Client Feedback Early
Engage stakeholders in:
-
Screen size visualization using mockups or AR preview
-
Seating position testing to verify viewing comfort
-
Content demonstration at proposed sizes
-
Budget tradeoff discussions balancing size and cost
Early validation prevents post-installation dissatisfaction.
Best Practice 6: Create Installation Documentation
Use calculator outputs to generate:
-
CAD drawings with precise dimensions (X-DRAW integration)
-
Installation specs with mounting positions
-
Cable routing diagrams
-
Alignment references for field technicians
-
Commissioning checklists for testing
XTEN-AV’s documentation features automate this critical phase.
Best Practice 7: Leverage Integrated Platforms
Use comprehensive tools like XTEN-AV that:
-
Combine screen sizing and throw distance calculations
-
Integrate with CAD software and proposal tools
-
Access current product databases for specifications
-
Generate complete system documentation
-
Support workflow automation from design through installation
Integrated platforms deliver 40-60% time savings compared to using separate tools.
Frequently Asked Questions
Q: Should I calculate screen size first or throw distance first?
Always calculate screen size first based on viewing requirements, audience layout, and AVIXA standards. Only after determining the optimal screen dimensions should you use throw distance calculators to identify appropriate projector placement and model selection. Starting with projector selection constrains designs to equipment capabilities rather than viewing needs, compromising installation quality. XTEN-AV guides users through this correct sequence automatically.
Q: Can’t I just use one calculator for both purposes?
No. Screen size calculators and throw distance calculators serve fundamentally different purposes with distinct mathematical methodologies. Screen size depends on human visual perception, viewing angles, content readability, and industry standards. Throw distance depends on optical physics, lens characteristics, and projector specifications. While integrated platforms like XTEN-AV combine both functions, the underlying calculations remain separate. Generic “all-in-one” tools that oversimplify these distinctions produce inaccurate recommendations.
Q: Why does XTEN-AV recommend different screen sizes than online consumer calculators?
XTEN-AV implements AVIXA DISCAS professional standards that account for viewing purpose, content type, resolution, and multi-row seating – factors consumer calculators ignore. Consumer tools typically use oversimplified formulas like “viewing distance × constant” without considering whether viewers will watch movies, analyze data, or review presentations. XTEN-AV’s recommendations ensure commercial installations meet professional readability requirements and industry compliance standards, not just generic size estimates.
Q: What if my throw distance calculation shows my desired screen size won’t fit?
When throw distance constraints conflict with optimal screen sizing, you have several options: (1) Select short-throw or ultra-short-throw projectors with lower throw ratios, (2) Reduce screen size to fit available throw distance, (3) Consider LED video walls instead of projection, (4) Modify room layout to increase available throw distance. XTEN-AV automatically identifies these conflicts and suggests alternatives, preventing specification errors before equipment purchase.
Q: How does projector zoom affect throw distance calculations?
Zoom lenses provide variable throw ratios, offering installation flexibility. For example, a 1.5-2.2:1 zoom range means the projector can be positioned anywhere from 1.5× screen width to 2.2× screen width. Throw distance calculators must account for this range, identifying minimum and maximum feasible positions. XTEN-AV analyzes zoom capabilities and recommends operating at mid-zoom position when possible, providing installation tolerance while maintaining optimal image quality.
Q: Do I need different calculations for flat-panel displays versus projectors?
Yes. Flat-panel displays don’t involve throw distance calculations since they mount directly on walls. However, screen size calculators still apply – you must determine optimal display dimensions based on viewing distances and content requirements. XTEN-AV offers separate calculation modes for projection systems and flat-panel displays, applying appropriate methodology for each technology. The viewing optimization principles remain consistent regardless of display technology.
Q: Can I use throw distance calculators for rear-projection installations?
Yes, but rear-projection requires additional depth calculations accounting for: (1) Throw distance from projector to screen, (2) Mirror placements if using folded optical paths, (3) Ventilation clearances for projector heat dissipation, (4) Service access for maintenance. Rear-projection typically demands short-throw or ultra-short-throw projectors to minimize installation depth. XTEN-AV includes rear-projection planning tools that factor these additional constraints.
Q: Why do some calculators ask for screen width while others ask for diagonal?
Throw ratio formulas use screen width because that’s the horizontal dimension perpendicular to the throw distance. However, screens are typically specified by diagonal measurement. Professional calculators like XTEN-AV accept diagonal input and automatically convert to width using the aspect ratio (16:9, 16:10, 2.35:1). This prevents calculation errors from improper unit usage. Always verify which dimension a calculator requires – using diagonal in a width-based formula produces ~30-40% errors.
Q: How do resolution and pixel density relate to screen size calculations?
Higher display resolution contains more pixels in the same screen area, allowing viewers to sit closer without perceiving individual pixels. 4K displays enable viewing at 1.0-1.5× screen height, while Full HD requires 1.5-2.5× screen height for comfortable viewing. This means 4K installations can use larger screens at the same viewing distance, creating more immersive experiences. XTEN-AV’s resolution-aware calculations automatically optimize screen sizing based on your specified content resolution, ensuring recommendations leverage modern display capabilities.
Q: What’s the advantage of using XTEN-AV over free online calculators?
XTEN-AV provides: (1) AVIXA DISCAS standards compliance for professional installations, (2) Integrated screen sizing and throw distance calculations in unified workflow, (3) Resolution-aware and purpose-based recommendations, (4) Room constraint analysis ensuring designs fit actual spaces, (5) Product database integration with immediate equipment recommendations, (6) CAD and proposal generation through X-DRAW and x.doc, (7) Brand filtering for manufacturer preferences, (8) Professional documentation for client presentations. Free consumer tools provide basic estimates; XTEN-AV delivers complete commercial-grade AV workflows.
Conclusion
Understanding the distinction between projector screen size calculators and throw distance calculators is fundamental to professional AV system design. These tools serve complementary but distinctly different purposes: screen size calculators determine optimal display dimensions based on viewing requirements and human factors, while throw distance calculators determine projector placement based on optical characteristics and equipment specifications.
The critical insight for AV integrators is recognizing that screen sizing must occur first in the design workflow, driven by audience needs, content type, AVIXA standards, and viewing comfort. Only after establishing optimal display dimensions should professionals proceed to throw distance calculations that identify appropriate projector categories, specific models, and mounting positions capable of achieving those sizes.
Attempting to design in reverse – selecting projectors first and sizing screens to match equipment capabilities – invariably compromises viewing quality and fails to meet professional standards. This equipment-first approach represents one of the most common mistakes in inexperienced AV design, resulting in installations that technically function but fail to optimize the user experience.
Modern integrated platforms like XTEN-AV Screen Size Calculator have revolutionized this workflow by combining both calculator types within unified ecosystems. Rather than juggling separate tools and manually cross-checking compatibility, AV professionals now access seamless workflows that automatically verify throw distance feasibility against optimal screen sizing, identify conflicts before specification, and suggest alternatives when constraints exist.
The professional advantages of using sophisticated, integrated calculation tools extend beyond mere convenience. AVIXA DISCAS compliance, resolution-aware optimization, multi-row seating analysis, product database integration, and automated documentation generation transform calculation from isolated mathematical exercises into comprehensive design workflows that accelerate project development while improving accuracy.
As we advance through 2026 and beyond, AI-enhanced calculators, computer vision room analysis, augmented reality visualization, and predictive recommendation engines will further elevate calculation tool capabilities. However, the fundamental principle remains unchanged: professional AV design requires understanding both viewing optimization (screen sizing) and optical feasibility (throw distance) as complementary components of successful installations.
For AV integrators, consultants, and system designers seeking competitive advantages, mastering both calculator types and understanding when to apply each represents essential professional competency. Leverage integrated platforms like XTEN-AV that streamline these workflows, eliminate manual errors, and accelerate project delivery while maintaining the highest professional standards. Your installations, clients, and business performance will all benefit from this disciplined, tool-supported approach to projection system design.
PakarPBN
A Private Blog Network (PBN) is a collection of websites that are controlled by a single individual or organization and used primarily to build backlinks to a “money site” in order to influence its ranking in search engines such as Google. The core idea behind a PBN is based on the importance of backlinks in Google’s ranking algorithm. Since Google views backlinks as signals of authority and trust, some website owners attempt to artificially create these signals through a controlled network of sites.
In a typical PBN setup, the owner acquires expired or aged domains that already have existing authority, backlinks, and history. These domains are rebuilt with new content and hosted separately, often using different IP addresses, hosting providers, themes, and ownership details to make them appear unrelated. Within the content published on these sites, links are strategically placed that point to the main website the owner wants to rank higher. By doing this, the owner attempts to pass link equity (also known as “link juice”) from the PBN sites to the target website.
The purpose of a PBN is to give the impression that the target website is naturally earning links from multiple independent sources. If done effectively, this can temporarily improve keyword rankings, increase organic visibility, and drive more traffic from search results.